

When you need a dessert that just screams “special occasion” but you only have Tuesday evening to make it happen, you reach for the mashups. And honestly, what’s better than taking two iconic desserts and slamming them together? That’s exactly how we ended up with the glorious crème brûlée cheesecake. I know, it sounds intimidating! People hear “brûlée” and immediately picture complicated custards and endless baking times. But here at Cooking by Felix, my mission is to cut through the noise and show you that this luxurious treat is completely achievable—even when your schedule is frantic. We don’t sacrifice that rich, creamy texture for speed; we just find smarter ways to get there. This recipe is proof that you can deliver gourmet results without spending your entire day in the kitchen. If you love turning everyday moments into something special, you’ll want to check out my collection of simple, delicious desserts!
- Why This is the Best Creme Brulee Cheesecake Recipe (Expert Tips Included)
- Gathering Ingredients for Your Homemade Creme Brulee Cheesecake
- Step-by-Step Instructions for the Creme Brulee Cheesecake Recipe
- Tips for a Decadent Dessert Mashup Success
- Variations: Beyond the Classic Creme Brulee Cheesecake
- Serving Suggestions for This Luxurious Baked Desserts Treat
- Storage and Reheating for Your Creme Brulee Cheesecake
- Frequently Asked Questions About Creme Brulee Cheesecake Recipe
- Share Your Ultimate Cheesecake Dessert Experience
Why This is the Best Creme Brulee Cheesecake Recipe (Expert Tips Included)
When people search for the best creme brulee cheesecake, they are usually picturing two nightmares: a cracked, sad-looking cheesecake surface, or crystallized sugar that melts instantly. We are going to solve both problems right here! My goal is to give you that restaurant-quality, impossibly smooth center without needing complicated setups. Think of this as my shortcut to elegant baking.
The structural advantage in this recipe comes down to two things: temperature control during baking and a very patient cooling process. Seriously, hiding the cheesecake in the turned-off oven after baking is the difference between success and disaster. For more on avoiding those dreaded cracks, I’ve got a deep dive into my no-crack New York style cheesecake methods.
Achieving a Creamy Baked Cheesecake Recipe Texture
For that signature creamy baked cheesecake recipe texture—the kind that yields when you press it gently—you need to fight air incorporation. That means your cream cheese absolutely *must* be soft, but not warm or melty. If it’s too cold, you end up over-beating trying to smooth it out, and that whips in air bubbles. Don’t do it!
Only mix on low speed, and add the eggs one at a time, mixing just until the yolk disappears. Once the final ingredients are in, stop mixing. The slow cool-down in the oven seals the deal, allowing the custard to set gently, not shock itself into splitting. Patience here pays off huge!
Gathering Ingredients for Your Homemade Creme Brulee Cheesecake
Okay, we’re moving into the fun part: gathering our supplies! Making a fantastic homemade creme brulee cheesecake is all about having the right components ready to go before you even power up the mixer. I group everything by component so I’m not scrambling mid-mix. Trust me, once those wet ingredients start coming together, you want your dry ones already measured out.
For the Graham Cracker Crust
This base sets the stage, and we want it sturdy enough to handle that heavy cheesecake on top! Melted butter is key here; it acts like the glue holding your crumbs together so they don’t just crumble when you slice into it.
- 1 1/2 cups graham cracker crumbs
- 1/3 cup granulated sugar
- 6 tbsp unsalted butter, melted
For the Vanilla Bean Cheesecake Filling
Here’s where we load up on that richness! Remember our chat about texture? That means your cream cheese needs to be truly softened—leave it out for at least an hour. Also, make sure those three large eggs are at room temperature so they blend without chilling the batter.
- 16 oz cream cheese, softened
- 3/4 cup granulated sugar
- 3 large eggs
- 1 tsp vanilla extract (Or, if you’re feeling fancy, scrape in the seeds from half a vanilla bean like I sometimes do!)
We also need the elements that make it tender:
- 2 tbsp sour cream
- 1 cup cold heavy cream
For the Caramelized Sugar Topping Dessert Layer
This is the grand finale layer before the actual torching! The heavy cream needs to be cold when you whip it to get those lovely soft peaks, so don’t pull that out until the cheesecake is totally chilled.
- 1 cup cold heavy cream
- 1/2 cup granulated sugar (reserved specifically for this top layer)
Step-by-Step Instructions for the Creme Brulee Cheesecake Recipe
Alright, it’s time to put all those beautiful ingredients to work! Follow these steps exactly, especially regarding oven time and cooling, if you want that flawless presentation. We’re making an ultimate cheesecake dessert here, folks, and timing is everything for the perfect creme brulee cheesecake experience. It might seem like a lot of waiting, but the oven time itself is pretty quick! For other easy sweet hits, take a peek at my easy pumpkin pie recipe.
Preparing the Crust and Preheating
First things first: get your oven warmed up to 325°F (160°C). Grab your 9-inch springform pan and line that bottom with parchment paper—this is non-negotiable for easy release later. Mix up your graham cracker crumbs, the smaller amount of sugar, and the melted butter until it looks like wet sand. Press that firmly into the pan bottom. Then, pop that crust in the oven for just 10 minutes before letting it cool down a touch while you whip up the filling.
Mixing the Creamy Cheesecake Filling
This is where you need the gentle touch! Put your softened cream cheese in the mixer and beat it until it’s completely smooth—no hiding lumps, just pure creaminess. Slowly beat in the 3/4 cup of sugar. Now, for the eggs: add them one by one. Seriously, mix until *just* combined after each egg. Overmixing here guarantees air, and air means cracks later! Finally, fold in the vanilla and sour cream. Keep the heavy cream separate; we use that later!
Baking the Creme Brulee Cheesecake with Water Bath Technique
Pour that luscious batter right over your cooled crust. Now, find a roasting pan big enough to hold your springform. Carefully set the cheesecake inside, then pour hot water around it until the water level is about halfway up the sides of the springform pan. This bath is our secret weapon against dryness and those pesky cracks! Bake it for about 50–60 minutes. When the edges look set but the very center still has a slight wiggle, turn the oven *off*. Crack the door open slightly, leave the cheesecake inside, and just let it hang out for a solid hour while it chills down slowly. This gentle process is key for that velvety texture we love.
Creating the Caramelized Sugar Topping Dessert
Once the cheesecake is fully cooled on the rack, cover it up and move it to the fridge. It needs at least 6 hours—overnight is truly best—so it sets up perfectly. When you’re ready to serve, take your cold heavy cream and whip it until you get soft peaks. Gently fold in the final 1/2 cup of sugar you set aside. Spread this lovely cream layer evenly over the chilled cake. Then, sprinkle a thin, even layer of extra granulated sugar right on top. That’s your caramelized sugar topping dessert layer, ready for the torch!
Tips for a Decadent Dessert Mashup Success
You’ve nailed the baking, you’ve chilled it perfectly, and now you have this stunning decadent dessert mashup ready for its grand finale look. But that torch can be scary, right? We need that perfect contrast—a warm, shatteringly crisp top over ice-cold, creamy cheesecake. That sound? That’s the sound of success, and I’ll show you how to get it every single time. If you love mastering tricky steps, you should definitely check out my guide on brown butter chocolate chip cookies; it’s all about technique!
How to Torch Sugar Topping Without Melting the Filling
This is the make-or-break moment! We want instant caramelization, not gentle warming. If your filling starts looking squishy under the heat, you’ve held the flame too close for too long. The secret is distance and movement. Hold your kitchen torch about 3 to 4 inches above the sugar and keep it moving constantly in small, overlapping circles. You’re melting the sugar, not trying to cook the cream underneath it underneath it. Work fast around the whole surface. If you don’t have a torch, don’t sweat it! You can use your broiler, but you have to be glued to the oven door. Pop the sugar-topped cheesecake on the highest rack, watch like a hawk, and pull it out the second it turns deep amber. It’s quick, but you can’t walk away, or you’ll go from ‘brûlée’ to ‘burnt’ instantly. For more on getting that perfect finish, I always look at other great bakers like the methods shared by The Recipe Critic.
Making Mini Creme Brulee Cheesecakes
Sometimes you don’t want a huge slice of decadence; you want a perfectly portioned bite! Luckily, adapting this recipe into mini creme brulee cheesecakes is super easy. You’re just decreasing the bake time significantly. Use a standard muffin tin lined with paper wrappers or lightly greased. Fill them about 3/4 full with the batter. Since they are small, they won’t need that intimidating water bath. They usually bake perfectly in about 18–22 minutes at 325°F. Make sure they are completely chilled before you add the whipped cream and torch that tiny, perfect sugar cap. They look just as gorgeous on a platter!
Variations: Beyond the Classic Creme Brulee Cheesecake
I love the classic version of our creme brulee cheesecake, truly I do, but sometimes you just need to shake things up a bit, right? Since the base flavor is that beautiful, smooth vanilla, it takes on other bright flavors incredibly well. This recipe is really the perfect canvas for whatever fun twist you’re dreaming up for your next special occasion dessert. If you want to stick with cheesecake magic but veer into a different color palette, you absolutely have to try my red velvet cheesecake next time!
Adding Citrus or Spice to Your Cheesecake with Brulee Top
The simplest upgrade you can make to this cheesecake with brulee top involves just a little zest or a dash of warmth in the filling. Before you add the eggs, try mixing in the zest of one whole lemon or even an orange into that cream cheese mixture. It cuts through the richness perfectly! The slight tanginess balances out the sweetness of that final caramelized layer, making every bite bright.
Alternatively, if you want a warmer flavor profile, grab some spices! A scant 1/4 teaspoon of ground cinnamon or a tiny pinch of ground cardamom mixed into the filling ingredients right before the eggs go in really deepens that vanilla flavor under the sugary crust. It’s subtle, but it elevates the whole experience into something truly gourmet without adding any real fuss.
Serving Suggestions for This Luxurious Baked Desserts Treat
Now that you have this jaw-dropping, crackle-top masterpiece, you might be wondering how to present it. This creme brulee cheesecake is already a star on its own, but a few simple touches can take it from great to showstopper status for your next big gathering. When I serve this, I always try to lean into contrast—especially sour or tart flavors to cut through that deep, buttery richness.
For true lovers of luxurious baked desserts, I highly recommend keeping the fruit very simple so you don’t compete with the vanilla and caramelized sugar. My favorite thing to serve alongside a slice is a tiny spoonful of homemade raspberry sauce. It gives you that beautiful pop of acidity and color on the plate. You can find my super easy, no-fuss recipe for easy raspberry jam recipe—no pectin needed! It takes about 15 minutes and tastes ten times better than anything store-bought.

If you want something lighter than a sauce, fresh berries work wonders. A small pile of tart raspberries or maybe some thinly sliced sugared lemon peel placed right next to the slice? Perfection. They look elegant and offer a clean, palate-cleansing bite after the richness of the cheesecake. If you want more ideas on serving stunning desserts, check out what the folks over at Savoring Moments suggest for their showstopper desserts; they always nail the presentation!
Storage and Reheating for Your Creme Brulee Cheesecake
Okay, this is possibly the most important part of keeping your creme brulee cheesecake absolutely perfect: storage. Since we have two very, very different components—the creamy chilled cake and the rigid, crisp sugar top—we cannot store them together for long. If you try wrapping up the whole thing after torching, that beautiful caramelized sugar cap is going to get sticky, soft, and sad almost immediately!
The good news is the cheesecake base itself is a survivor! You can absolutely make the entire cake, let it chill for that required six hours or overnight, and keep it stored beautifully in the fridge for up to four days. Just make sure it is wrapped tightly with plastic wrap after it has fully set but *before* you’ve added that creamy topping layer.
Storing the Cheesecake Base Separately
If you are planning on serving this over a few days, or if you just want a backup plan just in case the party gets rescheduled, store the cream layer and the sugar topping separately from the cake base. Keep the chilled, plain cheesecake wrapped tightly in the fridge. The whipped cream topping (the layer before the sugar sprinkle) can also be stored safely in an airtight container in the fridge for about 24 hours. You might need to give it a quick whisk if it deflates a little, but it should hold up fine.
The Golden Rule for Caramelized Topping
I cannot stress this enough: do not torch the sugar topping until you are moments away from serving it. The torching process creates heat that starts to melt the cold cream underneath, and once that starts, the whole thing turns into a soupy mess within an hour or two. The contrast between the hard, warm crackle and the cold, smooth cheesecake is the whole point of this decadent dessert mashup!
So, when it’s time to eat: unwrap the cheesecake, spread your cold cream mixture evenly over the entire surface, sprinkle your sugar thinly, and then torch it right there on the counter or serving platter. This way, everyone gets that perfect warm, shatteringly crisp bite against the cold custard filling. If you have leftovers *after* torching, you can store those slices (torch marks and all) under plastic wrap in the fridge for about two days, but you’ll miss that crackle!
Frequently Asked Questions About Creme Brulee Cheesecake Recipe
I get tons of questions every week about this recipe, and honestly, that’s how I know we all love this decadent dessert mashup! Baking such a hybrid dessert can lead to some head-scratching moments, so let’s clear up the common hurdles right now. If you ever have a question I missed, feel free to reach out on my contact page!
Can I make this creme brulee cheesecake recipe ahead of time?
Oh yes, you absolutely should make the base ahead of time! This lets that beautiful, thick cheesecake structure set up exactly how it should. You can bake and chill the entire cheesecake base (no cream or sugar on top yet!) up to two days in advance. The critical part, though, is the final step. You must apply that whipped cream layer and then torch the caramelized sugar topping dessert *immediately* before you plan to serve it. If you torch it too early, that crisp cap gets sticky and melts into the cream.
Is a water bath necessary for this easy creme brulee cheesecake?
That’s what everyone asks when they see the instructions for the easy creme brulee cheesecake! I included the slow-cooling-in-the-oven step as a real-life, busy-cook alternative to a traditional water bath. That slow cool-down really helps keep the top from cracking! However, if you are aiming for the absolute silkiest, most perfect texture—the kind you see in patisseries—the water bath is truly the gold standard. It keeps the oven temperature incredibly stable around the cake, which ensures super smooth results every single time. For a breakdown of why it helps, you can see great tips over at the Olives + Thyme blog as well, who share their take on creme brulee cheesecake.
What is the best way to get a thick, crackly caramelized sugar topping dessert?
The perfect crackle comes down to two things: sugar thickness and heat application. First, keep the sugar layer sprinkled over your chilled cream topping *thin*—think maybe two or three tablespoons total spread thin enough that you can almost see the white cream underneath. If you pile on too much sugar, the outside will burn to a bitter crisp long before the center melts and smooths out into that beautiful, glassy top. Second, use direct, quick heat from a kitchen torch. High heat melts the sugar instantly before it has time to sink into the cold cream below. Fast movement is your friend here!
Share Your Ultimate Cheesecake Dessert Experience
Well, we did it! We took two amazing desserts and managed to combine them into one show-stopping feast. That’s the magic of cooking at home, isn’t it? You take a little bit of inspiration and mold it into exactly what you need!
I sincerely hope you had as much fun making this creme brulee cheesecake as I did baking it for you in theory. Now it’s your turn! I absolutely thrive on seeing what you create in your own kitchens. Did the sugar crackle perfectly on the first try? Did you add a little lemon zest to the filling?
Please, please leave a comment below and tell me how it went. Hearing from you helps me keep creating recipes that fit into real, busy lives. If you have a second, just tap those stars at the top of the page to rate this recipe—it helps other home cooks find their next great baking project. And if you happen to snap a photo of that gorgeous caramelized top, tag me on social media! Happy baking, friends. You can read a bit more about my philosophy on making elegant food achievable over on my About Page!
PrintUltimate Crème Brûlée Cheesecake Recipe
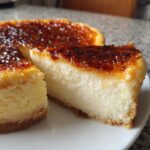
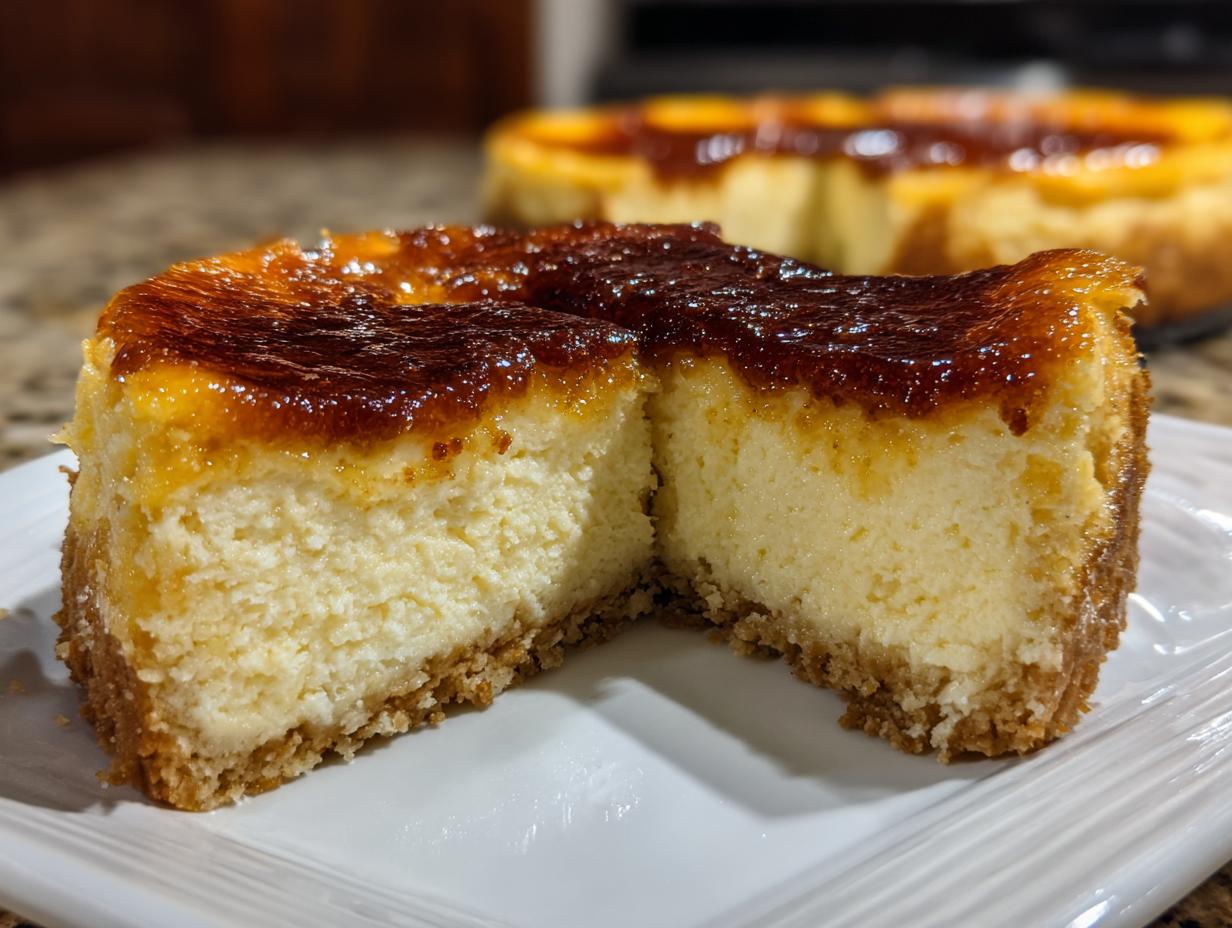
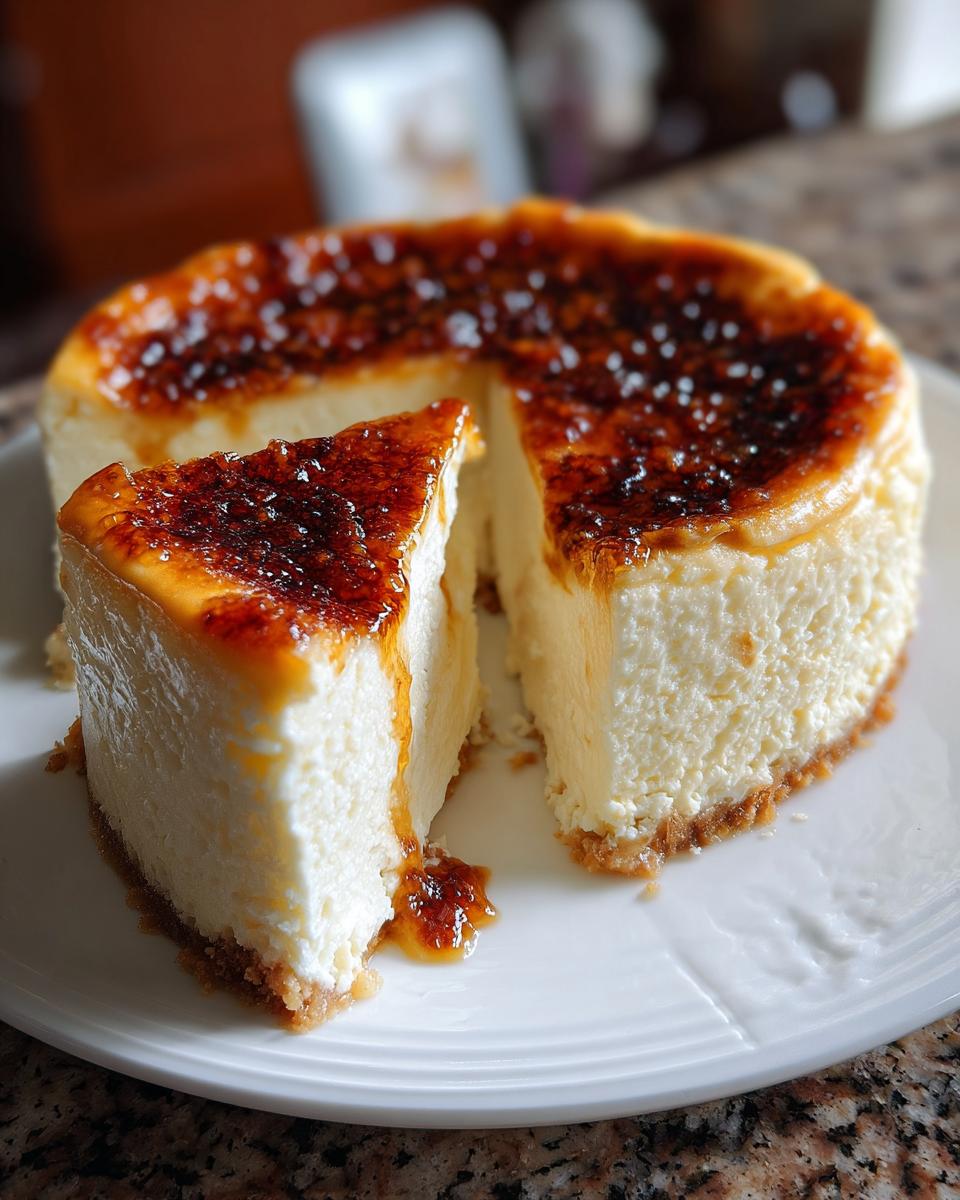
Combine the rich, creamy texture of baked cheesecake with the signature crackly, caramelized sugar topping of classic crème brûlée. This recipe delivers a showstopper dessert that is surprisingly simple to make.
- Prep Time: 30 min
- Cook Time: 60 min
- Total Time: 7 hours 30 min
- Yield: 10 servings 1x
- Category: Dessert
- Method: Baking and Torching
- Cuisine: American Fusion
- Diet: Vegetarian
Ingredients
- 1 1/2 cups graham cracker crumbs
- 1/3 cup granulated sugar (for crust)
- 6 tbsp unsalted butter, melted
- 16 oz cream cheese, softened
- 3/4 cup granulated sugar (for filling)
- 3 large eggs
- 1 tsp vanilla extract
- 2 tbsp sour cream
- 1 cup cold heavy cream
- 1/2 cup granulated sugar (for topping)
Instructions
- Preheat your oven to 325°F (160°C). Prepare a 9-inch springform pan by lining the bottom with parchment paper.
- Make the crust: Combine graham cracker crumbs, 1/3 cup sugar, and melted butter. Press the mixture firmly into the bottom of the prepared pan. Bake for 10 minutes. Let cool slightly.
- Make the cheesecake filling: Beat the softened cream cheese until smooth. Gradually add 3/4 cup sugar and beat until combined. Mix in the eggs one at a time, mixing just until incorporated after each addition. Stir in vanilla extract and sour cream.
- Pour the cheesecake batter over the cooled crust. Place the springform pan inside a larger roasting pan. Carefully pour hot water into the roasting pan until it reaches halfway up the sides of the springform pan (this helps prevent cracks).
- Bake for 50 to 60 minutes, or until the edges are set but the center still jiggles slightly. Turn off the oven, crack the door open, and let the cheesecake cool inside the oven for 1 hour.
- Remove the cheesecake from the water bath and cool completely on a wire rack. Chill in the refrigerator for at least 6 hours, or preferably overnight.
- Prepare the topping: When ready to serve, whip the cold heavy cream until soft peaks form. Gently fold in the 1/2 cup sugar for the topping. Spread this layer evenly over the chilled cheesecake.
- Caramelize the sugar: Sprinkle a thin, even layer of extra granulated sugar over the cream layer. Use a kitchen torch to melt and caramelize the sugar until it forms a hard, amber crust. Work quickly to avoid heating the cheesecake filling too much.
- Serve immediately after torching for the best contrast between the warm, crisp top and the cold, creamy cheesecake.
Notes
- If you do not have a kitchen torch, you can place the sugar-topped cheesecake under a preheated broiler for 1-2 minutes, watching constantly to prevent burning.
- For a vanilla bean flavor, scrape seeds from half a vanilla bean into the filling mixture.
- This recipe works well for a luxurious baked desserts experience.
Nutrition
- Serving Size: 1 slice
- Calories: 450
- Sugar: 35
- Sodium: 250
- Fat: 30
- Saturated Fat: 18
- Unsaturated Fat: 12
- Trans Fat: 0
- Carbohydrates: 40
- Fiber: 1
- Protein: 8
- Cholesterol: 120