

It feels like every weeknight or holiday rolls around, and I stare down a huge butternut squash, wondering how to make it taste like more than just good-enough boiled mush. You know the feeling—you want that cozy, soul-satisfying side dish, but you do *not* have forty-five minutes to coddle a vegetable!
That’s why I perfected this simple method for roasted butternut squash. Seriously, forget everything you think you know about fiddly winter cooking. This recipe is my go-to secret weapon because it reliably delivers those gorgeous, deeply caramelized squash cubes with edges that snap just a little, while the inside melts in your mouth. For me, this is how you simplify fall and winter cooking without ever sacrificing that deeply flavorful taste we crave.
We’re focusing on speed and texture here, using just a handful of ingredients to make something truly exceptional that’s ready before the main course is even halfway cooked. If you want the best easy roasted vegetables recipe, this is it!
- Why This is the Best Oven Roasted Squash Recipe
- Ingredients for Perfectly Roasted Butternut Squash
- How to Roast Butternut Squash Perfectly: Step-by-Step
- Flavor Variations for Your Roasted Butternut Squash
- Tips for Perfect Roasted Butternut Squash Texture
- Serving Suggestions for This Fall Side Dishes Favorite
- Storage and Reheating Instructions for Roasted Butternut Squash
- Frequently Asked Questions About Roasted Butternut Squash
- Estimated Nutritional Data for Roasted Butternut Squash
Why This is the Best Oven Roasted Squash Recipe
I’ve tried it all, trust me. But for a stunning side dish that feels gourmet but really isn’t, this simple roasted butternut squash recipe wins every time. Why? Because it hits that sweet spot of flavor, speed, and texture that busy people need.
- It’s genuinely quick! Total time sits comfortably under an hour, making it perfect for a go-to healthy weeknight vegetables side.
- The texture is unbeatable—you get that crispy exterior next to the creamy center. No mush allowed in my kitchen!
- It uses just a few ingredients, proving you don’t need a spice cabinet explosion for amazing results.
Achieving Caramelized Squash Cubes
The secret to those beautiful, sweet, brown bits is simple: high heat. When you roast butternut squash at 400°F, the natural sugars in the squash start to concentrate and caramelize quickly. That’s how you get that deep, nutty flavor hitting your palate instead of just tasting like steamed squash.
Simple Roasted Vegetable Side in Under an Hour
We’re talking 15 minutes of prep work—max. Then, about 30 minutes in the oven, and BOOM! You’ve got this impressive dish ready. If you’re looking for an easy butternut squash recipe that comes together faster than takeout, this is the one I rely on.
Ingredients for Perfectly Roasted Butternut Squash
Okay, I love fancy flavor bombs as much as the next person, but for this particular recipe, we are keeping things streamlined. This is where the magic of a truly minimal ingredient vegetable roast shines through. You only need four main things, plus the squash itself! Seriously, that’s it. It’s proof that you don’t need a million bottles of spices to make a fantastic side dish.
When you’re picking out your squash, aim for one medium one, which should clock in around 3 pounds. That gives you just the right amount of cubes for four happy servings. Don’t stress too much about exact weight; if yours is a little bigger, just toss it with a tiny bit more oil.
Here is the simple lineup:
- 1 medium butternut squash (about 3 lbs)
- 2 tablespoons olive oil
- 1 teaspoon kosher salt
- 1/2 teaspoon black pepper
That’s the baseline! If you are feeling ambitious and want to tweak it later for a sweet and savory side dish vibe, we’ll talk about maple syrup in the next section. But for now, grab these core components. If you want to see how I use just a few things for something totally different, check out my recipe for quick, easy homemade BBQ sauce!
How to Roast Butternut Squash Perfectly: Step-by-Step
This is where the actual cooking magic happens, and honestly, it’s so basic, you’ll wonder why you ever tortured yourself with complicated vegetable recipes. Getting that perfect texture—tender inside, slightly crunchy outside—is all about following these critical steps. If you can manage a hot oven and a decent knife, you can master this! This process is why this turns into one of my favorite 30-minute weeknight dinners.
Preparation and Uniform Cutting for Roasted Butternut Squash
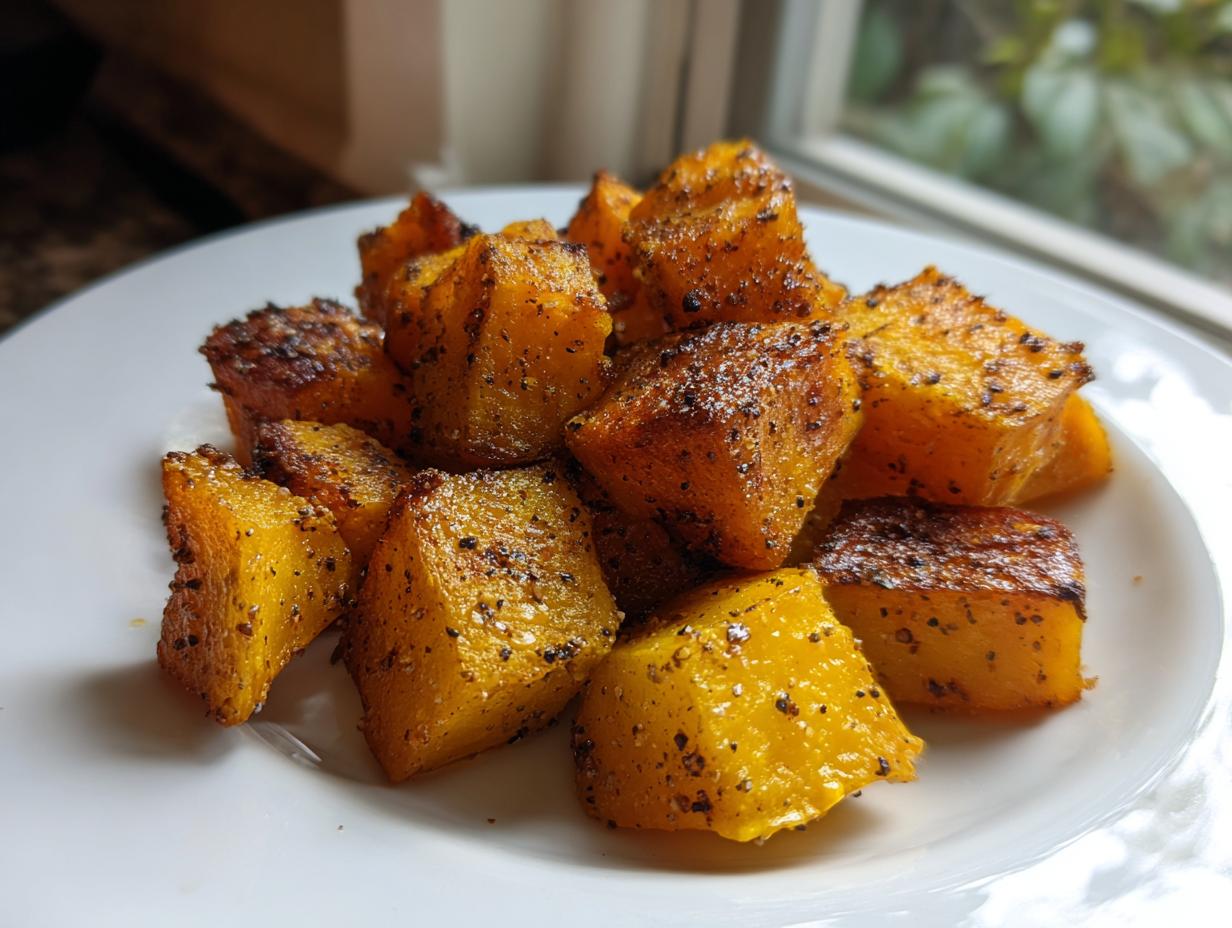
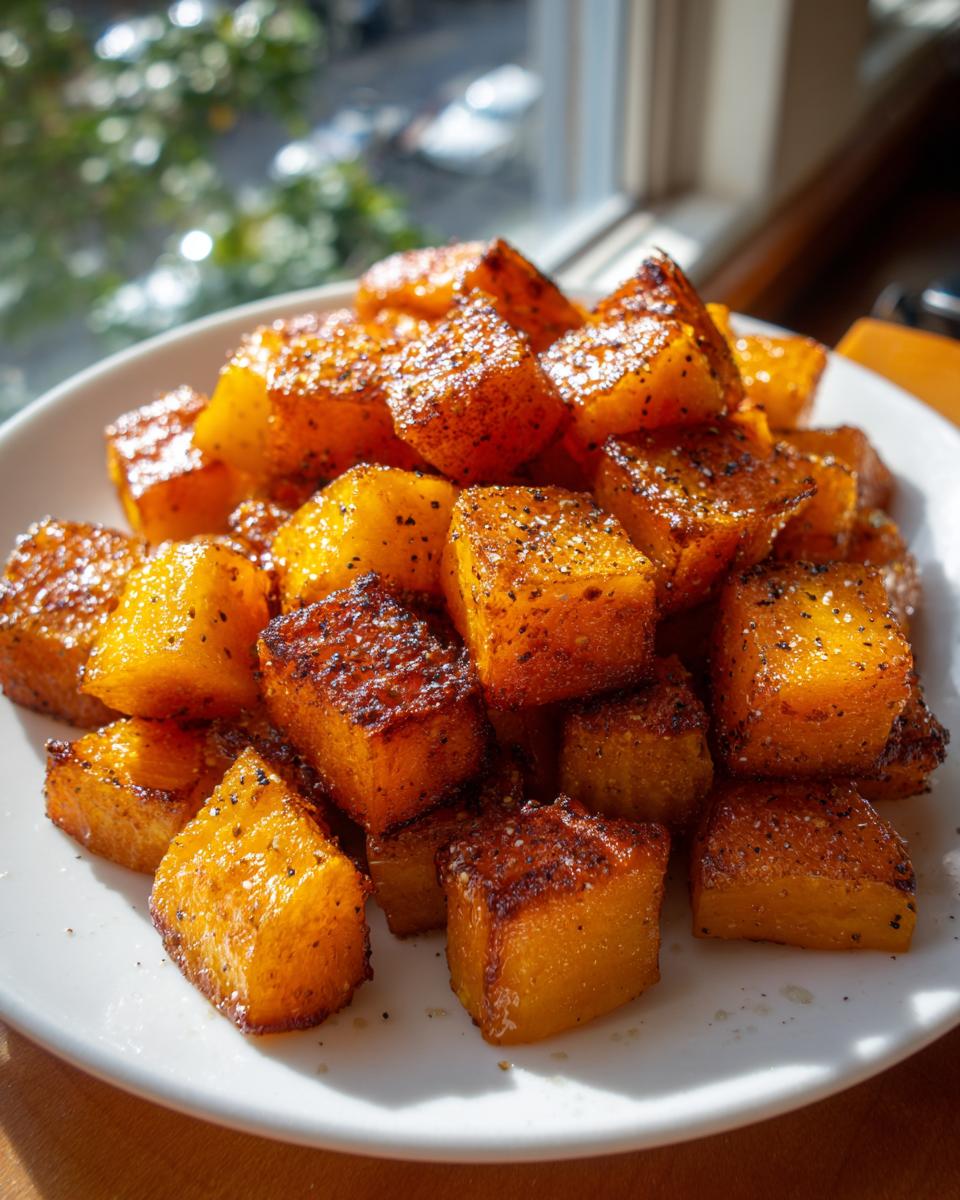
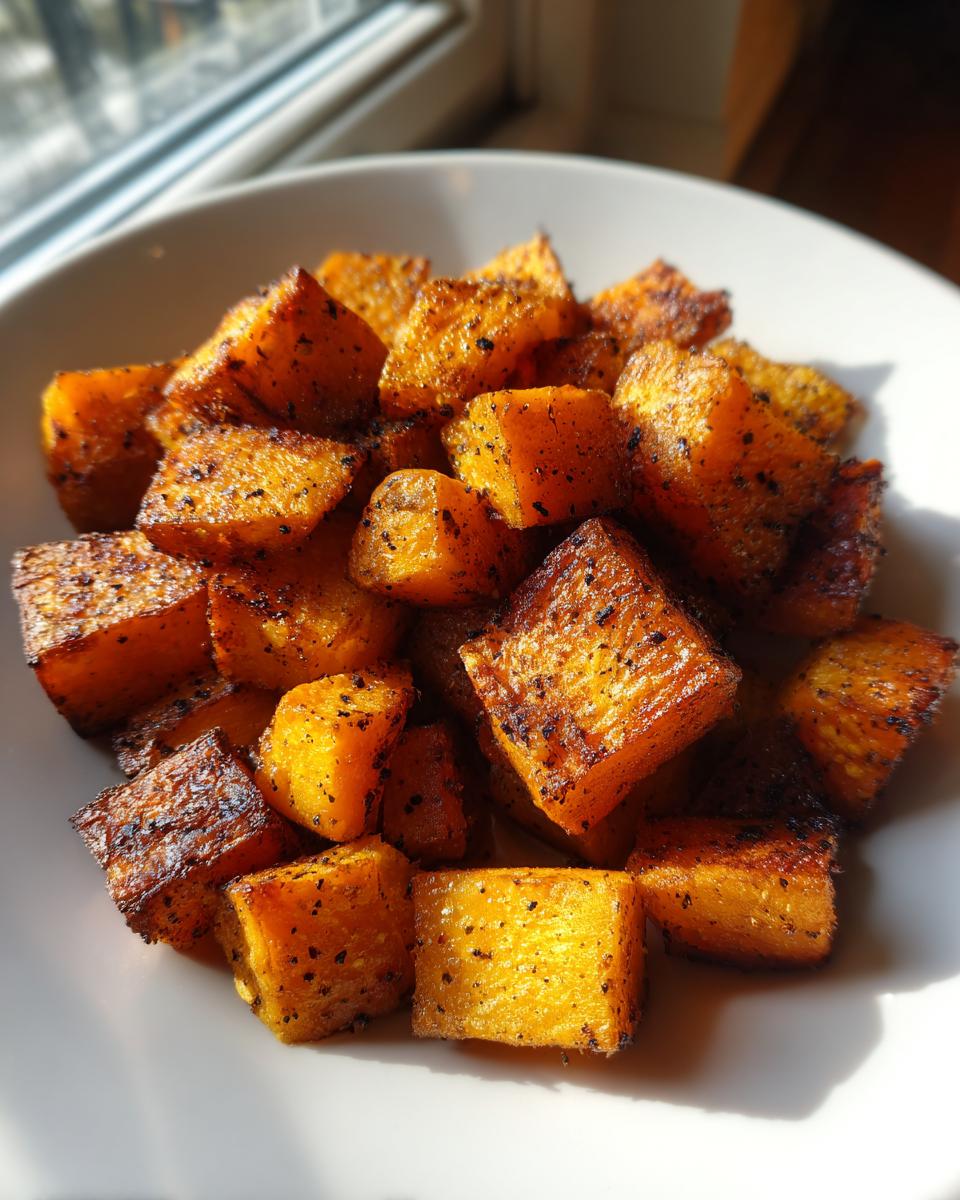
First things first: heat is your friend! Make sure that oven is blazing hot at 400°F (200°C) before you even touch the squash. Next, tackle the peeling. I cut the ends off, slice it right down the middle lengthwise, and then use a sturdy spoon to scoop out those stringy seeds. Now, for the super important part: cutting. You absolutely must aim for uniform, 1-inch cubes. If you have wildly different sizes, the small ones will burn before the big ones get soft. Consistency is key to getting that perfect creamy roasted butternut squash texture.
Seasoning for Savory Seasoned Squash
Once everything is cubed, toss the pieces onto your baking sheet. Drizzle on the olive oil—don’t be shy! Then hit it with the salt and pepper. Now, ditch the spoon or spatula for this step. Use your hands! I always feel like I get the most even coating when I just dig my hands in there and massage the oil and seasoning all over every single cube. If you decide later you want something richer, this is also where you’d mix in a tablespoon of maple syrup to shift it towards that sweet and savory side dish flavor profile.

Roasting Technique for Crispy Edges
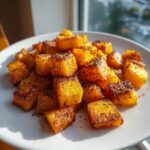
This is the make-or-break moment for crispiness. You *must* spread the seasoned squash out in a single layer. If you pile them up like a squash mountain, they steam, and we are hunting for roasting here! If your pan is too small, grab a second one—I promise, using two pans is better than ending up with mush. They roast for 25 to 35 minutes total. Set a timer for 15 minutes, then pull them out and toss them around. This ensures all sides get direct heat exposure. When they’re fork-tender with beautifully browned edges, you’ve got yourself some fantastic savory seasoned squash!
Flavor Variations for Your Roasted Butternut Squash
Once you master the basic salt-and-pepper method for perfect roasted butternut squash, the flavor possibilities open right up! I love having a base recipe, but sometimes you need a little *oomph* depending on what’s for dinner. These variations take that perfect crispy-on-the-outside, creamy-on-the-inside texture and dress it up just enough to feel special, whether it’s for a relaxed Tuesday or heading into the big holiday meal.
These simple additions prove that while the technique is important (hello, high heat!), the final flavor profile is totally up to you. I often switch between these two depending on my main course. If you’re feeling like something sweet, pop over to see my recipes for simple delicious desserts too—balance is key!
Making a Sweet and Savory Side Dish
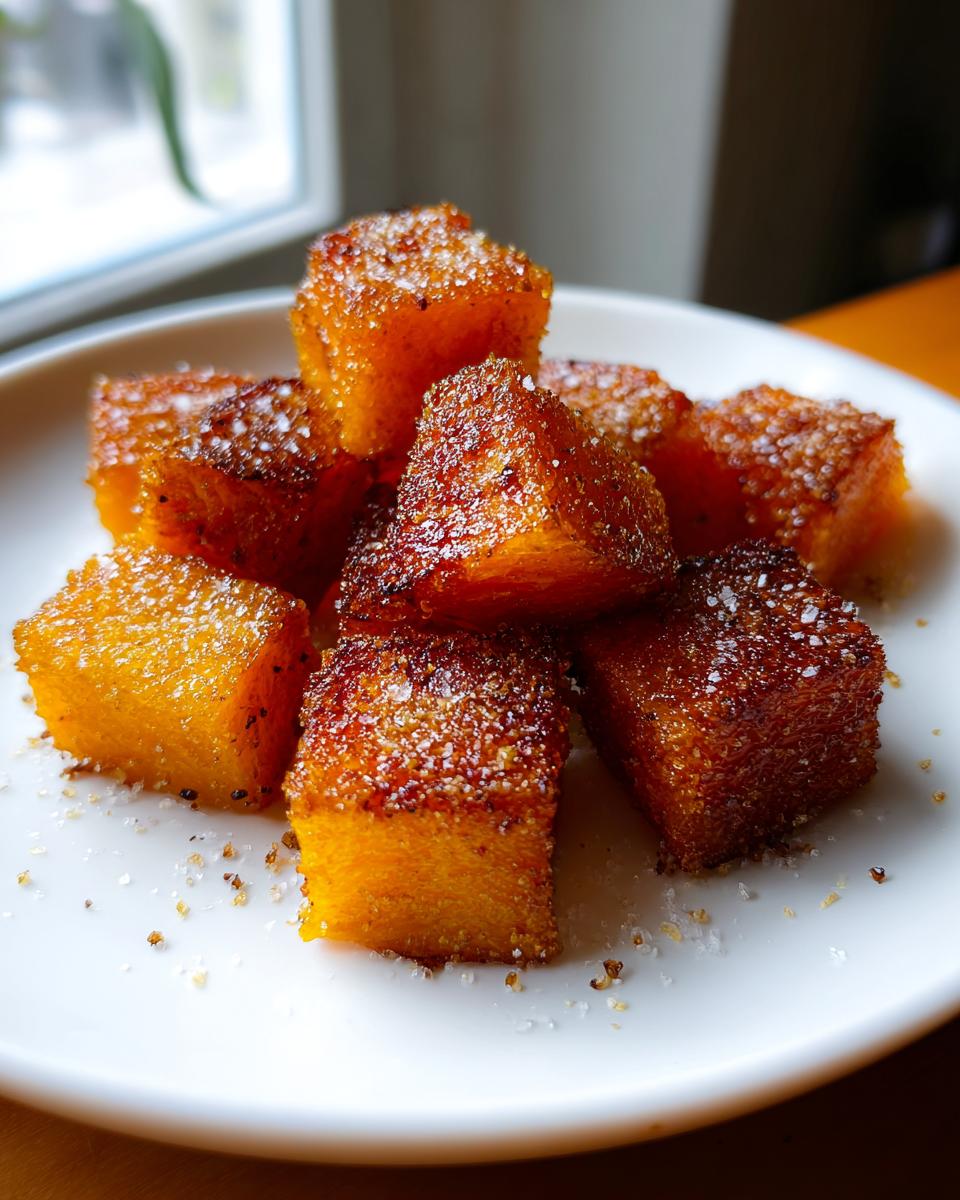
Okay, this one is my absolute favorite for dressing up the squash for someone who likes a little glaze action. If you want that irresistible sweet and savory side dish, all you need to do is introduce maple syrup to the party.
Right alongside your olive oil, salt, and pepper, drizzle in just one tablespoon of real maple syrup before you toss everything together. The high heat of the oven makes that syrup seize up just a bit, creating these incredible sticky, sweet little pockets on the cubes. It really elevates this as a Thanksgiving squash recipe candidate!
Simple Herb Roasted Vegetables Flavor Profile
If you’re serving richer meats, like pot roast or something heavily seasoned, you might want to lean into the earthier, savory side. This is when I skip the sugar entirely and lean into dried herbs for a classic, deeply satisfying roast. This creates that wonderfully savory seasoned squash.
For this flavor profile, when you’re mixing up your seasoning, add 1/2 teaspoon of garlic powder and just a tiny bit—about 1/4 teaspoon—of dried thyme. Garlic powder melts into the oil and distributes evenly, and thyme brings that woodsy aroma that just smells like a cozy kitchen. It’s an awesome way to feature this as a wonderful simple herb roasted vegetables option.
Tips for Perfect Roasted Butternut Squash Texture
I know we talked about success—getting those crispy edges and that tender middle—but sometimes you pull the tray out and things just aren’t quite right. Don’t panic! Texture is where most people struggle with this vegetable, but I’ve learned a couple of tricks to guarantee that irresistible result every time. It’s all about preventing steam and respecting the cube size.
Let’s talk about keeping that interior beautifully soft and creamy. Remember that note I mentioned about the cube size? This is crucial for that creamy roasted butternut squash texture. If you cut those cubes too small—say, half an inch—by the time the outside crisps up, the inside has completely surrendered to mushiness. I recommend keeping them right at that 1-inch mark. It gives the middle enough heft to stay soft and fluffy while the outside gets golden brown and a little chewy.
The absolute enemy of crispiness is steam. If the pan is crowded, the moisture released from the squash has nowhere to go, and you end up boiling your vegetables instead of roasting them. You will see the difference instantly if you can spread them out so they all have a little space to breathe; this is essential for achieving those perfect caramelized squash cubes.
Here’s a little expert trick I picked up for cleanup and non-stick insurance: parchment paper! Even though we use oil, sometimes the sugars stick right to the metal, making scraping awkward. Laying down a sheet of parchment paper makes sure nothing sticks. It won’t affect the high-heat roasting process at all, but trust me, when you go to scrape these treasures onto your serving platter, you’ll be glad you did it.
Serving Suggestions for This Fall Side Dishes Favorite
So, you’ve pulled your tray of perfectly roasted butternut squash out of the oven. The caramelization smells incredible, and now you’re thinking, “What on earth do I serve this with?” Because this recipe is so simple yet so flavorful, it truly acts as the ultimate supporting player for almost any meal during the cooler months. It’s genuinely one of those versatile fall side dishes that works double duty.
When it comes to holidays, this is my non-negotiable Thanksgiving squash recipe. It’s easy enough to make while you’re wrestling with the turkey, and it brings a lovely sweetness that cuts through the richness of gravy and stuffing. I usually make a double batch just to make sure we have enough for leftovers!
For a standard weeknight meal, these squash cubes are fantastic tucked right into a bowl of hot grains. Think about tossing them with some warm farro or quinoa; that hearty grain base perfectly soaks up any little bit of oil or seasoning left on the pan. It turns a standard grain bowl into something instantly cozy and satisfying. It’s an amazing pairing for virtually any roasted meat, too!
If you’re doing a big roast, like a pork loin or, yes, even my secret recipe for a juicy roast turkey, this squash acts as the perfect counterpart. The slightly sweet, earthy flavor complements savory herbs without fighting them. Keep it simple, keep it roasted, and watch it disappear!
Storage and Reheating Instructions for Roasted Butternut Squash
The best part about this recipe being so good is that you absolutely have to make extra! Seriously, leftovers of perfectly roasted butternut squash are my secret weapon for quick meals the next day, but you have to treat them right so they don’t turn into sad, soggy cubes.
When storing them, the key is to cool them down quickly and keep them dry. Once they are completely cool—and I mean room temperature cool, not just warm—stow them in an airtight container in the fridge. They usually keep really well for about four to five days. That’s a solid work week of backup side dishes!
Now, for reheating, listen to Aunt Felix on this one: please, for the love of crispy edges, avoid the microwave! The microwave blasts moisture all over the place, and those lovely caramelized bits you worked so hard for will turn instantly soft. If you want to maintain that balance we worked so hard for—the tender inside and the bite on the outside—you need crisp heat.
I always recommend using the oven or, even better, the air fryer. Preheat your oven to about 350°F, spread the leftovers on a baking sheet (you can even use parchment again!), and let them bake for about 8 to 10 minutes. If you’re using an air fryer, 3 minutes at 375°F is usually perfect. They heat up fast, and that dry heat re-crisps the outside just enough. It tastes almost as good as fresh!
If you’re already planning your next batch, you might want to check out my recipe for easy cranberry brie bites—those are also amazing leftovers, by the way, but they do require a different reheating strategy!
Frequently Asked Questions About Roasted Butternut Squash
I get so many messages from folks who are trying this recipe for the first time, and that’s wonderful! It means this simple approach to roasting is working for busy people everywhere. Usually, the questions circle back to prep work and texture, which are totally valid concerns when dealing with a hard vegetable like winter squash. I want to make sure you get that perfect result every single time, so let’s clear up some common spots.
If you’re planning ahead for dessert after your meal, you might want to save my recipe for easy white chocolate fudge for later!
Can I skip peeling the butternut squash for this easy butternut squash recipe?
You totally *can*, but I really, strongly advise against it if this is your first time trying to get that perfect result. The skin on butternut squash gets pretty tough and chewy when roasted, and it tends to absorb oil unevenly. When you peel it, you expose all that lovely flesh evenly to the heat, which is the secret to that gorgeous, even caramelization and the creamy roasted butternut squash texture we’re aiming for.
If you are absolutely pressed for time, use a heavy-duty vegetable peeler. Just take your time, make long, steady strokes from top to bottom. It goes much faster than you think! Once it’s peeled, you’re good to go with the rest of this easy butternut squash recipe.
What temperature should I use for the best roasted butternut squash?
We are locking this in at 400°F (200°C). You need that high heat! If you drop it down to 350°F, you risk having the squash sit and steam in its own moisture for too long before it ever gets hot enough to properly brown. That high temperature is what guarantees those beautiful, almost crackly edges we are after on our caramelized squash cubes. It speeds up the process, too, keeping this a wonderful quick vegetable side!
How do I prevent my roasted butternut squash from getting mushy?
This always comes down to two things, and you’ll see these points repeated because they are that important! First, overcrowding the pan. If those cubes are touching shoulder-to-shoulder, they sweat, and steaming equals mush. Give them space! Use two baking sheets if you have to, so every single piece has direct contact with the hot metal tray.
Second, cube size! If your pieces are too tiny, they cook through too fast before the outside can properly brown, turning soft. Stick to that 1-inch standard size. Those bigger chunks insulate the middle, keeping it softer and more tender while the outside gets perfectly roasted. Keep those two things in mind, and you’ll nail that desired creamy roasted butternut squash texture every single time.
Estimated Nutritional Data for Roasted Butternut Squash
I always get asked about the nutrition when folks see how easily this roasted butternut squash comes together. It’s easily one of my favorite moist, healthy side dishes because you get loads of fiber and just natural goodness from the squash itself. Since we are only using olive oil and simple salt and pepper for the basic version, the numbers stay really clean!
But, and this is important, these numbers are my best guess based on the standard 3 lb squash and the exact measurements listed. Every brand of oil or salt is slightly different, so consider this your ballpark for tracking your intake, not your lab-tested final figure!
Here’s a breakdown per serving (which is about 1 cup cooked):
- Serving Size: 1 cup cooked
- Calories: 130
- Sugar: 7g
- Sodium: 300mg
- Fat: 5g
- Saturated Fat: 1g
- Unsaturated Fat: 4g
- Trans Fat: 0g
- Carbohydrates: 21g
- Fiber: 4g
- Protein: 2g
- Cholesterol: 0mg
See? It’s fantastic! Low in fat, zero cholesterol, and a great source of fiber. It’s a win-win for getting those essential healthy weeknight vegetables on the table without any guilt. Enjoy that beautiful simplicity!
PrintPerfectly Simple Roasted Butternut Squash: Crispy Edges, Tender Inside
Make the best oven roasted squash with this simple recipe. You get crispy, golden edges and a soft, creamy interior every time. This easy butternut squash recipe is perfect for healthy weeknight vegetables or as a classic Thanksgiving squash recipe.
- Prep Time: 15 min
- Cook Time: 30 min
- Total Time: 45 min
- Yield: 4 servings 1x
- Category: Side Dish
- Method: Roasting
- Cuisine: American
- Diet: Vegetarian
Ingredients
- 1 medium butternut squash (about 3 lbs)
- 2 tablespoons olive oil
- 1 teaspoon kosher salt
- 1/2 teaspoon black pepper
Instructions
- Preheat your oven to 400 degrees Fahrenheit (200 Celsius). You need a hot oven for caramelization.
- Peel the butternut squash. Cut off the ends, slice it in half lengthwise, and scoop out the seeds.
- Cut the squash into uniform 1-inch cubes. Uniform size helps the squash roast evenly.
- Place the squash cubes on a large baking sheet. Drizzle with olive oil, then sprinkle evenly with salt and pepper. Toss everything together with your hands until the squash is fully coated.
- Spread the seasoned squash in a single layer on the baking sheet. Do not overcrowd the pan; use two sheets if necessary to ensure crisp edges.
- Roast for 25 to 35 minutes, tossing halfway through, until the squash is tender when pierced with a fork and the edges are nicely caramelized. Serve immediately as a simple roasted vegetable side.
Notes
- For a sweet and savory side dish, add 1 tablespoon of maple syrup to the oil and seasonings before roasting.
- If you want a more savory seasoned squash, add 1/2 teaspoon of garlic powder and 1/4 teaspoon of dried thyme to the seasoning mix.
- To achieve the creamiest roasted butternut squash texture, do not cut the cubes too small; slightly larger cubes retain more moisture inside.
Nutrition
- Serving Size: 1 cup cooked
- Calories: 130
- Sugar: 7
- Sodium: 300
- Fat: 5
- Saturated Fat: 1
- Unsaturated Fat: 4
- Trans Fat: 0
- Carbohydrates: 21
- Fiber: 4
- Protein: 2
- Cholesterol: 0