

You know that feeling? When you walk into a bakery and that incredible aroma of fresh, crusty bread just hits you? I used to think achieving that kind of bakery-quality **artisan bread** at home was reserved for experts who had hours, or even days, to spend tending dough. Trust me, I get it—the marketing world keeps us running, and sometimes dinner needs to actually materialize without a three-day commitment!
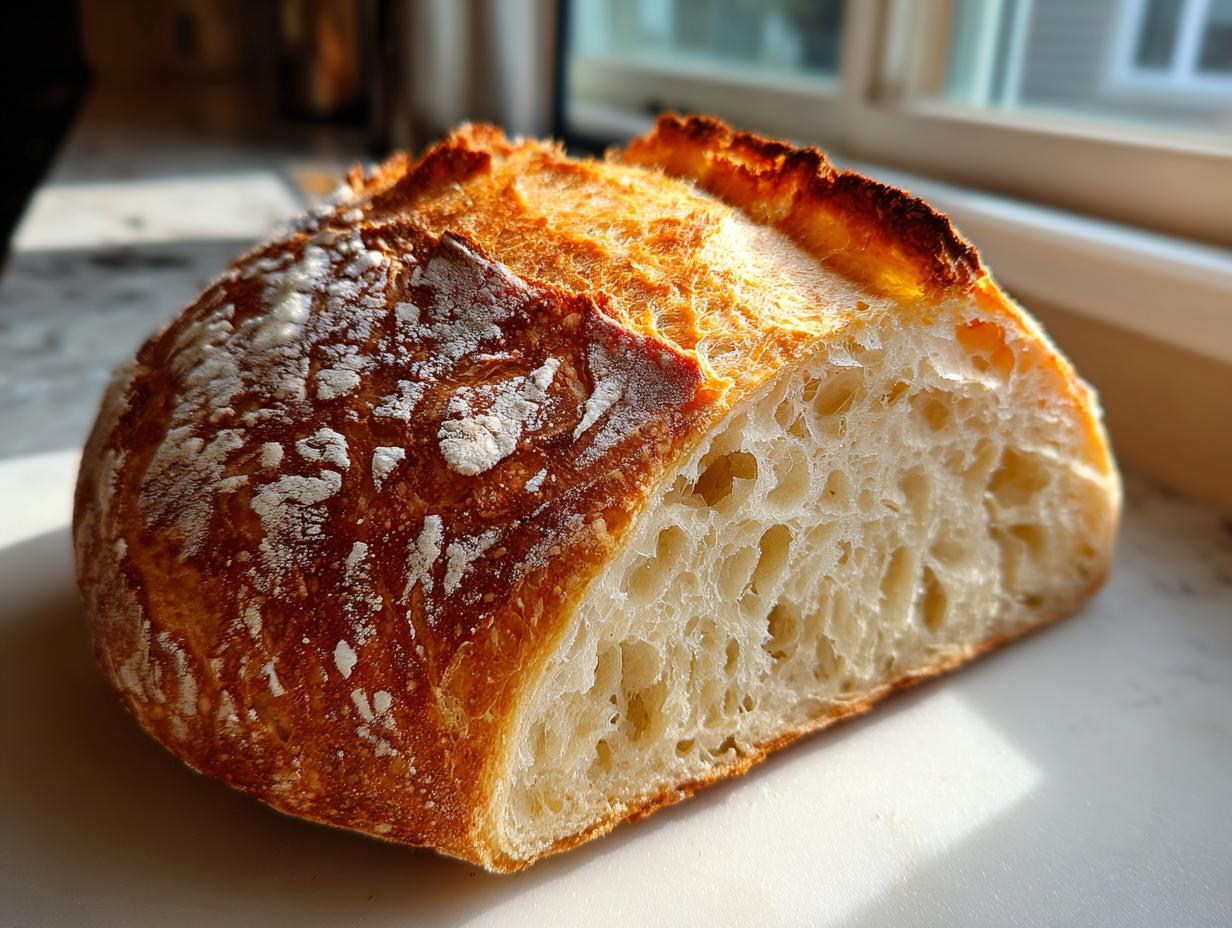
But I worked tirelessly to crack the code for us busy folks. This recipe right here is the real deal. It’s the ultimate no-knead, Dutch oven method that gives you a shatteringly crisp crust and that soft, airy interior you see in all the gorgeous photos. I promise, once you see how easy this is, you’ll never look at store-bought loaves the same way again.
- Why This No Knead Bread Recipe is Your Ultimate Artisan Bread Solution
- Gathering Ingredients for Your Artisan Bread Loaf
- Step-by-Step Instructions for the Dutch Oven Bread
- Tips for Homemade Bread Tips and Achieving a Fluffy Interior Bread
- Flavor Variations: Beyond the Basic Artisan Bread
- Serving Suggestions for Your Rustic Loaf Recipe
- Storage and Reheating Instructions for Artisan Bread
- Frequently Asked Questions About Easy Homemade Bread
- Share Your Homemade Bakery Bread Success
Why This No Knead Bread Recipe is Your Ultimate Artisan Bread Solution
The beauty of this whole process is that you put in about ten minutes of actual effort, and then time does all the heavy lifting! Forget the intense kneading sessions your grandparents probably did; this is one of the absolute **best no knead recipes** out there. It’s why I call this the perfect solution for **artisan bread for beginners**. We rely on a long, cool fermentation—that’s where the flavor builds!
It’s incredibly satisfying to pull out a stunning, rustic loaf that looks like it came from a high-end bakery, but was actually made using a simple **no knead bread recipe**. This honestly feels like cheating, but it’s pure science, I swear. If you’re looking for **easy homemade bread** that impresses every single time, you’ve found it.
Achieving That Bakery-Quality Crusty Bread Techniques
So, what gives us that incredible, shatteringly crisp crust? It all comes down to steam, and that’s where our trusty Dutch oven shines. When you bake bread in that heavy, covered pot, the dough steams itself early on. This steam keeps the surface soft long enough for the dough to fully expand—that’s what gives you that gorgeous oven spring and those beautiful cracks.
Once the steam has done its job, you take the lid off. This lets the heat blast the surface directly, caramelizing the flour and creating that dark, crunchy exterior we all crave in a **rustic loaf recipe**. It’s the single most important step for **mastering artisan crust**; truly, if you follow this instruction, you’ll nail the texture every time. You can read a bit more about my general approach to baking success over here, like with my easy brioche bread recipe, because technique matters!
Gathering Ingredients for Your Artisan Bread Loaf
Okay, let’s talk supplies! What I love most about this **easy homemade bread** is that the ingredient list is ridiculously short. You probably have most of it in your pantry right now. Seriously, the magic happens with just four basic things. But, if you’re like me and you want to elevate that plain loaf into something spectacular, I’ve included my favorite add-ins that really nail that bakery flavor profile.
These flavor additions are what push this from just good bread to the kind of bread people beg you for the recipe for. Don’t skip grabbing olive oil—we need that to keep our mixing bowl happy!
Base Ingredients for the No Knead Bread Recipe
For the foundation of your **rustic loaf recipe**, you need precision on these basics. Having everything measured out saves so much headache later!
- Flour: 3 cups of all-purpose flour. Don’t get fancy with anything too specific unless you’re ready to adjust the water!
- Salt: 1 ½ teaspoons. It’s critical for flavor, folks!
- Instant Yeast: Only ¼ teaspoon! This is the key to the long, slow rise. Don’t use active dry unless you bloom it first.
- Cool Water: 1 ½ cups. Cool, not warm—we aren’t trying to rush this process!
- Olive Oil: 2 tablespoons, just for coating the bowl to prevent sticking.
Optional Flavor Additions: Making Garlic Herb Artisan Bread
If you want to move beyond a simple white loaf and make something truly special, try adding these once you whisk the dry ingredients. These combinations are super popular for a reason!
- Dried Italian Herbs: 1 tablespoon. This gives it that wonderful, complex aroma.
- Garlic Powder: 1 teaspoon. A little boost of savory goodness.
- Grated Parmesan Cheese: ½ cup, added right near the end of the rise time! This creates pockets of salty goodness in your finished **artisan bread**.
If you’re looking for more ways to use simple, quality additions like this, check out my recipe for homemade breadsticks—it uses a similar vibe but in stick form!
Step-by-Step Instructions for the Dutch Oven Bread
This is where the magic really happens, and honestly, it’s where most people get intimidated. But I’m telling you, there is zero need to be scared! We are just mixing things and then walking away. That’s the beauty of this **Dutch oven bread** setup. Be careful though, once you start pulling out incredible loaves of **artisan bread for beginners**, you might start baking it every day!
Mixing and The Long Rest for Perfect Artisan Bread for Beginners
First things first—grab that large bowl where you whisked your dry ingredients together (flour, salt, yeast, and any herbs you chose). Now, pour in your 1 ½ cups of cool water. You need to mix this by hand or with a sturdy wooden spoon. I mean it—mix until everything is just combined into one giant, messy, shaggy mass. Seriously, stop mixing when you see flour streaks. If you fuss with it and try to make it smooth, you’re developing gluten instead of letting the yeast do the slow work!
Next, take that 2 tablespoons of olive oil and lightly coat a second, clean bowl. Scoop your messy dough into that oiled bowl and turn it over just once so the top gets a little slick too. Cover that bowl tightly with plastic wrap. Nope, a tea towel won’t cut it; we need it sealed tight. Now, you walk away. I mean it. Leave it alone on your counter at room temperature, anywhere from 12 hours up to 18 hours. Don’t panic! By the end of that time, your dough should look bubbly, relaxed, and much bigger.
If you decided to jazz things up with that Parmesan cheese? Great choice! In the last 30 minutes of that long rest, gently fold the cheese into the dough. Don’t knead it in, just gently fold until it’s mixed throughout. Get ready for the next quick—but hot—step.
Preheating the Oven and Preparing for the Rustic Loaf Recipe
About 30 minutes before that long rest is up, it’s time to fire up the heat. This step is absolutely vital for achieving that shatteringly crisp crust you see in the best loaves. Place your 5- to 7-quart Dutch oven, lid and all, right inside your cold oven. Turn that oven up to 450°F (232°C).
You need that pot screaming hot! When the oven hits temperature, you carefully, *carefully* remove that unbelievably hot Dutch oven. Use thick oven mitts, please—that metal gets dangerously hot. Gently scrape your bubbly dough right out of the mixing bowl and set it down into the hot pot. It might flop a little; that’s fine for a **rustic loaf recipe**!

Baking Your Artisan Bread: Lid On, Lid Off
Now, this is the two-part secret to success. First, put the lid back on your Dutch oven and slide it back into the hot oven. Bake it covered for exactly 30 minutes. This traps all the lovely steam created by the dough itself, which is the key to a fluffy interior and that huge rise we want. You can take this moment to score your **artisan bread** if you like—just make a quick, decisive slash across the top with a very sharp knife or razor blade. It helps control where the loaf cracks open.
Once those 30 minutes are up, you must remove the lid. This is the moment we switch gears to develop that signature brown crust. Let it bake uncovered for another 10 to 15 minutes until the entire exterior is a deep, beautiful golden brown. That’s how you guarantee **mastering artisan crust**! When it looks done, carefully take the bread out of the pot and place it on a wire rack. Don’t skip cooling, seriously!
For more tips on making gorgeous loaves, check out my instructions on my easy Italian bread recipe—the techniques overlap beautifully!
Tips for Homemade Bread Tips and Achieving a Fluffy Interior Bread
I know you’re going to be tempted. The smell coming off that loaf when it’s fresh from the Dutch oven is pure magic, right? But please, hear this key piece of advice from a fellow baker who has ruined many a perfect loaf by rushing the final step. I’ve gathered a few crucial **homemade bread tips** that move this recipe from good to truly professional-level. Building your confidence as a baker means understanding the ‘why’ behind the steps.
The Crucial Cooling Phase for Your Artisan Bread
This is my number one rule for getting that perfect **fluffy interior bread**: You absolutely must let the **artisan bread** cool completely—I mean really cool—on a wire rack before you slice it. If you cut into it while it’s even warm, that steam inside keeps working. Slice it too early, and you end up with a slightly gummy, sticky texture, even if the outside crust is perfect.
The wire rack is important too! It lets air circulate underneath the loaf, preventing condensation, which would otherwise make the bottom crust soggy. Think of it like letting a steak rest; the bread needs time for its internal structure to set. I know it’s hard, but wait at least an hour, or better yet, two!
Troubleshooting Common Easy Yeast Bread Issues
If your results aren’t perfect the first time, don’t sweat it! We all have those moments. The beauty of this **easy yeast bread** relies on fermentation, so temperature can throw things off. If your dough looked flat and didn’t rise much after 18 hours, your kitchen might have been too cold, or maybe your instant yeast was a bit old. That long, slow rise needs consistent, room-temperature cozy vibes.
If, on the other hand, your loaf came out dense and almost heavy, that usually means one of two things: either you accidentally warmed your water too much when you started, killing the yeast activity, or you mixed the dough too much in step one. Remember, we want a shaggy mass, not smooth dough! It should look messy. If you’re interested in looking at a method that uses an even slower, wilder fermentation, you can take a peek at my guide on my sourdough starter for beginners, but for this recipe, simplicity is your friend!
Flavor Variations: Beyond the Basic Artisan Bread
Basic, beautiful **artisan bread** is fantastic on its own, but sometimes you need a little extra flair, right? Since this recipe is so easy, it’s the perfect vehicle for flavor bombs! We talked about adding Italian herbs and garlic powder in the ingredients section, but let’s focus on the cheese for a minute. It truly takes this basic loaf and turns it into something worthy of a dinner party centerpiece.
If you’re planning to serve this with something simple like my easy homemade garlic butter recipe, bumping up the savory notes in the bread itself is just smart thinking!
Making the Parmesan Bread Recipe Easy Version
If you are going for that glorious **Parmesan bread recipe easy** version, timing is everything. You don’t want to mix the grated Parmesan in too early with the initial shaggy mass. Why? Because the cheese can get slightly lost or even burn a touch in the early, steamy bake. Instead, wait until the very last 30 minutes of that long, 12-to-18-hour rise.
Gently fold the cheese right in, finish the rise, and proceed with the baking steps. That way, the cheese melts beautifully inside the dough matrix, creating those pockets of salty, tangy goodness without messing with the overall structure. It pairs amazingly well with richer main dishes, like my famous parmesan-crusted chicken. Trust me on this—a little patience on the additions makes a huge difference!
Serving Suggestions for Your Rustic Loaf Recipe
Now that you’ve got this incredible, crusty, homemade **rustic loaf recipe** cooling on the rack, the biggest challenge is figuring out what to smother it with, right? Don’t let this beautiful bread sit there naked! Its texture—that hearty chewiness and amazing crust—means it stands up perfectly to heavier dips and richer companions. This bread is versatile enough for breakfast, lunch, or dinner, and I have a couple of go-to pairings that make the entire meal feel elevated.
If you made the plain version, it’s begging for good, quality butter and maybe a sprinkle of flaky salt. But if you went for the herbs or Parmesan, you have a real star ready for dipping. If it’s a chilly evening and you’re looking for comfort, nothing beats dipping thick slices into a warm bowl of soup. I often pair my **artisan bread** with my creamy roasted tomato basil soup. It’s classic for a reason!
But if you’re looking for something richer for a game day or gathering, you seriously need to make a dip to go alongside it. Forget crackers! Scoop up a massive chunk of this bread with a warm, gooey, savory dip. My personal favorite pairing that makes this loaf sing is a great beer cheese dip. Seriously, try dipping that crusty edge into my creamy beer cheese dip recipe—you might weep a little. It’s that good!
Honestly, the easiest serving suggestion is just ripping off a hunk while it’s still slightly warm (yes, I know I told you to wait, but sometimes we cheat with the heel!) and using it to mop up the last bits of sauce from a pasta dish. That’s real home cooking for you.
Storage and Reheating Instructions for Artisan Bread
So, you’ve mastered the bake! Congratulations! Now comes the tricky part: keeping that gorgeous, crusty exterior from going soft overnight. We are striving for that **homemade bakery bread** texture for as long as possible, and how you store it makes a huge difference. Store this **artisan bread** wrong, and you’ll wake up to a sad, floppy loaf.
My biggest rule for keeping this bread fresh—and this goes against what some people say about keeping cakes soft—is that you must avoid plastic bags like the plague! Plastic traps moisture, and moisture is the enemy of a good, crackly crust. If you want to keep it on the counter for a day or two, wrap it snugly in a clean paper bag or even a linen tea towel. This lets the crust breathe but keeps the interior from drying out too fast.
If you need to keep it longer than two days, freezing is your best friend. Slice the loaf first—this is vital! Thaw only the slices you need. Freezing pretty much suspends the bread in time, keeping that fresh texture locked in waiting for you.
But let’s talk about waking up to a loaf that’s lost its crispness. Don’t despair! You can revive that crust easily. We aren’t looking for a microwave here—that just steams the bread again and makes it chewy. Instead, we use the oven to bring back the crunch.
Reviving the Crust on Your Loaf
This is my favorite trick for bringing back that satisfying crunch on day two. Take your cooled loaf—or maybe even a couple of slices—and pop it right back into a hot oven. I set mine to about 350°F (175°C) and let it sit in there for just 5 to 7 minutes. You want the residual heat to hit that crust again and dry it out just enough to become brittle and crisp again. Listen for that little crackle when you pull it out!
If you’re just reheating a slice or two, your toaster oven works fantastic. It gives you that direct heat contact and brings it back to life quickly. It’s amazing how much difference a quick 5-minute reheat makes when you’re enjoying this **easy yeast bread** the next day!
Frequently Asked Questions About Easy Homemade Bread
I always get so many questions after people try this recipe for the first time! It’s amazing how many people are intimidated by baking **artisan bread**, but this no-knead method really breaks down the barriers. Here are a few things I hear most often about mastering this **easy homemade bread** and getting that perfect bake.
Can I make this artisan bread without a Dutch oven?
Oh, absolutely! While the Dutch oven is my MVP for trapping steam and creating that signature crust, it’s not the only way to mimic that environment. If you don’t have one, you need a substitute that traps steam. My go-to backup plan is using a standard heavy, oven-safe pot that has a tight-fitting lid—like a cast iron stockpot or even a metal canning kettle works in a pinch!
If you don’t have a tight-fitting lid, you can create steam by placing a metal baking sheet on the lowest rack while your oven preheats. Right before you put your dough in (maybe on a pizza stone or preheated cast iron skillet), carefully pour a cup of boiling water into that hot lower pan. Close the oven door quickly! That burst of steam will give you a similar opening effect for your **crusty bread techniques**. It’s a little more finicky than using the Dutch oven, but it totally works for getting a **rustic loaf recipe**.
How long can the dough rest for the best no knead recipes?
This long rest period is where the depth of flavor develops, so you have some wiggle room, which is fantastic for planning around a busy schedule! For the **best no knead recipes**, the sweet spot is 12 to 18 hours at a comfortable room temperature, somewhere around 70°F.
If your kitchen is naturally warmer, say closer to 75°F or even 80°F during the summer, you might be closer to the 12-hour mark. If it’s cooler, closer to 65°F, you might need the full 18 hours or even 20. Don’t worry about making it too sour; while the flavor gets more complex (a bit like a **simple sourdough style bread**), it won’t go truly sour because we are using commercial yeast, not a wild starter. You’re safe in that 12 to 18-hour window!
I often find that 14 hours gives me the perfect balance of flavor development and convenience. If you need to let it rest longer than 20 hours, I strongly suggest chilling the dough in the fridge after about 16 hours. Chilling slows everything down but you still get great flavor development without having to worry about the yeast going completely dormant or over-fermenting. You can read a little more about alternatives to Dutch ovens over here, too, if you’re curious: no knead artisan bread.
If you’re looking for more ideas on managing ingredients differently, I have a fun recipe for easy white chocolate fudge that also relies on a slow set time!
Share Your Homemade Bakery Bread Success
I poured my heart into making sure this **artisan bread** recipe worked for you, and honestly, the best part of sharing these recipes is seeing your results! Whether you followed the basic instructions or went wild with the Parmesan and herbs, I want to see what you created. There’s just something so comforting about knowing that my kitchen secret—the ultimate **no knead bread recipe**—is now making someone else’s dinner table feel cozier.
Don’t be shy! Drop a comment below telling me how your loaf turned out. Did that crust shatter perfectly? Was the interior wonderfully fluffy? Rating the recipe helps me know which of my simple recipes truly hits the mark for home bakers like you. Plus, sharing your experiences helps others feel confident trying this **easy homemade bread** for the first time.
And if you snapped a picture of your beautiful, golden-brown **Dutch oven bread**, please tag me on social media! I absolutely love seeing all your creations. If you paired it with something amazing—maybe you used it to scoop up a big helping of my best classic creamy egg salad recipe—I want to hear all about it! Happy baking, friends!
PrintUltimate No-Knead Dutch Oven Artisan Bread: Perfect Crusty Loaves for Beginners
You can bake bakery-quality artisan bread at home without kneading. This easy recipe uses a Dutch oven to give you a shatteringly crisp exterior and a soft, fluffy interior every time. This is the best no knead bread recipe for beginners.
- Prep Time: 10 min
- Cook Time: 45 min
- Total Time: 13 hours 5 min
- Yield: 1 large loaf 1x
- Category: Baking
- Method: Baking
- Cuisine: American
- Diet: Vegetarian
Ingredients
- 3 cups all-purpose flour
- 1 ½ teaspoons salt
- ¼ teaspoon instant yeast
- 1 ½ cups cool water
- 2 tablespoons olive oil (for bowl)
- 1 tablespoon dried Italian herbs (optional)
- 1 teaspoon garlic powder (optional)
- ½ cup grated Parmesan cheese (optional)
Instructions
- In a large bowl, whisk together the flour, salt, and instant yeast. If using, mix in the dried Italian herbs and garlic powder now.
- Add the cool water to the dry ingredients. Use a wooden spoon or spatula to mix until just combined into a shaggy mass. Do not overmix.
- Lightly coat a clean bowl with olive oil. Scrape the dough into the oiled bowl and turn it over once to coat the top.
- Cover the bowl tightly with plastic wrap. Let the dough rise at room temperature for 12 to 18 hours. The dough will become bubbly and increase in volume.
- If adding Parmesan cheese, gently fold it into the dough during the last 30 minutes of rising time.
- About 30 minutes before baking, place your 5- to 7-quart Dutch oven, with the lid on, into your oven. Preheat the oven to 450°F (232°C).
- Carefully remove the hot Dutch oven from the oven. Gently scrape the dough out of the bowl and place it directly into the hot Dutch oven. You can score the top of the dough lightly with a sharp knife if you wish.
- Cover the Dutch oven with the lid and return it to the oven. Bake for 30 minutes.
- Remove the lid and continue baking for another 10 to 15 minutes, or until the crust is deep golden brown. This step masters the artisan crust.
- Carefully remove the bread from the Dutch oven and let it cool completely on a wire rack before slicing.
Notes
- For an extra crispy crust, you can place a metal baking sheet on the bottom rack while preheating to help generate residual heat.
- If you prefer a simpler loaf, omit the optional herbs, garlic powder, and Parmesan cheese.
- Cooling the bread completely prevents the interior from becoming gummy when you slice it.
Nutrition
- Serving Size: 1 slice
- Calories: 205
- Sugar: 0.5
- Sodium: 380
- Fat: 1.2
- Saturated Fat: 0.2
- Unsaturated Fat: 1.0
- Trans Fat: 0.0
- Carbohydrates: 43
- Fiber: 1.5
- Protein: 7
- Cholesterol: 0