

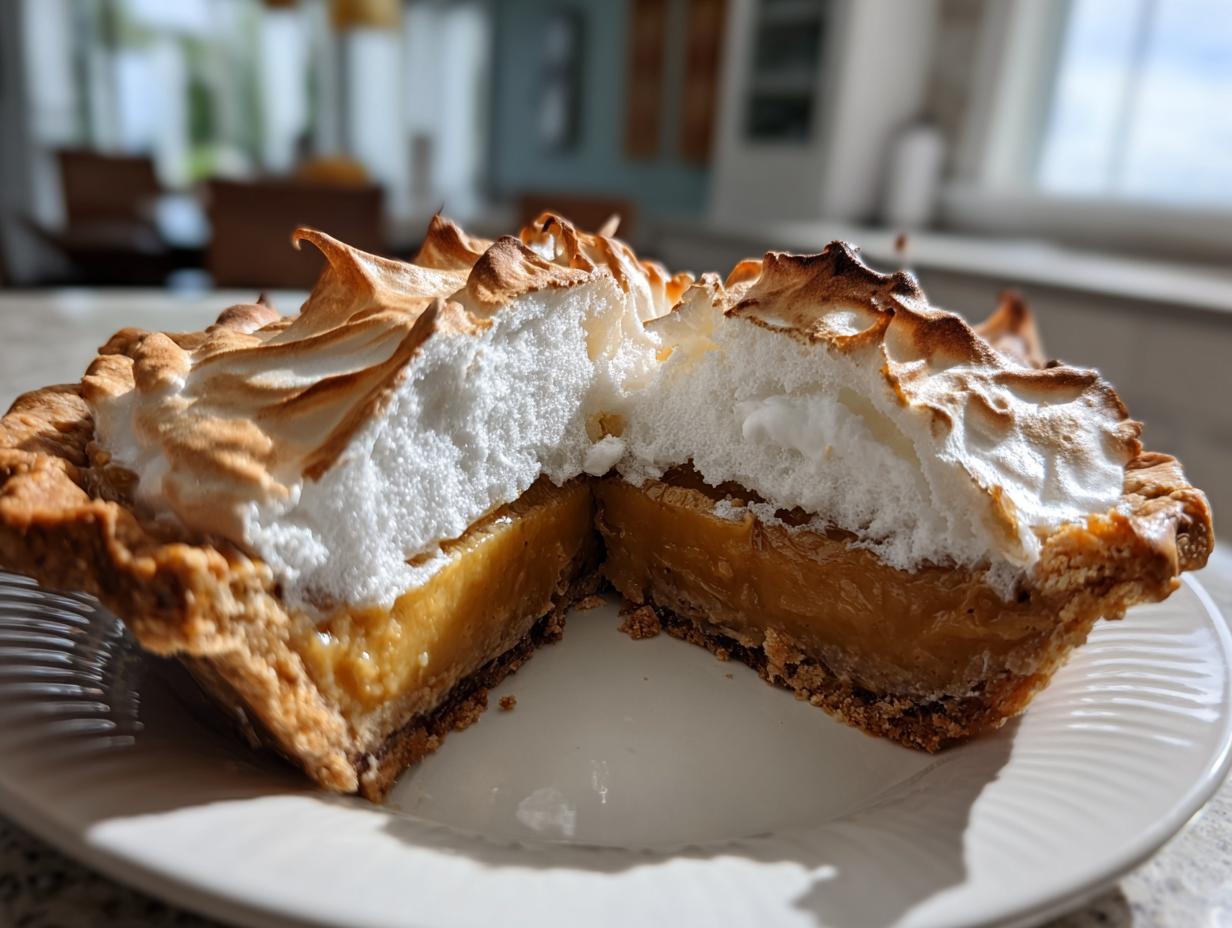
There are some flavors that just wrap you up like a warm blanket, right? For me, that’s the deep, comforting taste of homemade butterscotch. We’re not talking about something quick from a box here; we’re making a proper, old-fashioned butterscotch pie—the kind that makes everyone ask for your secrets at the holiday table, much like my best classic creamy egg salad recipe does! My goal is always that filling to be unbelievably silky smooth, paired with a cloud of perfect, sweet meringue. As a busy cook myself, I learned early on that amazing flavor doesn’t need hours of fuss. I’m Felix Hayes, and my whole kitchen philosophy is built around making these show-stopping, classic dessert recipes achievable, even on a weeknight. Trust me, this recipe bridges that gap between deep nostalgia and real-life schedules perfectly.
- Why This Classic Butterscotch Pie Recipe Works Every Time
- Ingredients for Your Old Fashioned Pie
- Step-by-Step Instructions for the Perfect Butterscotch Pie
- Tips for the Best Silky Smooth Pie Experience
- Variations on the Classic Dessert Recipes Theme
- Serving Suggestions for Your Butterscotch Pie
- Storage and Reheating Instructions for Homemade Butterscotch Filling
- Frequently Asked Questions About Making Butterscotch Pie
- Sharing Your Comfort Food Desserts Success
Why This Classic Butterscotch Pie Recipe Works Every Time
I know what you’re thinking: Old-fashioned pies sound fussy. But honestly, this one is built for success because we honor the traditional way just enough to get that incredible depth of flavor without sacrificing speed. It’s the best of both worlds, really! Think of it as a great weekend project that only takes about 40 minutes of active time before it gets to chill out.
- It delivers that unbelievably creamy butterscotch pie texture we all crave—no grainy sugar here!
- It uses simple pantry staples you probably already have, minus the box mix nonsense.
- It pairs that rich filling with a classic, fluffy meringue that holds its shape beautifully.
If you can stir a pot, you can master this dessert. It’s one of my go-to easy dessert ideas when I want something impressive but don’t want the whole day to disappear into the oven. You should totally check out my easy 3-ingredient fudge if you need another quick win!
Achieving a Silky Smooth Homemade Butterscotch Filling
The absolute deal-breaker for me in any custard pie is texture. We want smooth, we want velvety, we want it to coat the spoon perfectly. If you skip the tempering step, that’s where rookies mess up and end up with bits of scrambled egg floating around. Oof! Tempering means slowly raising the temp of those precious egg yolks by drizzling in a little bit of the hot milk mixture while whisking like crazy before introducing them to the main pot. It sounds fancy, but it’s just slow mixing! Get that right, and your **homemade butterscotch filling** will be pure liquid silk.
The Secret to a Stable Meringue Topped Pie
Let’s talk meringue. Nothing is sadder than peeling meringue that weeps all over your beautiful pie. My secret weapon here is twofold, both shown right in the directions. First, make sure your bowl is spotless and has zero grease when whipping the whites—fat kills volume! Second, we use cream of tartar because it stabilizes those egg whites beautifully, giving you those stiff, glossy peaks. And perhaps the most important part? Slather that meringue right onto the hot filling immediately. That direct heat transfer is key to anchoring the topping so it doesn’t shrink or weep while baking. Seriously, follow that rule, and your **meringue topped pie** will look picture-perfect, almost as perfect as the best classic French toast recipe!
Ingredients for Your Old Fashioned Pie
Okay, let’s get our station set up! When we make an old fashioned pie, we have to be precise because the filling is so delicate. I’ve listed everything below, but pay close attention to those few special notes for the best results. Seriously, don’t even think about using cold egg whites for the meringue—they won’t whip up right for us!
You’ll need three main groups of items: the crust that holds the magic, the rich filling itself, and the cloud-like meringue topping. If you’re looking for an amazing shortcut for a substitute, maybe try my easy white chocolate fudge recipe for a different kind of indulgence, but for this pie, these ingredients are non-negotiable for that authentic flavor!
Here’s what you need to grab before you start:
For the Crust (Use what you love!):
- 1 (9 inch) unbaked pie crust – Use your favorite store-bought, or make your own flaky crust!
For the Creamy Butterscotch Filling:
- 1 cup packed light brown sugar – Make sure that brown sugar is properly packed into the measuring cup, it adds that deep molasses flavor.
- 1/4 cup all-purpose flour
- 1/4 teaspoon salt
- 1 1/2 cups cold milk
- 3 large egg yolks, lightly beaten – These must be separated from the whites!
- 1/2 cup (1 stick) unsalted butter, cut into pieces – Unsalted is important here so we control the saltiness.
- 1 teaspoon vanilla extract
For the Fluffy Meringue Topping:
- 6 large egg whites, at room temperature – This is crucial! Warm whites whip up higher and faster.
- 1/2 teaspoon cream of tartar – Our stabilizer friend!
- 6 tablespoons granulated sugar (for meringue)
With these measured out, you’ve already done half the work, I promise you!
Step-by-Step Instructions for the Perfect Butterscotch Pie
Alright, time to get cooking! This is where that magic happens, and trust me, the smell while this filling is cooking is just pure nostalgia hitting you right in the face. That rich, sweet aroma of caramelized brown sugar—it takes me right back to my mom’s kitchen, even though this is an older style of dessert. We need to be attentive in the filling stage, but once that’s done, it’s a quick transition to the meringue finale. Don’t rush the stirring; that’s what guarantees the best results for this amazing brown sugar dessert. If you loved how moist my moist spice cake recipe turned out, you’ll appreciate the care we take here!
Preparing the Brown Sugar Dessert Filling Base
We start simply, so don’t get intimidated! First, get your oven ready to go to 350 degrees F and sit your unbaked pie crust on a baking sheet. That sheet just makes things easier later, trust me.
In a decent-sized saucepan—nothing too tiny—you’re going to whisk together your brown sugar, flour, and salt until they look thoroughly mixed. Now, slowly, gradually, whisk in that cold milk. Whisk until everything is smooth before you even think about turning on the heat. If you see lumps now, you’ll be dealing with lumps later, and we want a silky smooth pie!
Place that pan over medium heat. This is where you become a constant companion to your saucepan. You need to stir this mixture without stopping for about 8 to 10 minutes. We’re looking for it to thicken enough to coat the back of a spoon. It shouldn’t look like sludge, but it should definitely cling gracefully when you pull your spoon out. Don’t let it boil hard, just a gentle, constant simmer is perfect. Once it coats the spoon, take it right off the heat immediately!
Now for the most important step for a creamy butterscotch pie: tempering the yolks. In a separate small bowl, whisk up those 3 egg yolks lightly. Take about half a cup of that hot milk mixture you just made and drizzle it slowly into the yolks while you whisk them aggressively. This gently warms them up so they don’t scramble when we add them back. Once they look happy and blended, pour that yolk mixture right back into the main saucepan.
Return the pot to medium-low heat. Cook, stirring constantly, for just 1 minute more. Remember what I said? No boiling now! We just want to set that custard. Take it off the heat one last time. Now drop in those pieces of butter and stir until they melt completely and the filling looks gorgeous and glossy. Stir in that vanilla extract. Finally, pour all that delicious, hot filling right into your waiting pie crust and set it aside while we deal with the cloud topping.
Making the Fluffy Meringue and Final Bake for Your Butterscotch Pie
While the filling is hot, you get to work on the meringue—this is what makes it a truly meringue topped pie! Make sure your mixing bowl and whisk attachment are surgically clean. Any tiny bit of grease means sad, flat meringue, and we absolutely refuse to accept that!
Use your electric mixer to beat those room-temperature egg whites along with the cream of tartar. Beat them until they start to form soft, billowy peaks—they should flop over a bit if you lift the whisk. Now, slowly, slowly, start sprinkling in that granulated sugar, about a tablespoon at a time, still beating the whole time. Keep going until you have stiff, glossy peaks. When you pull the whisk out, the peak should stand straight up without even thinking about bending! That glorious cloud-like texture is what we’re aiming for for this butterscotch pie.
Gently spread that meringue over your hot filling. You want to make sure the meringue touches the crust all the way around the edge. Why? Because if the filling is exposed anywhere, it shrinks when it cools and causes that awful gap between the filling and the crust. Don’t dollop it high in the middle; spread it evenly and seal those edges!
Pop the pie (still on the baking sheet!) into the 350-degree oven for only 12 to 15 minutes. We’re not cooking the filling here; we’re just lightly browning the meringue until it gets that classic golden hue on top. When it comes out, this is critical: you must let the pie cool completely on a wire rack for at least 3 hours before anyone dares slice into it. Cutting it too soon guarantees a soupy mess. Patience earns you that perfect slice!
Tips for the Best Silky Smooth Pie Experience
Even with a fantastic recipe, sometimes little things can throw off that gorgeous texture we worked so hard for, right? Since we are going for peak **silky smooth pie** performance here, I want to share the little tweaks I learned over a few batches that really make this **butterscotch pie** shine and help you avoid those common bakery pitfalls. These are the details that elevate a good pie to a great, **nostalgic dessert**.
First, let’s talk about making sure that filling is absolutely flawless. My grandmother always told me that if you can see something that looks remotely powdery or uneven in a custard or pudding, it hasn’t been strained, and that’s a mistake waiting to happen. So, for the **homemade butterscotch filling**, she always insisted on straining the mixture.
The Strainer Trick for Ultimate Smoothness
After you’ve taken the filling off the heat (step 6), before you pour it into the crust, grab a fine-mesh sieve and pour the hot filling through it into a bowl, and then into the pie shell. Yes, it adds an extra step, but trust me, anything remotely lumpy, any tiny bit of egg that decided to cook too fast, gets caught there. It’s the golden ticket to having that incredibly uniform, velvety texture that makes people think you bought this from a fancy bakery. If you’re looking for other incredibly creamy recipes, my easy homemade chocolate pudding benefits from this same technique!
Handling the No-Bake Option
I mentioned the no-bake option in the previous section, but it deserves a quick spotlight here because it changes how you handle temperature! If you decide to skip baking the crust and the meringue entirely (maybe you just want that creamy filling on a warm evening), you must use a crust that doesn’t require heat, like a graham cracker crust. When you go no-bake, you aren’t baking the filling to set it; you are relying on chilling. Make sure those egg yolks are tempered perfectly, and then plan on chilling the finished pie for at least four hours—sometimes even six—to get it firm enough to slice neatly. It will be a softer, more pudding-like texture than the baked version, but still delicious!
Why Egg Whites Need to Be Grease-Free (Meringue Weeping Insurance)
We talked about this briefly before, but I need to hit this home again because it’s such a common issue with any **meringue topped pie**. If there is even one microscopic drop of fat—butter, oil, or yolk—in that bowl when you start whipping the egg whites, they won’t form those beautiful, strong bonds needed for structure. Fat kills protein coagulation! If you are worried about leftover residue, wipe the clean bowl and whisk attachment with a paper towel dipped in white vinegar or lemon juice, then dry it off. This completely cleans and de-greases the surfaces. It’s an old kitchen trick that instantly solves meringue weeping right at the source!
Variations on the Classic Dessert Recipes Theme
I know this recipe is already a winner, but sometimes you need options, right? Maybe you’re in a major rush, or perhaps you just want to lean into that Southern vibe a little harder. This recipe is surprisingly flexible, even though its heart is firmly planted in the old fashioned pie category. Don’t feel like you have to stick strictly to baking if life happens to be throwing curveballs at you!
Since you are definitely looking for some satisfying, rich sweets, if you ever get tired of pie filling, you should check out my strawberry rhubarb pie—it’s a bright, tangy change of pace!
Pivoting to a No Bake Pie Recipes Version
If you need this glorious brown sugar dessert flavor but can’t turn the oven on—or maybe your crust just broke when you docked it (oops!)—we can absolutely switch gears to a no-bake setup. This is where we lean into the magic of a **graham cracker crust pies**!
Instead of using your unbaked pastry shell, press a mixture of graham cracker crumbs and melted butter firmly into your pie plate and chill that until it’s solid. When you make the **homemade butterscotch filling** (steps 1 through 6), you must ensure you cook it until it’s extremely thick because it won’t get any firmer in the oven later. Once you pour that hot filling into the chilled crust, you skip the whole egg yolk tempering dance (since we aren’t baking), and you chill the entire pie until it is completely firm.
If you skip the meringue entirely for the no-bake version, you can top the chilled pie simply with real whipped cream or maybe some chopped pecans for texture. It’s lighter, faster, and still delivers that classic buttery goodness. If you want to see someone else tackle a very famous version of this, you can look at what Dolly Parton does with her recipe here!
Adding Rustic Charm: A Southern Pie Recipes Twist
For those of you who love the deep, complex flavors often found in **Southern pie recipes**, you can sneak some extra warmth into that filling base without affecting the overall smoothness. When you are stirring the brown sugar, flour, and salt together (step 2 in the filling prep), try adding just a small pinch of ground cinnamon or a tiny grating of fresh nutmeg right into the dry ingredients.
You won’t taste ‘cinnamon pie,’ just a richer, deeper, almost smoky layer underneath the butterscotch flavor. It complements the brown sugar so beautifully and gives that feeling of a dessert that’s been simmering on a porch all afternoon. It pairs perfectly with that tall, fluffy meringue we make, turning it into a truly decadent **comfort food dessert**!
Serving Suggestions for Your Butterscotch Pie
Okay, we finally made it! Your butterscotch pie is cooled, the meringue is perfectly set, and the smell filling your kitchen is just divine—that deep brown sugar scent is the best! Now, the big moment: how should we serve this rich beauty? Because this pie is so incredibly decadent and sweet, I always lean toward serving it with something that offers a bright contrast in flavor or temperature. It just balances everything out perfectly.
If you’re looking for something to cut through that richness, simple is best. A quick dollop of freshly whipped cream is non-negotiable for me. We’re talking heavy cream, maybe a teaspoon of powdered sugar, and just a splash of vanilla—beat it until it holds soft peaks, but don’t overdo it. That light, airy cream contrasts wonderfully with the dense, silky smooth pie filling.
For a little textural fun and a pop of color, consider a sprinkle of toasted pecans or walnuts right over the meringue just before serving. The crunch is fantastic! If you want something a little brighter, a small side of tart, fresh raspberries or sliced strawberries works miracles. The slight acidity of the berries cleanses the palate after that rich brown sugar hit.
If you’ve ever made my moist orange juice cake, you know I love a good glaze, but for this pie, simplicity lets the butterscotch star! Just make sure you slice it with a sharp, thin knife dipped in hot water between cuts for those clean, enviable slices every time.
Storage and Reheating Instructions for Homemade Butterscotch Filling
So you’ve made this incredible, show-stopping **butterscotch pie**, and now you have leftovers! Yay! Or maybe you made it a day ahead of time, which is actually a genius move. The reality is, like most beautiful custard pies, this one really requires a little care during storage to maintain that gorgeous texture we worked so hard to achieve. I’m giving you the lowdown on how to keep that homemade butterscotch filling perfect for a few days.
First things first: this pie needs to live in the fridge. That rich, custard filling is dairy and egg-based, so leaving it on the counter after it cools down is a big no-no for both safety and quality. If you’re planning ahead, you can absolutely bake the crust and the filling a day before you want to serve it, but wait to add that lovely meringue topper until just a few hours before you plan on serving it.
Keeping the Meringue Stable
Meringue is lovely, but it’s notoriously dramatic once it hits the cold air of the refrigerator. If you’ve baked your meringue right onto the filling (as per the recipe!), you might notice some moisture forming on top—we call that weeping. It’s totally normal! The high sugar content in the meringue tends to draw moisture, which then condenses when cold.
To store a fully assembled pie, cover it loosely with plastic wrap. Don’t press the plastic directly onto the meringue unless you absolutely have to, because it will stick and ruin those pretty peaks! If you are worried about it, my pro tip is to simply chill the pie uncovered for about an hour after it cools down completely, and then loosely drape plastic wrap over the top, making sure it doesn’t touch the meringue. It should last beautifully for two days in the fridge.
Reheating Butterscotch Pie? Stick to Cold!
Here’s the hard truth about this particular custard pie secret: you really shouldn’t reheat it. Custard fillings and baked meringues do not play well with microwaves or ovens once they are set. Microwaving the pie will turn that silky filling into something sad and rubbery, and it will definitely deflate your meringue! So, if you’re saving leftovers, your best bet is to enjoy them straight from the fridge, nice and chilled. It’s actually still delicious cold, kind of like a rich pudding!
If you happen to have leftover plain filling that you didn’t pour into a crust (maybe you were tasting as you went—I do that all the time!), that portion is much easier to manage. Any extra homemade butterscotch filling can be stored in an airtight container in the fridge for up to three days. You can serve that chilled filling over pound cake or even use it as a dip! For more tips on managing your sweets, check out this easy cranberry brie bites recipe—it’s easy cold snacking, too!
Frequently Asked Questions About Making Butterscotch Pie
I get so many notes about this pie, and honestly, most questions boil down to making sure we nail that texture and avoid the dreaded meringue collapse! Don’t worry if you have questions; that’s why we are here to share the real custard pie secrets. When you’re making something this beautifully old fashioned, a few extra tips go a long way to making it one of your favorite easy dessert ideas.
Can I skip the meringue and just use whipped cream?
Absolutely! If you’re nervous about the meringue or just prefer a lighter topping, whipped cream is a fantastic substitute for this butterscotch pie. The key difference is timing. If you use whipped cream, you must chill the filling completely before gently spooning the cream on top. If you put whipped cream on hot filling, it’s going to melt into a puddle faster than you can say “brown sugar.” Since the filling is so rich, I often just dust the chilled pie with a tiny bit of cocoa powder or a sprinkle of cinnamon instead of a full topping, just to keep the focus on that **creamy butterscotch pie** flavor.
Why did my meringue start shrinking and weeping after baking?
Ugh, the eternal meringue struggle! There are usually two culprits causing shrinking or “weeping” (that watery layer underneath). One, we already talked about: the filling needs to be hot when you apply the meringue so the base heat sets the bottom layer of egg whites. Two, if you didn’t whip the whites stiffly enough, they won’t hold their structure when exposed to heat. Make sure those peaks are truly stiff and glossy! Also, if you used a metal bowl that wasn’t perfectly clean, that residual fat is the enemy. If you want more recipe help on frosting stability, you can check out my smooth cream cheese frosting guide—the science for stabilizing egg whites is similar!
Can I substitute regular milk for the cold milk in the filling?
You can technically use other milks, but I wouldn’t recommend it for this old fashioned pie recipe if you are chasing that authentic flavor and texture. The recipe calls for whole milk because of its fat content. That fat is crucial to creating the rich, creamy base we need, especially when combining it with the butter and egg yolks. If you use skim milk, the filling will be much thinner and might not set correctly because it lacks the necessary fat to emulsify properly. If you absolutely have to substitute, stick to something with a similar fat content, like half-and-half, but the result won’t be quite as perfectly luscious as the original.
Is it better to use a homemade or store-bought crust?
This is where the ‘busy cook’ in me really shines: use what saves your sanity! If you have the energy, making a homemade, flaky crust is unmatched for a truly spectacular presentation. But listen, we are aiming for an achievable, delicious from scratch dessert, and sometimes that means saying yes to store-bought. The key is if you use store-bought, make sure it’s a crust you blind-bake (or dock well) because the filling doesn’t need much extra baking time after it’s poured in. For quick pie ideas, pre-made is a lifesaver!
How long before serving should I take the pie out of the fridge?
Because that **homemade butterscotch filling** is so tender, serving it straight from the very coldest part of your fridge can make it almost too firm to cut cleanly. I recommend taking the whole pie out about 30 to 45 minutes before you intend to slice it. This lets it warm up just slightly, making it easier to slice beautifully (which helps keep the meringue intact!) while still being delightfully cool and custardy. You can find another great recipe for a slightly different take on this classic here!
Sharing Your Comfort Food Desserts Success
That’s it! You’ve created a masterpiece—a true slice of comforting, rich, nostalgic heaven. Making this **butterscotch pie** from scratch is a real accomplishment, whether you nailed that **silky smooth pie** texture or you’re just thrilled you managed the meringue! Now that you’ve got this amazing **comfort food dessert** ready to go, I truly want to know how it turned out for you.
Please don’t just disappear with the leftovers! Come back here and let me know your experience. Did the tempering step go smoothly for you? Did you try the no-bake variation? Leave a comment below and rate the recipe using the star system—it helps me know which classic dessert recipes I need to feature next!
Tell Me About Your Pie!
Seriously, every single comment helps me build better, more reliable recipes for all of us busy cooks out there. I love seeing how you customize things or what tricks you might have discovered on your own journey to the perfect **homemade butterscotch filling**.
If you’ve managed to snap a photo of that beautiful, tall meringue topping or a perfectly clean slice, please share it! Tag me on social media so I can cheer you on. It means the world to me when I see these old-school flavors coming back to life in modern kitchens. It keeps the tradition going, and that’s exactly what Cooking by Felix is all about!
If you’re already thinking about what sweet treat to tackle next, maybe skip the pie and try my super fudgy chocolate crinkle cookies for a different kind of indulgence!
PrintClassic Old-Fashioned Butterscotch Pie with Silky Meringue

Make a truly comforting, rich butterscotch pie with a silky smooth filling and a classic, fluffy meringue topping. This recipe honors traditional methods for a deeply satisfying dessert.
- Prep Time: 20 min
- Cook Time: 25 min
- Total Time: 2 hours 45 min
- Yield: 8 servings 1x
- Category: Dessert
- Method: Baking
- Cuisine: American
- Diet: Vegetarian
Ingredients
- 1 (9 inch) unbaked pie crust
- 1 cup packed light brown sugar
- 1/4 cup all-purpose flour
- 1/4 teaspoon salt
- 1 1/2 cups cold milk
- 3 large egg yolks, lightly beaten
- 1/2 cup (1 stick) unsalted butter, cut into pieces
- 1 teaspoon vanilla extract
- 6 large egg whites, at room temperature
- 1/2 teaspoon cream of tartar
- 6 tablespoons granulated sugar (for meringue)
Instructions
- Preheat your oven to 350 degrees F. Place the unbaked pie crust on a baking sheet.
- In a medium saucepan, whisk together the brown sugar, flour, and salt. Gradually whisk in the cold milk until smooth.
- Cook the mixture over medium heat, stirring constantly, until it thickens enough to coat the back of a spoon, about 8 to 10 minutes. Do not let it boil rapidly.
- Remove the saucepan from the heat. In a small bowl, lightly beat the egg yolks. Slowly drizzle about 1/2 cup of the hot milk mixture into the egg yolks while whisking constantly to temper them.
- Pour the tempered egg yolk mixture back into the saucepan with the remaining hot mixture. Return the pan to medium-low heat. Cook, stirring constantly, for 1 minute more. Do not boil.
- Remove from heat. Stir in the butter until completely melted and smooth. Stir in the vanilla extract.
- Pour the hot butterscotch filling into the unbaked pie crust. Set aside while you prepare the meringue.
- To make the meringue, beat the egg whites and cream of tartar in a clean, grease-free bowl with an electric mixer until soft peaks form. Gradually add the 6 tablespoons of granulated sugar, beating until stiff, glossy peaks form.
- Spread the meringue evenly over the hot filling, making sure the meringue touches the edges of the crust all around to prevent shrinking.
- Bake for 12 to 15 minutes, or until the meringue is lightly golden brown.
- Cool the pie completely on a wire rack for at least 3 hours before slicing.
Notes
- For a truly silky smooth filling, strain the custard mixture through a fine-mesh sieve before pouring it into the crust.
- If you prefer a no-bake option, use a graham cracker crust and chill the filling until firm instead of baking the final pie.
- To prevent the meringue from weeping, make sure your mixing bowl for the egg whites is completely free of any fat or grease.
Nutrition
- Serving Size: 1 slice
- Calories: 420
- Sugar: 45g
- Sodium: 250mg
- Fat: 22g
- Saturated Fat: 13g
- Unsaturated Fat: 9g
- Trans Fat: 0.5g
- Carbohydrates: 55g
- Fiber: 1g
- Protein: 7g
- Cholesterol: 150mg