

It’s so easy to get caught up in the grind, isn’t it? We look at a simple orange sitting on the counter and think, “Well, that’s just breakfast.” But I want to show you how to take that everyday fruit and transform it into something truly elegant. Trust me, making beautiful, glossy, chewy candied orange slices is shockingly straightforward when you stick to the right technique. This method relies on a slow, patient simmer in simple syrup, which pulls the bitterness out and locks in that incredible, bright citrus flavor.

For me, these treats feel like finding a little piece of sunshine tucked away in your pantry. They prove that even the busiest people, like I used to be trying to balance my marketing job, can create something luxurious just by treating simple ingredients with care. When you get that perfect translucent chew, you’ll understand why I cherish this recipe. If you love quick sweets, you should check out my easy 3-ingredient fudge recipe too!
- Why You Will Love This Simple Candied Orange Slices Recipe
- The Best Oranges for Candying and Necessary Equipment
- Ingredients for Perfect Candied Orange Slices
- Step-by-Step Guide to Making Candied Orange Slices
- Variations: Chocolate Dipped Candied Orange Slices
- Tips for Success with Your Homemade Citrus Candy
- Serving Suggestions for Candied Orange Slices
- Storage and Making Ahead for Your Candied Orange Slices
- Frequently Asked Questions About Making Candied Orange Slices
Why You Will Love This Simple Candied Orange Slices Recipe
Honestly, these treats feel like a major upgrade without demanding a ton of complex work. Once you realize the power of the simple syrup fruit recipe technique, you’ll be hooked. Here’s why this recipe deserves a permanent spot in your baking rotation:
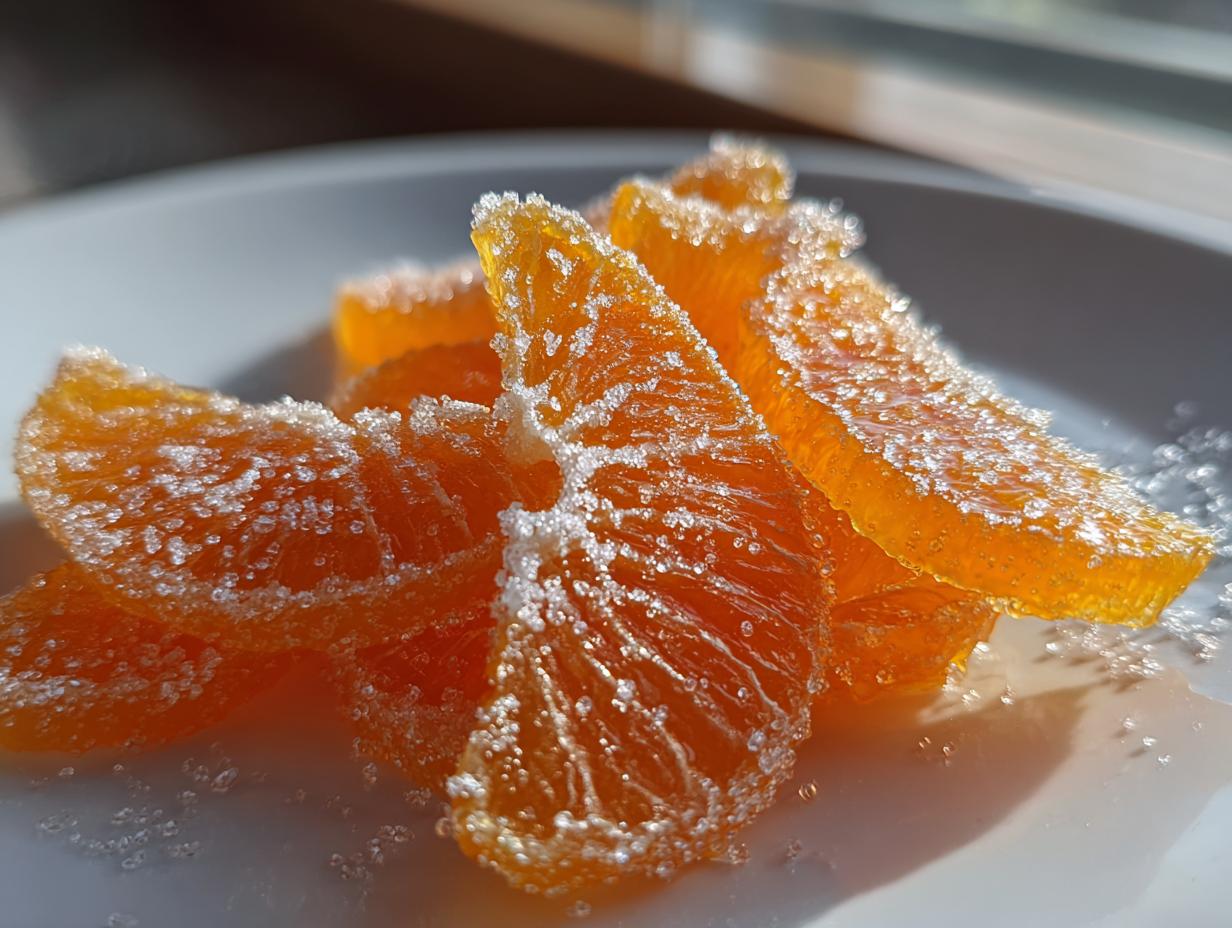
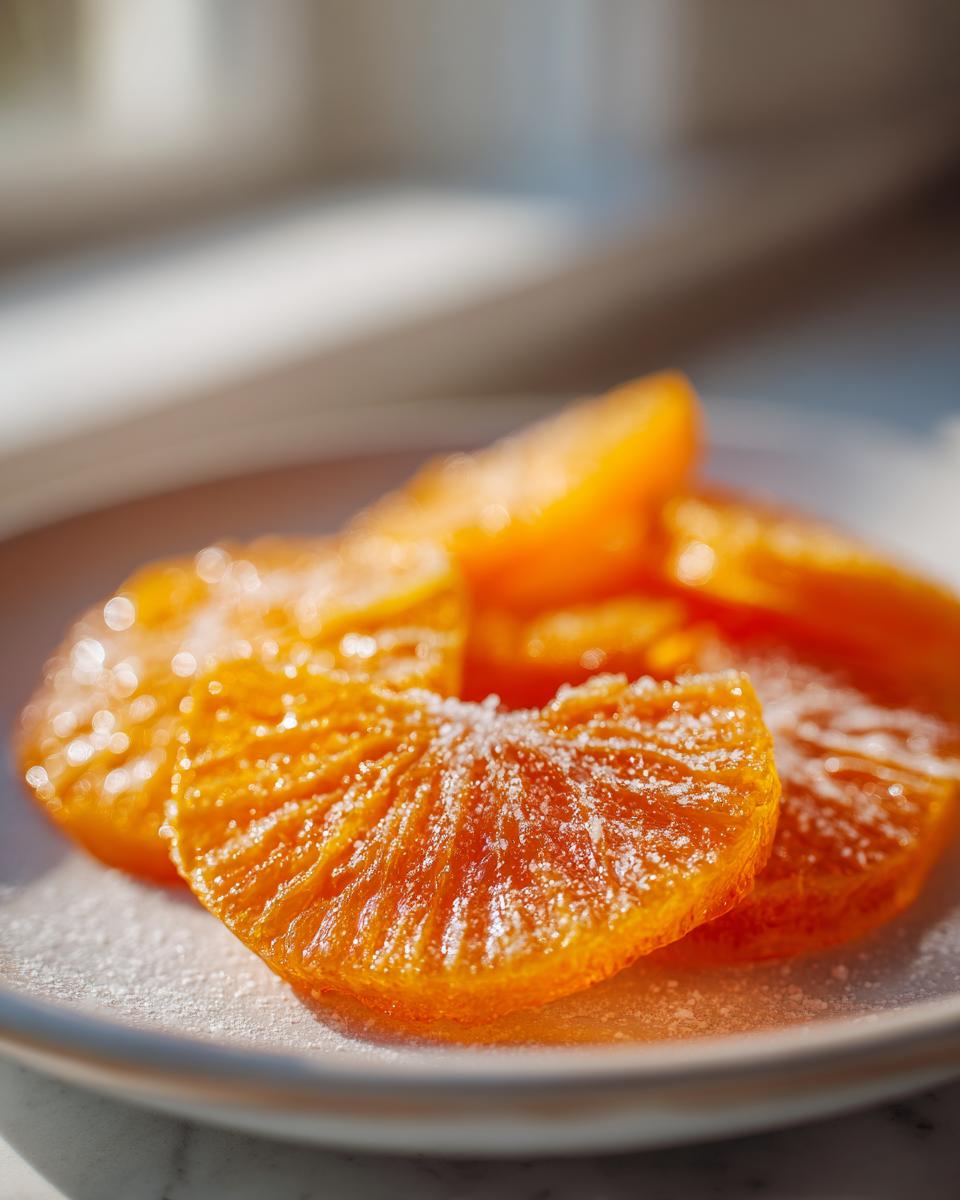
- They achieve that perfect texture: wonderfully chewy citrus snack that isn’t sticky or hard.
- The final look is incredible—think beautiful, glassy orange slices that gleam on any dessert.
- The flavor hits just right: perfectly balanced sweet and tangy orange treats.
- They are so versatile! Use them as an orange slice topping for cakes or just eat them straight from the rack.
If you need another easy, guaranteed success recipe for your kitchen, my moist apple bread is fantastic this time of year!
The Best Oranges for Candying and Necessary Equipment
You can certainly use any firm orange you have lying around, but if you want those show-stopping, jewel-like results, you need to pick the right fruit. For the absolute best experience, I always recommend using oranges that have a slightly thicker peel. Navel oranges work great, but you might find that a slightly less common variety, maybe something with a bit more structure, holds up better during that long, slow simmer. This ensures you get those gorgeous, intact rounds.
Essential Tools for Making Candied Orange Slices
Don’t worry, you don’t need a fancy candy thermometer for this! We are sticking to the basics that most of us already have in the cupboard. Having these items ready saves so much fuss when you finally get started making these:
- A medium, heavy-bottomed saucepan—we don’t want any scorching during that long simmer!
- A sharp knife for slicing the fruit precisely.
- A wire rack set over a baking sheet ready for drying.
- Parchment paper or a silicone mat for the rack, just in case things get sticky.
Ingredients for Perfect Candied Orange Slices
Gathering your supplies is the first real step toward creating this sweet and tangy treat. I always lay everything out before I even touch the fruit; it keeps me calm and prevents those frantic last-minute searches! This recipe truly relies on the precision of the sugar, so measure carefully. Don’t forget that little bit of lemon juice—it brightens everything up beautifully.
You will need these core items for the sugar bath:
- 2 large navel oranges (or best oranges for candying)
- 3 cups granulated sugar, divided
- 2 cups water, divided
- 1/4 cup fresh lemon juice
And here are the fun extras that really elevate the final product. I highly suggest trying the dark chocolate version; it’s just divine! If you want something equally impressive but faster, try my moist orange juice cake recipe, which uses fresh citrus too!
- Optional: 4 ounces dark chocolate for dipping
- Optional: Flaky sea salt for topping
Step-by-Step Guide to Making Candied Orange Slices
Okay, buckle up, because this is where the magic happens! Making amazing candied orange slices takes patience, but the actual hands-on work is surprisingly simple. The secret to getting that bright, sweet taste without any harsh bitterness is all in the preparation; don’t skip those blanching steps!
Preparing and Blanching the Orange Slices
First things first, we need perfect slices. Wash your oranges really well—since we eat the peel, you want them spotless! Slice them thinly, aiming for about 1/8 of an inch thick. Toss the ends away. Now for the essential technique: bitterness removal. Put the slices in your pot and cover them with water. Bring it to a boil, then immediately drain them off. You need to repeat this entire process two more times. Yes, three times total! It seems like extra work, but this is how we guarantee that sweet flavor shines through later.
Creating the Simple Syrup Fruit Recipe Base
Once the oranges are prepped, we make the bath that transforms them. In that same clean saucepan, mix up 2 cups of sugar and 2 cups of water. Make sure you stir it over medium heat until that sugar totally disappears—we need a smooth simple syrup fruit recipe base here. Once it’s clear, toss in your blanched orange slices along with that little splash of lemon juice. That lemon juice is my little trick to boost the naturally tangy orange treats flavor!
Simmering and Soaking for Glassy Orange Slices
Now, turn the heat way down low. We want a gentle simmer, not a rolling boil, for about 45 minutes to an hour. You’ll see the white pith start turning clear; that’s your cue that the sugar is penetrating. This slow cooking creates those beautiful glassy orange slices. When they look tender, turn off the heat. Here’s the hardest part: leave them alone! Let those slices soak in the syrup for at least four hours, but I insist you leave them overnight. They need that time to fully absorb the sweetness.
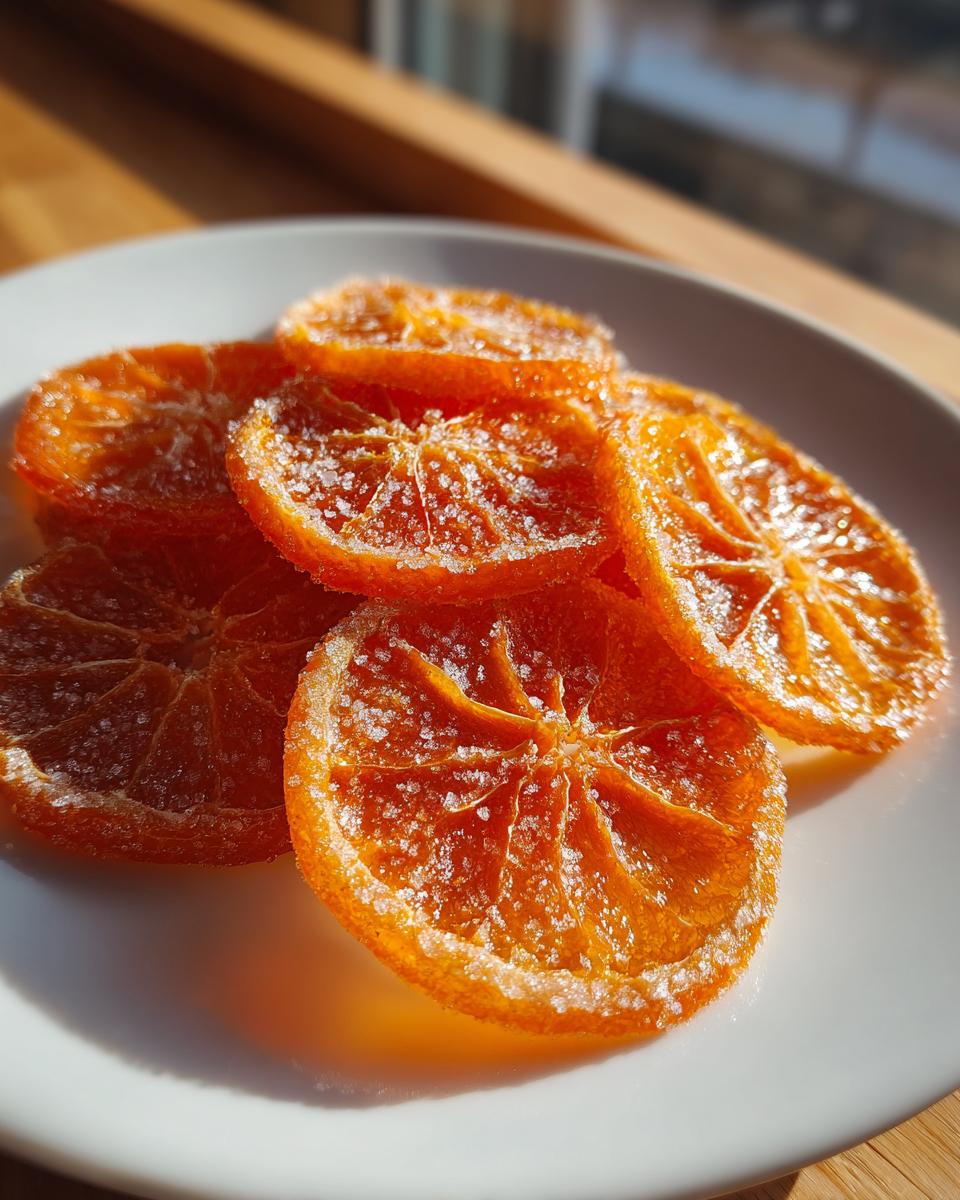
Drying the Candied Orange Slices in the Oven
Once they’re soaked, carefully lift them out, let the extra syrup drip back into the pot (save that leftover syrup, by the way!). Lay them single-file on your prepared wire rack. Preheat your oven to the absolute lowest setting you have—we’re talking around 170°F or 75°C. Pop them in for about an hour to two hours. You have to flip them halfway through. The goal isn’t to bake them crisp; we want them to be dry enough to touch without being sticky, but still wonderfully chewy citrus snack.
If you’re looking for other simple but impressive treats, check out my recipe for easy white chocolate fudge—it’s ridiculously good!
Variations: Chocolate Dipped Candied Orange Slices
If you want to take your amazing candied orange slices from a lovely snack to show-stopping dessert garnish, you absolutely have to try dipping them in chocolate. It really only takes a few extra minutes, and the result is stunningly gourmet! Once your slices are fully dried out—remember, they need to be dry to the touch—it’s time to move on to the chocolate.

For the best flavor contrast, I love using a good quality dark chocolate. Melt four ounces until it’s smooth. Then, just dip one half of the orange slice into the melted chocolate, letting the excess drip off for a second. Lay it back on your wire rack immediately! This is crucial: sprinkle just a tiny pinch of flaky sea salt over the chocolate before it sets. That saltiness against the sweet, tangy orange? Pure heaven. If you love rich chocolate treats, my chocolate crinkle cookies are the perfect follow-up!
Tips for Success with Your Homemade Citrus Candy
I know we’ve covered the steps, but sometimes you need a few extra nuggets of wisdom to move from “good” to “phenomenal.” Achieving that perfect, slightly chewy citrus snack texture instead of something brittle or sticky is all about controlling the drying stage. My biggest tip for everyone making candied orange slices? Use that leftover syrup! Don’t just pour it down the sink!
That thick, fragrant liquid is an absolutely incredible base for a homemade cocktail or mocktail. Think of it as a ready-made simple syrup fruit recipe concentrate. Just thin it with sparkling water or use it when mixing a whiskey sour for a bright citrus kick. Also, if you prefer a matte sugar finish instead of the glossy, dried look, toss your warm, drained slices in some granulated sugar *before* you put them in the oven to dry. It gives them a slightly different, lovely texture. If you’re looking for another amazing treat using simple ingredients, you must try my Filipino cassava cake recipe!
Serving Suggestions for Candied Orange Slices
So, you’ve made these dazzling citrus jewels—now what? These aren’t just for staring at! They are perfect for instantly elevating anything you serve. My favorite way to use them is as a beautiful gourmet orange garnish sitting right on top of a dark chocolate cheesecake. They add height and that pop of color we all crave.
They are also fantastic when included in your holiday orange platter ideas alongside cheeses and nuts. Or, if you’re shaking up some cocktails, a single slice makes the most elegant rim decoration you can imagine. For everyday baking, they are the ideal orange slice topping for cakes or even just tucked into my favorite blueberry muffin batter before it goes into the oven. If you want a frosting base that supports these gorgeous toppings, you have to try my smooth and tangy cream cheese frosting!
Storage and Making Ahead for Your Candied Orange Slices
The best part about making a batch of candied orange slices is that you don’t have to eat them all immediately! Store them in a single layer in a completely airtight container once they are totally cool and dry. Don’t crowd them, or they might start sticking together and lose that perfect texture we worked so hard for.
And here’s a little secret: they are even better the next day! Giving them a full 24 hours allows the sugars to settle in, really locking in that chewy citrus snack quality. If you want to prep early for the holidays, this is the perfect homemade citrus candy project to get done ahead of time. Speaking of quick holiday prep, my easy cranberry brie bites are always a hit!
Frequently Asked Questions About Making Candied Orange Slices
Sometimes you just need a quick answer so you can get back to the kitchen! I gathered a few questions I always get when people try this recipe for the first time. Don’t hold back—ask away! We want everyone to succeed in making perfect DIY citrus gifts.
How do I prevent my candied orange slices from being bitter?
That’s the number one question! If your end product turns out bitter, you skipped the most important step: blanching. You absolutely must boil and drain the slices three separate times. When you boil them, the water draws out those harsh, bitter oils trapped in the white pith. Trust me, doing those three rapid boils is the key to achieving those lovely, sweet and tangy orange treats without any bite!
How long do these homemade citrus candy slices last?
Because we dry them slowly in the oven, they last quite a while! If you store them correctly in an airtight container at room temperature—and keep them away from humidity—your candied orange slices should stay delightfully chewy for up to three weeks. They really are the best homemade garnish you can keep on hand!
Which oranges are best for learning how to make orange garnish?
If you’re just starting out, stick with thick-skinned navel oranges. They handle the simmering process without disintegrating. As you get more confident, try blood oranges for color, or maybe even lemons for a zingier version of this easy candied fruit recipe. Consistency is what matters most for a beautiful result.
Can I skip the oven drying time if they feel dry enough?
Oh, I’m tempted to sometimes, especially when I’m eager to try one! But please don’t skip the low oven time. Even if they seem dry on top, they might still be gooey inside, which means they won’t store well. That slow bake at the lowest temperature evaporates the last of the surface moisture, turning them from sticky to that perfect, resilient chew. If you want to perfect that technique, I highly recommend learning how to make my classic creamy egg salad recipe, as it requires careful temperature management too!
PrintSimple Candied Orange Slices Recipe

You can make these sweet and tangy candied orange slices at home using fresh oranges. This recipe yields glossy, chewy citrus candy perfect for garnishing cakes, snacking, or giving as homemade gifts.
- Prep Time: 20 min
- Cook Time: 1 hr 15 min
- Total Time: 3 hr 35 min
- Yield: About 2 dozen slices 1x
- Category: Dessert
- Method: Simmering and Drying
- Cuisine: American
- Diet: Vegetarian
Ingredients
- 2 large navel oranges (or best oranges for candying)
- 3 cups granulated sugar, divided
- 2 cups water, divided
- 1/4 cup fresh lemon juice
- Optional: 4 ounces dark chocolate for dipping
- Optional: Flaky sea salt for topping
Instructions
- Prepare the oranges: Wash the oranges well. Slice them thinly, about 1/8 inch thick. Discard the ends.
- Blanch the slices: Place the orange slices in a medium saucepan. Cover them with water (about 2 cups). Bring to a boil, then immediately drain. Repeat this blanching process two more times to reduce bitterness.
- Make the simple syrup: In the same saucepan, combine 2 cups of sugar and 2 cups of water. Bring the mixture to a boil over medium heat, stirring until the sugar dissolves completely.
- Simmer the fruit: Add the blanched orange slices and the lemon juice to the syrup. Reduce the heat to low and simmer gently for about 45 to 60 minutes. The slices should become translucent and tender. Stir occasionally to prevent sticking.
- Cool and soak: Remove the pan from the heat. Let the orange slices soak in the syrup for at least 4 hours, or preferably overnight, to fully absorb the sweetness.
- Dry the slices: Remove the slices from the syrup, letting excess drip off. Place them in a single layer on a wire rack set over a baking sheet.
- Bake to dry: Preheat your oven to the lowest setting (usually 170°F or 75°C). Bake the slices for 1 to 2 hours, flipping them halfway through. You want them to be dry to the touch but still chewy.
- Coat (Optional): If you want chocolate dipped candied orange slices, melt the dark chocolate. Dip half of each dried slice into the chocolate and place them back on the wire rack. Sprinkle with flaky sea salt immediately.
- Finish: Let the slices cool completely until the chocolate sets or the sugar coating dries. Store in an airtight container.
Notes
- For a sugar coating instead of drying plain, toss the warm, drained slices in 1 cup of granulated sugar before the drying step.
- If you are using the leftover syrup, you have a bright citrus recipe base. You can use it as a simple syrup fruit recipe for cocktails or pour it over cakes.
- For the best visual result, look for firm, brightly colored oranges.
Nutrition
- Serving Size: 1 slice
- Calories: 85
- Sugar: 20g
- Sodium: 2mg
- Fat: 0.1g
- Saturated Fat: 0g
- Unsaturated Fat: 0g
- Trans Fat: 0g
- Carbohydrates: 22g
- Fiber: 0.5g
- Protein: 0.2g
- Cholesterol: 0mg