

Some days, you just need a win in the kitchen, right? Between deadlines and trying to remember everything on the grocery list, elaborate baking feels impossible. That’s why I’m so excited to share these cheerio bars with you today. They are the ultimate solution when you need something satisfying *right now*. This recipe embodies the whole mission of Cooking by Felix: creating foolproof, reliable meals and snacks that deliver huge flavor without demanding hours of your time. If you love fuss-free recipes like my easy 3-ingredient fudge, you are going to love these bars. They are genuinely a pantry staple here lately, and I know they are going to save your busy weeknights, too.
- Why These Peanut Butter Cheerio Bars Are Your New Favorite 3 Ingredient Snacks
- Gathering Ingredients for No Bake Cheerio Bars
- Step-by-Step Instructions for Easy Cereal Bars
- Tips for Success Making Cheerio Bars
- Variations: Making Your Cheerio Bars Unique
- Storage and Making Ahead with Cheerio Bars
- Frequently Asked Questions About Cheerio Bars
- Estimated Nutritional Data for Cheerio Bars
- Share Your Homemade Cheerio Bars
Why These Peanut Butter Cheerio Bars Are Your New Favorite 3 Ingredient Snacks
If your goal is speed and simplicity, look no further! These delightful **cheerio bars** are truly one of my favorite 3 ingredient snacks because they require zero oven time. I threw these together last week when I completely forgot I needed snacks for my nephew’s soccer team the next morning—talk about lifesavers! They hit that sweet spot of being sweet, slightly salty, and incredibly satisfying. These are the kind of quick homemade snacks that remind us that eating well doesn’t have to be complicated. You can even check out my guide on easy white chocolate fudge if you love a quick, no-bake success!
Perfect for School Lunch Box Ideas
When packing lunches, you need things that travel well and don’t fall apart halfway through the day. These **cheerio bars** are firm enough to hold their shape perfectly inside a container. They are such a reliable alternative to those overly processed, brightly colored bars you see at the store. My philosophy is that if you can make it in 15 minutes of active time, it should absolutely replace whatever is sitting wrapped in plastic!
Achieving the Perfect Chewy Cereal Squares Texture
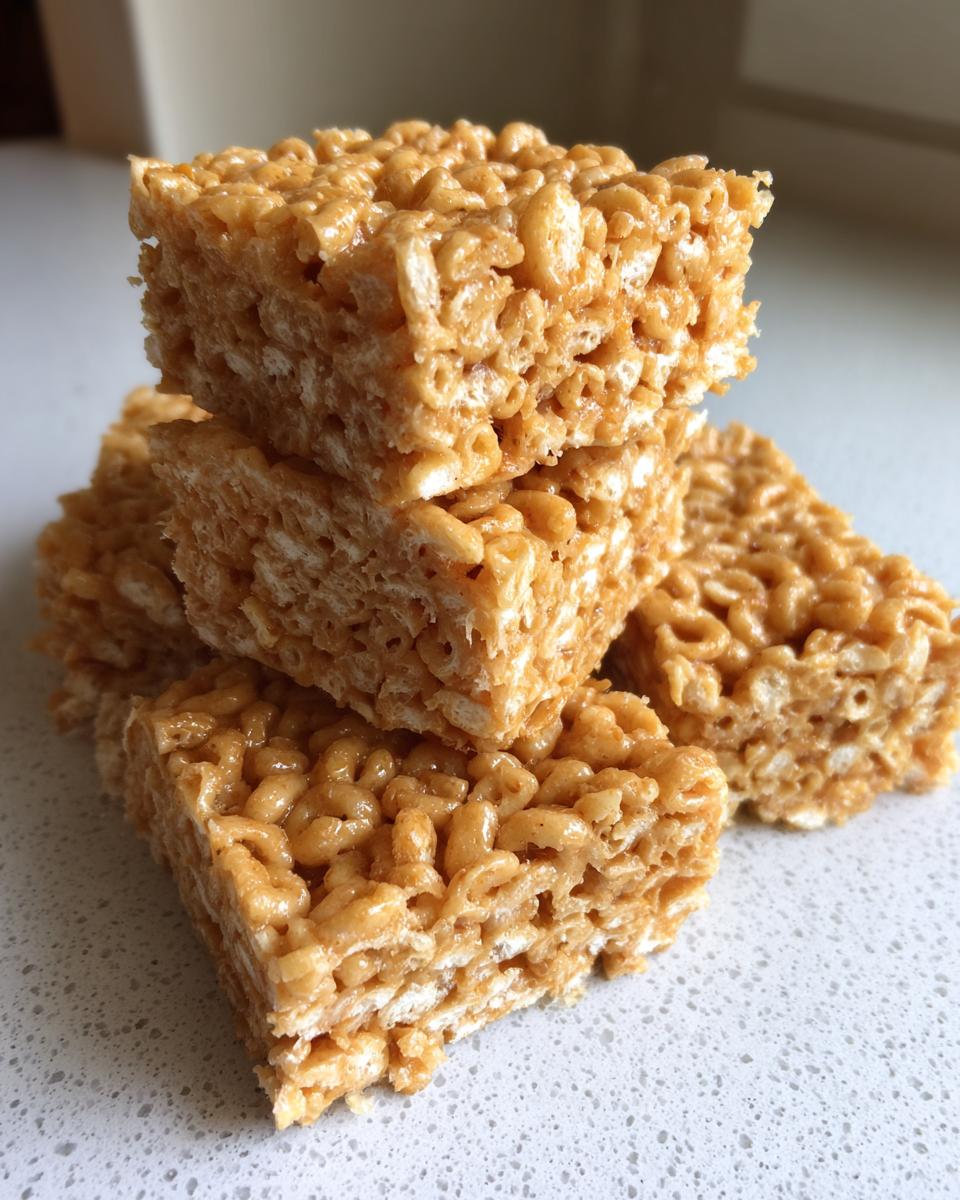
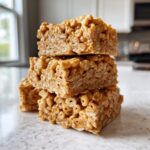
Everyone wants that perfect bite—not cakey, not crumbly—just perfectly chewy cereal squares. The secret to getting the right consistency in these cheerio bars is all in that liquid mix. When you balance the honey and the peanut butter exactly right, they create a slightly sticky, pliable binder that coats every single piece of cereal. It sets up beautifully the moment it hits the fridge, guaranteeing chewiness every time.
Gathering Ingredients for No Bake Cheerio Bars
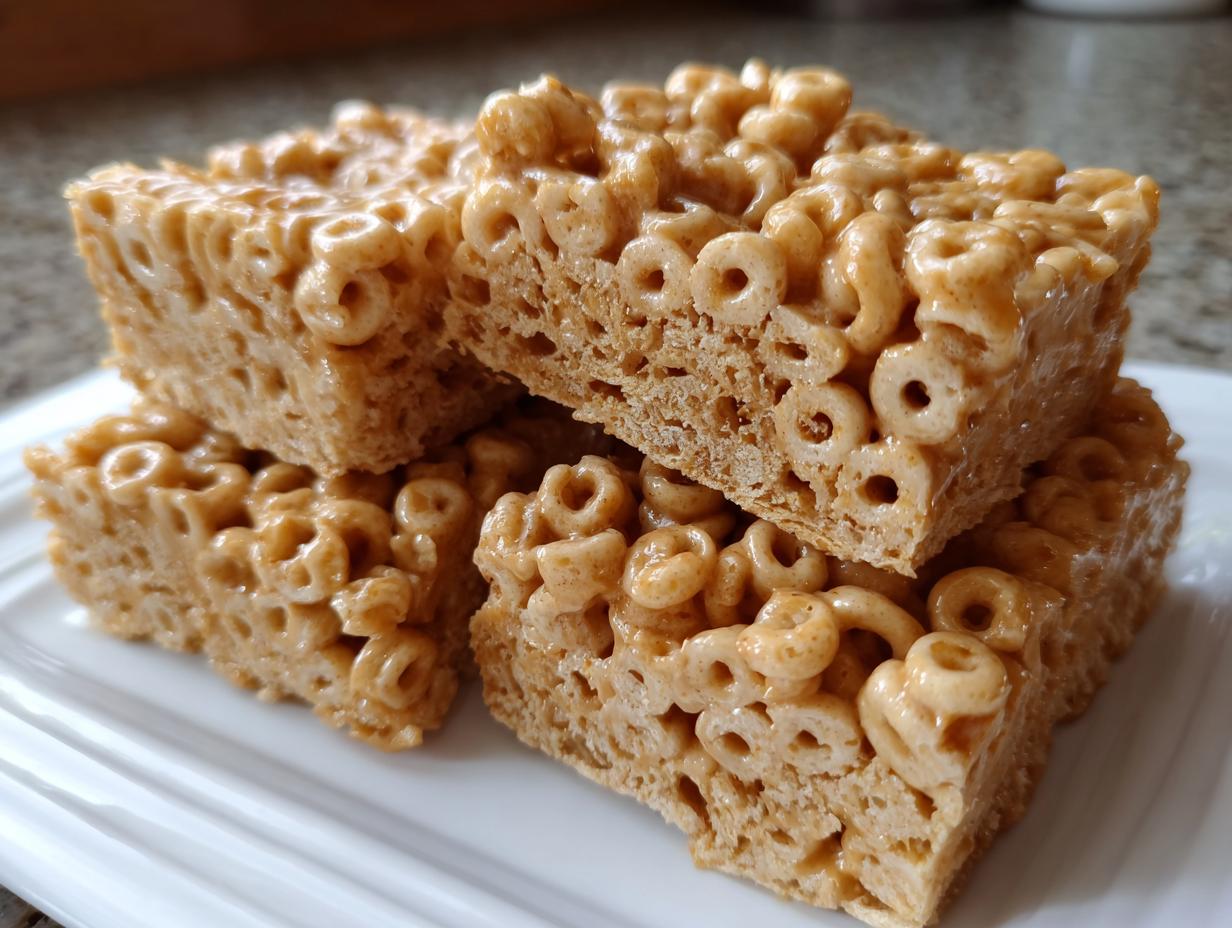
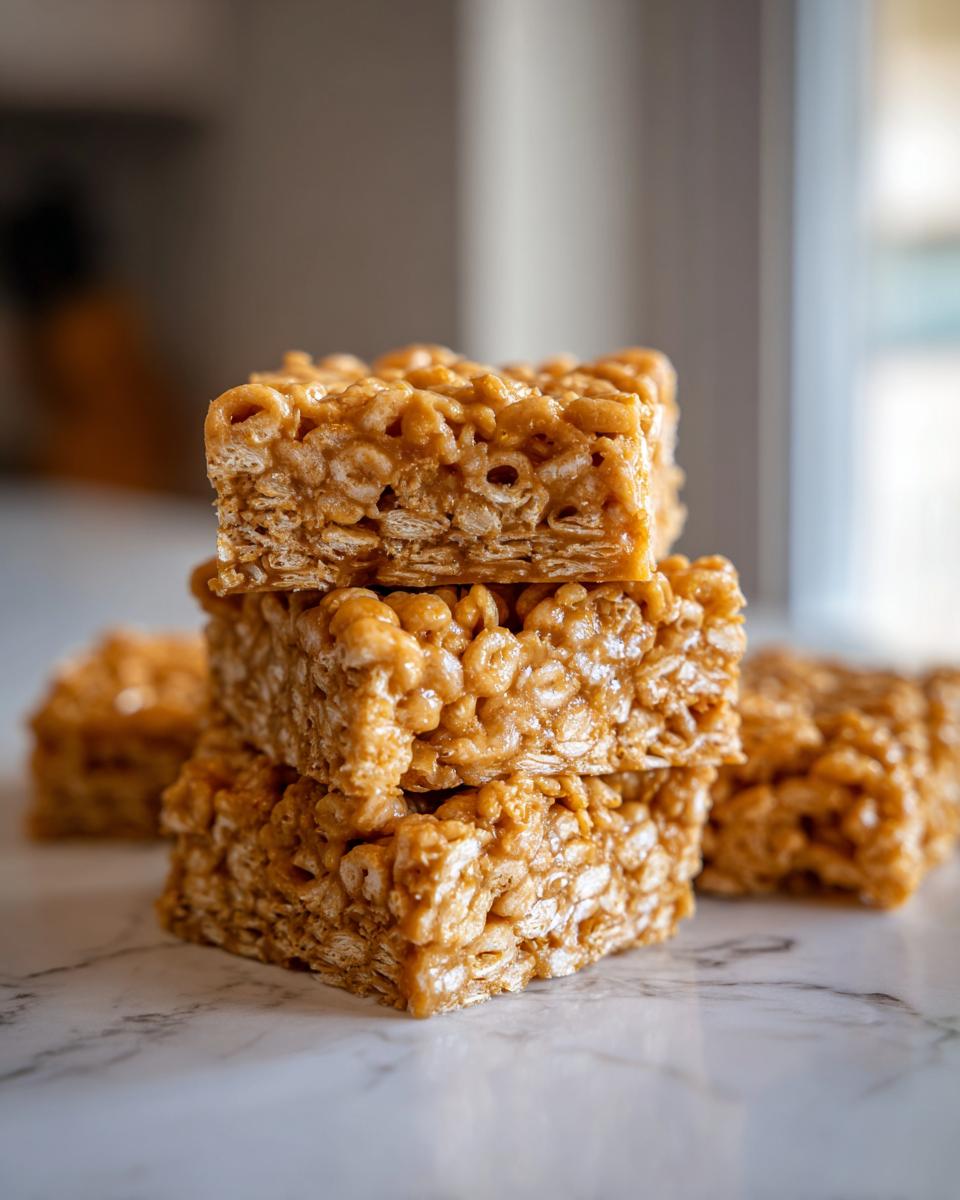
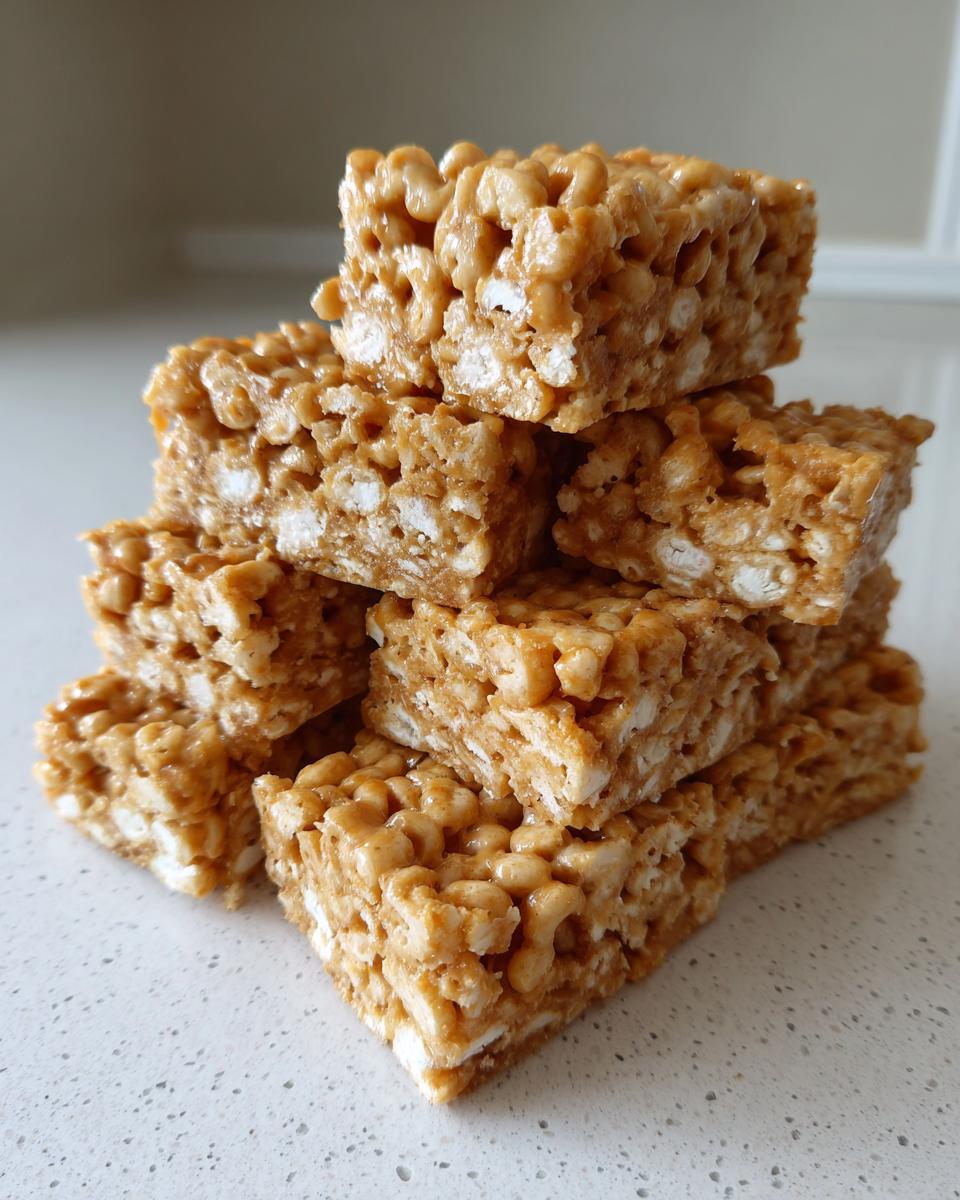
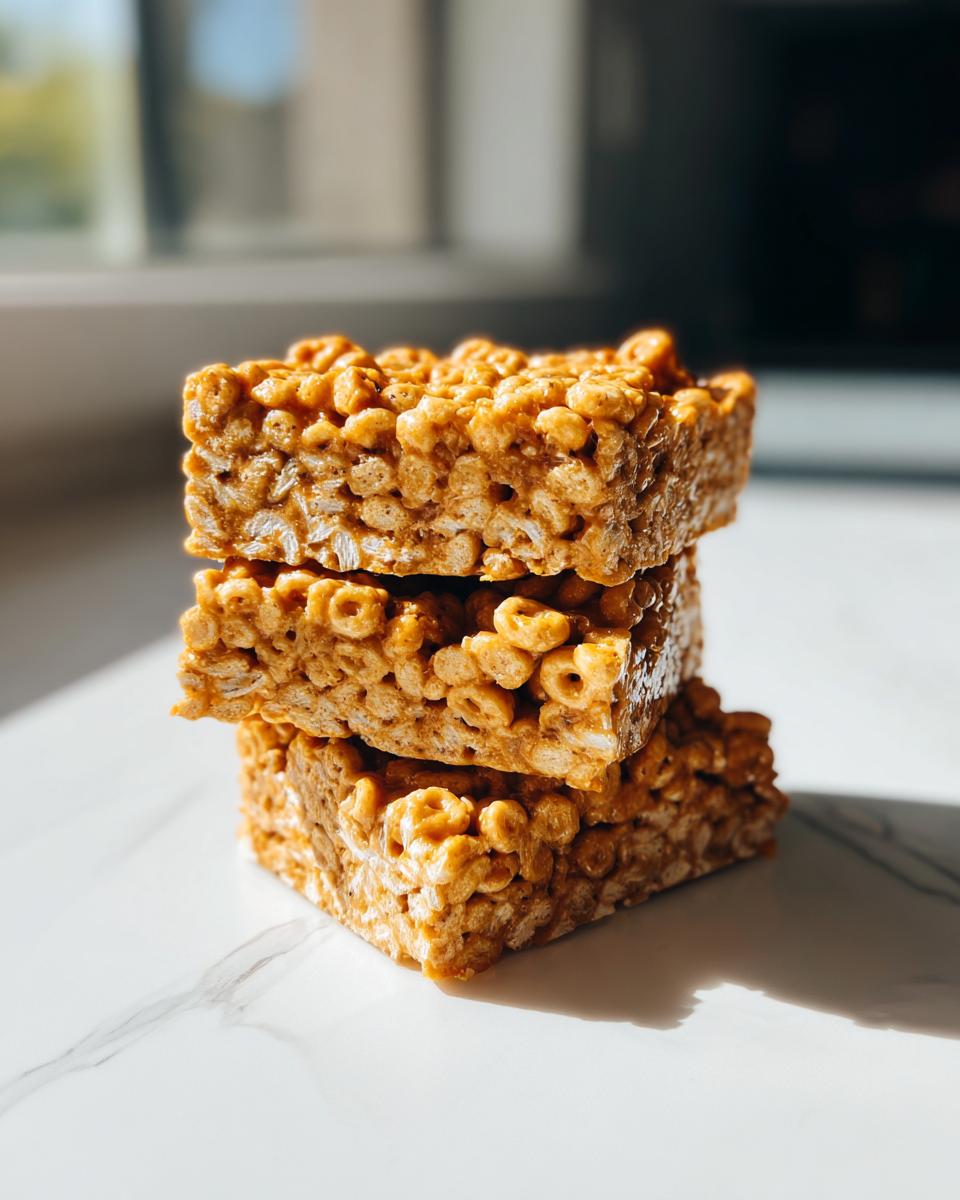
You only need three things for these, which is why I love keeping them stocked in my pantry. First up is the cereal—I highly recommend using Honey Nut Cheerios because that little bit of extra sweetness really helps them shine, but regular Cheerios work just fine in a pinch! Then you need your creamy peanut butter; please make sure it’s smooth, not the natural, runny kind for this recipe, okay? And finally, you need the secret glue: honey. If you’re looking for more ways to utilize what you already have, check out my guide on easy pantry recipes!
Step-by-Step Instructions for Easy Cereal Bars
Okay, let’s get down to business! These **cheerio bars** move fast once you start combining things, so make sure your parchment paper is ready to line that 8×8 pan first. You don’t want to scramble later! Next, get those 6 cups of Cheerios into a big bowl so they are waiting patiently. The active mixing only takes a few minutes once the binder is hot, so efficiency here is key for that perfect texture. If you need a savory distraction while you wait for things to set, check out my recipe for quick, easy homemade BBQ sauce—it’s surprisingly fast!
Melting the Binder for Perfect Cheerio Bars
This is where we build the structure, so pay attention! You’re combining the peanut butter and honey in a saucepan over medium-low heat. I mean low heat, folks. We are just gently persuading them to blend, not creating volcano lava. Stir constantly until it’s smooth and totally combined—don’t let it boil! Boiling changes the sugar structure, and that can make your final bars either way too hard or too crumbly. We need a beautifully smooth, warm liquid to coat everything perfectly.
Pressing and Setting the Peanut Butter Cheerio Treats
As soon as that warm sweet mixture is totally coating the cereal, you need to get it into your prepared pan. Don’t dawdle! Use a spatula or another piece of parchment paper, and press that mixture down firmly and evenly across the entire surface. You want to compact these **peanut butter cheerio treats** nicely so they stick together when you cut them. Then, into the fridge they go! You must give them at least one full hour—I usually leave mine for 90 minutes—to chill and bake these bars solid before you even think about slicing them.
Tips for Success Making Cheerio Bars
These bars are incredibly forgiving, but following a couple of small rules ensures you get that awesome, chewy texture every single time. The absolute biggest mistake people make is not mixing fast enough after the warm binder hits the dry cereal. You have to move quickly! If the mixture cools down before it’s in the pan, it gets stiff, and you end up with crumbly **cheerio bars** that won’t hold together when you press them.
Here’s my little secret, folks: the binding mixture needs to look exactly like thick, pourable caramel when you take it off the heat—smooth, glossy, and easily flowing off your spoon. If it looks patchy or too stiff in the saucepan, give it just thirty more seconds on low heat, stirring nonstop. Just remember, you aren’t aiming for boiling, just smooth melting! For another easy, reliable win, you have to try my best classic creamy egg salad recipe for lunch next week.
Variations: Making Your Cheerio Bars Unique
While these simple three-ingredient **cheerio bars** are perfect on their own, sometimes you just need a little sparkle! It’s so much fun customizing these. If you want to dress them up a bit, try stirring in about half a cup of mini chocolate chips right before you press them into the pan. They melt just enough while they cool to create those lovely, gooey pockets. My favorite upgrade is adding a decadent topping. Once these babies are chilled and firm, melt one cup of chocolate chips with a tablespoon of coconut oil and pour it right over the top for a gorgeous finish. If you haven’t tried my magic cookie bars yet, you’ll love this drizzling technique!
Also, feel free to experiment with the cereal base! If you swap out half the Cheerios for crispy corn flakes or even some oats, you end up with truly unique **cheerio bars**. Just make sure the total volume of dry cereal stays around 6 cups so the binder ratio stays correct. Remember, the goal is always deliciousness served easily!
Storage and Making Ahead with Cheerio Bars
One of the best things about these **cheerio bars** is that they are fantastic meal-prepped snacks. You can totally make a batch on a Sunday afternoon, and they’ll be perfect for grabbing all week long. The key is storage, though! You definitely want to keep them chilled. Pop them into an airtight container, and they stay wonderfully fresh and chewy in the refrigerator for up to a week. Trust me, they disappear fast, making them ideal for busy weekday pacing.
They even travel well if you wrap the individual cut squares tightly in plastic wrap before putting them in the container. It helps them keep that nice, firm texture. If you love planning ahead for treats, you should check out my recipe for easy Filipino cassava cake—another make-ahead winner!
Frequently Asked Questions About Cheerio Bars
I know you might have a few lingering questions before you dive into making these—that’s totally fine! It’s those small tweaks that make the difference between a good snack and a *great* snack. Here are the common things people ask me about these **no bake cheerio bars**.
Q1: Can I use natural peanut butter for these peanut butter cheerio treats?
You certainly can, but it requires a little extra attention! Natural peanut butter, the kind that separates, can sometimes make your binder mixture feel a bit greasy or less cohesive. If you use it, you might need to warm the honey and peanut butter mixture a bit longer on low heat and stir extra thoroughly to make sure it emulsifies properly. It tends to result in slightly less firm **cheerio bars**, but they taste amazing!
Q2: Can I substitute the honey with maple syrup or another sweetener?
Honestly, honey is the best choice here because its specific thickness and sugar content contribute directly to the chewiness. If you swap it for maple syrup, you change the moisture content dramatically, and the bars might not set up correctly to achieve those perfect **chewy cereal squares**. I haven’t tested other substitutes heavily, so if you are trying something new, start small!
Q3: Are these considered toddler approved treats?
Absolutely! These are a huge hit with little ones. Since they are soft and easy to chew, they are fantastic for **toddler approved treats**. Just make sure when you cut them, you slice them into smaller, manageable squares for them. If you want to make them even better for tiny hands, feel free to check out my recipe for the best classic French toast recipe—my kids devour that too!
Q4: Can I use plain Cheerios instead of Honey Nut Cheerios?
Yes, you absolutely can use the plain ones if that’s what you have on hand! These will just not be quite as sweet, which is great if you plan on adding a chocolate topping later. They still have enough structure and flavor to make fantastic **easy cereal bars**. Just be aware they might taste a little less rich than the Honey Nut variety.
Estimated Nutritional Data for Cheerio Bars
I always want to give you a heads-up on what you’re eating, even for quick snacks like these amazing **cheerio bars**! Based on the standard recipe—which usually uses Honey Nut Cheerios, regular creamy peanut butter, and honey—you are looking at about 185 calories per square.
Keep in mind, these numbers are just my best estimate, okay? The exact brand of peanut butter or whether you use natural or processed ingredients will change things slightly. For example, switching to almond butter or a low-sugar honey will definitely shift the fat and sugar counts. But generally, you’re looking at decent protein, lots of carbs for energy, and about 9g of fat for that satisfying chew.
- Serving Size: 1 bar
- Calories: 185
- Fat: 9g
- Carbohydrates: 24g
- Protein: 5g
If you want to see how this fits into a larger meal plan, check out my notes on making a moist, easy one-bowl chocolate cake—sometimes you need a proper dessert after all that healthy snacking!
Share Your Homemade Cheerio Bars
That’s it—you’ve made it! Now you have a fresh batch of the easiest, chewiest **cheerio bars** you’ll ever need. I really hope these become a staple in your busy week just like they are in mine. In the spirit of the Cooking by Felix philosophy, cooking should always be about sharing and connecting, so I absolutely want to hear what you think!
Once you’ve let these set up and cut them into squares, please come back here and leave a star rating so others know how reliable this recipe is. And if you’re sharing your amazing creations on Instagram or Facebook, tag me! Seeing your photos of these sweet cereal snacks connecting you and your family brings me so much happiness, it really proves that we can reclaim joy in the kitchen, even on the busiest days. If you’re looking for another truly special treat that’s great for sharing, you have to try my cannoli cookies next!
PrintEasy No-Bake Peanut Butter Cheerio Bars
Make these simple, no-bake Cheerio bars using just three pantry staples. They are chewy, satisfying, and perfect for quick snacks or lunch box treats.
- Prep Time: 10 min
- Cook Time: 0 min
- Total Time: 70 min
- Yield: 16 squares 1x
- Category: Snack
- Method: No-Bake
- Cuisine: American
- Diet: Vegetarian
Ingredients
- 6 cups Cheerios cereal (Honey Nut recommended)
- 1 cup creamy peanut butter
- 1 cup honey
Instructions
- Line an 8×8 inch baking pan with parchment paper, leaving an overhang for easy removal.
- Measure the Cheerios into a large bowl.
- In a small saucepan over medium-low heat, combine the peanut butter and honey. Stir constantly until the mixture is smooth and fully melted together. Do not let it boil.
- Pour the warm peanut butter and honey mixture over the Cheerios in the bowl.
- Use a rubber spatula to mix everything together until the cereal is completely coated. Work quickly before the mixture cools and stiffens.
- Transfer the mixture to the prepared baking pan. Press the mixture down firmly and evenly into the pan using the back of the spatula or another piece of parchment paper.
- Refrigerate the bars for at least 1 hour, or until completely set.
- Lift the bars out of the pan using the parchment paper overhang. Cut into squares or rectangles for serving.
Notes
- For a richer flavor, you can use natural peanut butter, but you may need to warm the mixture slightly longer to ensure it combines well.
- If you want a chocolate topping, melt 1 cup of chocolate chips with 1 tablespoon of coconut oil and spread over the chilled bars before cutting.
- These are excellent for school lunch box ideas because they hold their shape well.
Nutrition
- Serving Size: 1 bar
- Calories: 185
- Sugar: 10g
- Sodium: 75mg
- Fat: 9g
- Saturated Fat: 1.5g
- Unsaturated Fat: 7.5g
- Trans Fat: 0g
- Carbohydrates: 24g
- Fiber: 2g
- Protein: 5g
- Cholesterol: 0mg