

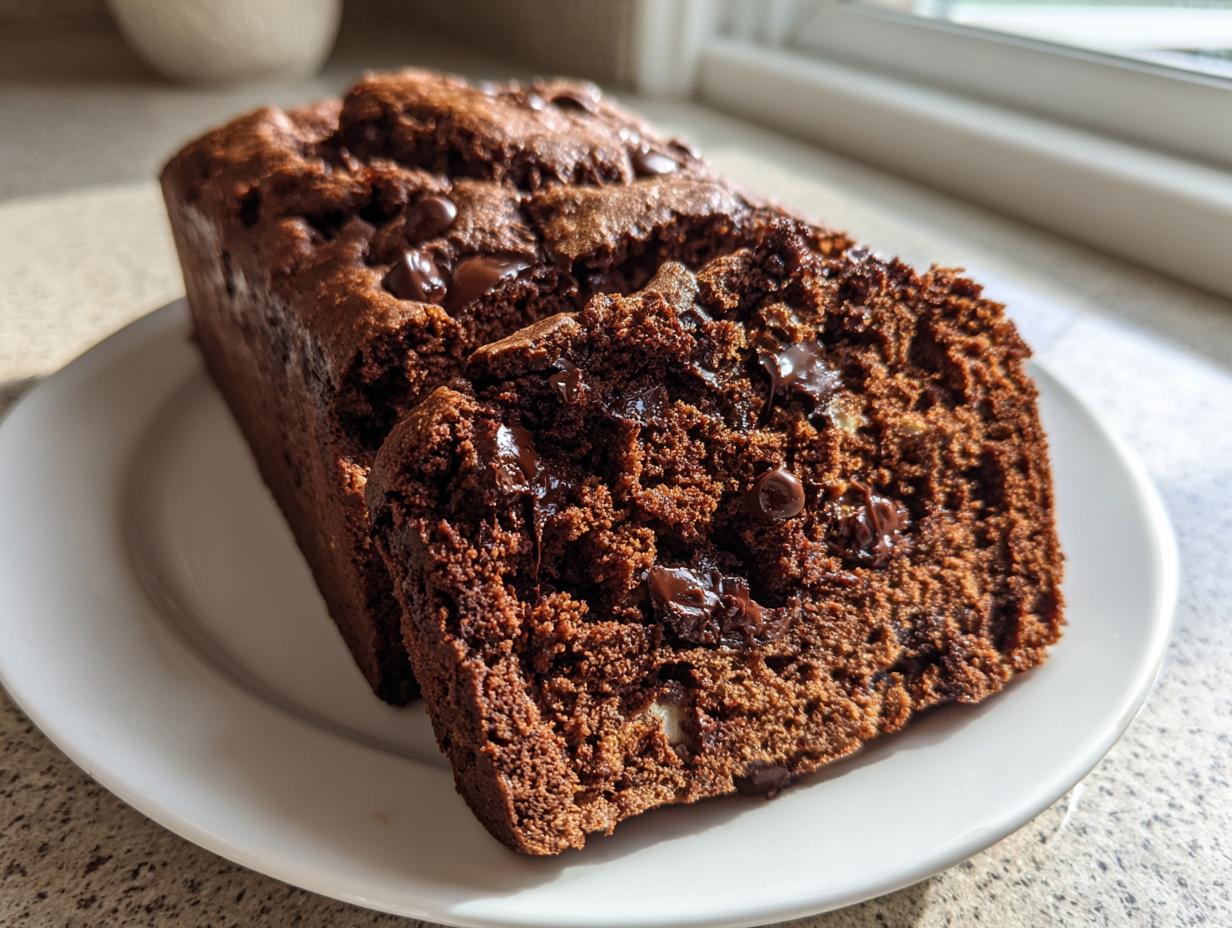
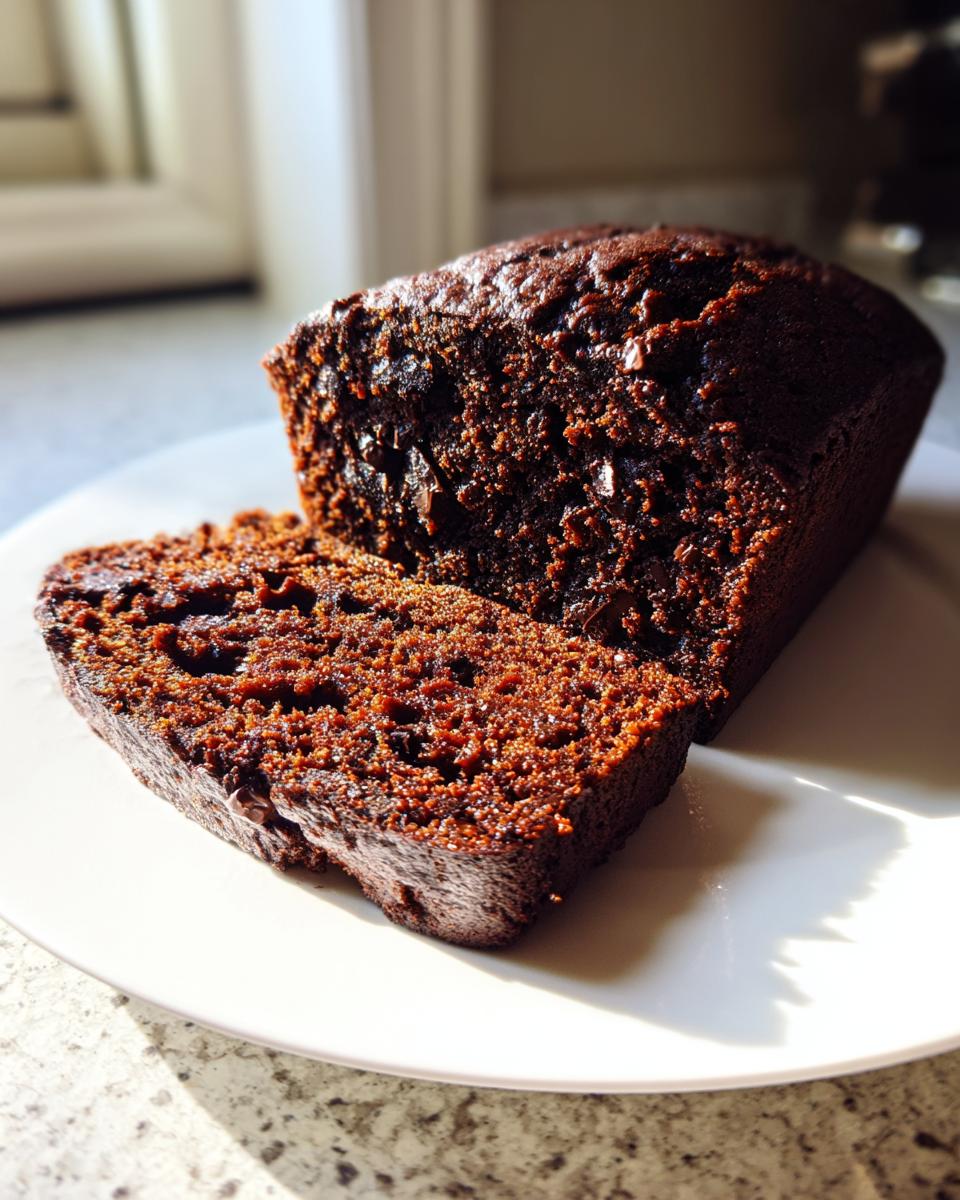
Raise your hand if you’ve ever looked forward to a slice of rich, homemade chocolate bread, only to find it dry and crumbly after one day? Me too! That was me five nights a week when I was juggling a chaotic marketing career. That’s why I spent so much time perfecting this Ultra-Moist, Easy One-Bowl Chocolate Bread. I needed that deep, decadent chocolate flavor without spending an hour kneading dough or waiting around for things to rise. This recipe, built on my mother’s baking wisdom, is my promise to you: you can have incredible, velvety chocolate bread any night of the week. Felix truly believes the best flavors shouldn’t require the most time.
We’re ditching the mixer for one trusty bowl, and I’ll show you exactly how the simple ingredients interact to create a loaf that stays ridiculously moist. Trust me, you’re going to want to save this chocolate cake adjacent recipe for later!
- Why This Ultra-Moist Chocolate Bread Recipe Works (The Secret to Velvety Texture)
- Gathering Ingredients for Your Perfect Chocolate Bread
- Step-by-Step Instructions: Making Your Easy Chocolate Bread
- Tips for Success: Mastering the Simple Chocolate Loaf Cake
- Serving Suggestions for Your Chocolate Bread
- Storage and Reheating Instructions for Homemade Chocolate Loaf Cake
- Frequently Asked Questions About This Chocolate Bread Recipe
- Understanding the Nutrition in Your Chocolate Bread
- Share Your Decadent Chocolate Loaf Experience
Why This Ultra-Moist Chocolate Bread Recipe Works (The Secret to Velvety Texture)
So, what’s the real trick to this unbelievably Moist Chocolate Bread? It’s all about the physics of the wet ingredients, honestly! We’re using oil instead of solid butter, which keeps things soft even when cold. Then we hit it with buttermilk for tenderness, followed by that crucial half-cup of hot liquid—whether it’s water or coffee. That hot stuff blooms the cocoa powder, making the flavor explode and creating that Velvety Chocolate Loaf texture we crave. If you want a deeper flavor, use hot coffee; it really pulls the chocolate notes forward. Don’t worry about the ingredients being completely room temperature here; it just doesn’t matter as much in a quick bread like this!
Key Benefits of This Easy Chocolate Bread
- It’s genuinely a One Bowl Chocolate Bread—minimal dishes, maximum flavor!
- It’s lightning fast—this falls right into the best Quick Bread Recipes category.
- The texture is unbelievably fudgy, leaning toward a luxurious chocolate loaf cake.
- It uses simple pantry staples, meaning you can make it whenever that craving hits!
Gathering Ingredients for Your Perfect Chocolate Bread
Okay, gathering the supplies for this Chocolate Bread Recipe is thankfully straightforward since we aren’t messing with yeast or proofing times! Everything goes into one bowl, so you don’t need specialized equipment—just measuring cups and a good whisk. I try to have everything ready before I start mixing, which is my number one rule for keeping any quick Chocolate Dessert Bread from overmixing. Remember, we are aiming for velvety, not tough!
Here’s what you’ll need waiting for you:
- 1 3/4 cups all-purpose flour
- 3/4 cup unsweetened cocoa powder
- 1 1/2 teaspoons baking soda
- 1/2 teaspoon baking powder
- 1/2 teaspoon salt
- 1 1/2 cups granulated sugar
- 1/2 cup vegetable oil
- 2 large eggs
- 1 teaspoon vanilla extract
- 1 cup buttermilk (trust me on this for moisture!)
- 1/2 cup hot water or hot brewed coffee
- 1 cup semi-sweet chocolate chips (These are totally optional, but seriously, why skip them? You can find more fun ideas for using up melted chocolate in my easy 3-ingredient fudge guide.)
Ingredient Notes and Substitutions for Rich Cocoa Bread
I often get asked about buttermilk. If you don’t have buttermilk hanging around, don’t stress! It’s super easy to DIY. Just take one cup of regular milk—whole milk works best for richness, by the way—and stir in one teaspoon of white vinegar or lemon juice. Let it sit for about five minutes until it looks a little curdled. That’s your buttermilk!
Now, that hot liquid is non-negotiable for that deep chocolate flavor. While hot water dissolves the cocoa and sugar perfectly, using hot brewed coffee instead makes the chocolate taste… well, more chocolatey! You won’t taste the coffee, I promise. It just acts like a secret flavor booster for your Rich Cocoa Bread. Use whatever you have, but if you can manage the coffee, do it!
Step-by-Step Instructions: Making Your Easy Chocolate Bread
This is where the magic of the one-bowl method really shines! First thing’s first, make sure your oven is preheated to 350°F (175°C). Grab that 9×5 inch loaf pan and get it greased and floured up good—we want a clean release later for our beautiful chocolate bread.
Start by dumping all your dry stuff into the biggest bowl you have. That means the flour, cocoa powder, baking soda, baking powder, and salt. Give it a good whisk until everything looks uniform. Next, throw in all that sugar and whisk again until it’s fully mixed into the powders. It’s so satisfying when the dry ingredients are perfect.
Now, we add the liquid stuff right on top! Pour in the vegetable oil, your eggs, that little shot of vanilla, and the buttermilk. Mix this with a spatula or a whisk until you just barely see everything combine. Seriously, stop mixing the second you don’t see a giant streak of flour anymore. If you overwork it, you end up with a gummy loaf, and we are aiming for that perfect fudgy texture. Then, carefully pour in your hot water or coffee and mix *gently* until the batter is smooth. I know it seems weird, but this batter will be wonderfully thin, almost like a thick soup. If you’re adding chocolate chips, fold those in right here.
Pour that thin batter into your prepped pan and slide it into the oven. See? No kneading required!
Achieving Perfect Bake Time for Fudgy Chocolate Loaf
Baking is where a little patience pays off to keep this a truly Moist Chocolate Bread. You’re looking at 50 to 60 minutes in that 350-degree heat. Forget trying to eyeball it; you need to test it! Slide a wooden skewer right into the center of your Fudgy Chocolate Loaf. We are not looking for it to come out bone dry, oh no. We want moist crumbs clinging to that skewer. If it’s wet batter, give it five more minutes and test again. Overbaking is the ultimate enemy of a great chocolate loaf!
Once you hit that sweet spot, pull it out immediately. Let it sit in the pan for a good 15 minutes—this lets it firm up a bit before the big flip. Then, invert it onto a wire rack to cool completely, or at least long enough that you can stand slicing into it without it falling apart.
Tips for Success: Mastering the Simple Chocolate Loaf Cake
Since this is one of my favorite Quick Bread Recipes to whip up when I’m suddenly desperate for something rich, I’ve learned a few little tricks to make sure it always comes out perfect, even when I’m half-asleep. The biggest thing to remember, which I mentioned when mixing, is to stop as soon as the flour streaks disappear. Seriously, if you keep mixing, you are developing gluten, and that turns our lovely, soft Homemade Chocolate Loaf Cake into something closer to a stale brownie.
When you think you’ve mixed enough, mix exactly three more times with your spatula, and then stop. Give it a quick scrape down the sides of the bowl, and that’s it. Patience in mixing is your greatest tool for that Best Chocolate Bread texture.
Now for taking this loaf into full “dessert territory,” which is where it really shines! If you want that intensely Fudgy Chocolate Loaf result—almost like a brownie bread recipe—you need to think about a swirl. You can take about a quarter cup of the prepared batter and mix in a spoonful of melted chocolate or even a dollop of Nutella right in a separate small bowl. Swirl that concentrated, fudgy mix on top of the main batter in the pan before it goes into the oven. It sinks down just the right amount as it bakes, giving you those incredible, gooey ribbons when you slice into it warm.
Also, if you are baking this on a particularly humid day, sometimes the baking time shifts slightly, so always trust your skewer test over holding strictly to 60 minutes. We are looking for that slightly sticky, moist crumb cling, not a dry stick!
Serving Suggestions for Your Chocolate Bread
Honestly, this chocolate bread is one of those rare recipes that works perfectly, no matter when you serve it. It’s rich enough to be a decadent end to a heavy meal, yet simple enough to be your go-to slice next to your morning coffee. I love that it spans the gap between dessert and breakfast so easily!
You don’t need much fuss to dress this up. If you’re serving it warm, a light dusting of powdered sugar is my first choice—it gives it that classy, bakery-style look without adding unnecessary extra sweetness. It just lets the deep cocoa flavor shine through.
But if you’re truly feeling indulgent, or if you’ve made this loaf for a weekend treat, go ahead and treat it like cake! A scoop of vanilla bean ice cream on a warm slice of this Chocolate Dessert Bread is just heaven. The contrast between the warm, fudgy bread and the cold, creamy vanilla is just divine. Or, if you want something slightly lighter, a thin smear of salted butter brings out the richness of the chocolate even more—it’s fantastic for a special Breakfast Chocolate Loaf.
If you’re looking for more easy breakfast ideas that require zero yeast, you definitely need to check out my recipe for classic French toast. It’s another one that comes together super fast!
Storage and Reheating Instructions for Homemade Chocolate Loaf Cake
The great news about this Homemade Chocolate Loaf Cake is that, thanks to all that oil and buttermilk, it manages to stay incredibly moist for days. This is definitely not a bread you have to eat all in one sitting, though I certainly wouldn’t blame you if you tried!
If you find yourself with leftovers—which usually means you resisted slicing into it for more than 24 hours—storage is super simple. Just like my notes mentioned, you want to wrap it tightly. I usually use two layers: first, a sheet of plastic wrap pressed directly onto the cut side if there is one, and then I wrap the whole loaf snugly in aluminum foil or pop it into an airtight container. Keep it right on the counter at room temperature. Seriously, reheating is often preferred, so don’t worry about the fridge—that actually dries out quick breads faster!
If you decide you need a serious moment of chocolate indulgence later in the week, reheating is key to bringing back that fresh-from-the-oven tenderness. You have two great options for enjoying your leftover chocolate bread.
For a single slice, I like to wrap it loosely in a paper towel and microwave it for about 15 to 20 seconds. It gets warm, soft, and seems to melt the chocolate chips right back into the crumb. If you’re feeling fancy, you can spread a little bit of my easy white chocolate fudge on top right after warming it up!
If you have a few slices to revive, pop them into a toaster oven set to a low temperature—maybe 300°F—for just three or four minutes. This gives it a tiny bit of crust back while warming the inside gently. It tastes almost exactly like you just pulled it out of the oven, trust me on this!
Frequently Asked Questions About This Chocolate Bread Recipe
I always get so many questions rolling in once people see how easy this loaf is! It’s amazing how versatile a good quick bread can be. Here are a few things I hear most often when folks are planning to bake this chocolate bread for the first time.
Can I use regular milk instead of buttermilk?
Yes, you absolutely can, but you have to do the little trick I mentioned earlier! Buttermilk is slightly acidic, and that acidity reacts with the baking soda to give you lift and keep things tender. If you only have regular milk, just stir one teaspoon of white vinegar or lemon juice into one cup of milk and let it sit for five minutes before using it. Voila! You’ve got your tenderizer for this easy chocolate bread recipe. Whole milk gives the best fat content, but 2% works fine too.
Can this recipe be adapted for muffins or cupcakes?
Oh, I love that idea! Turning this into a chocolate dessert bread muffin is a fantastic way to control portions. You’ll want to line your muffin tins really well, or use liners, because chocolate batter can sometimes stick. Since muffins and cupcakes bake faster than a full loaf, start checking them around the 18 to 22-minute mark at 350°F. You’re still looking for those moist crumbs on a tester, not a clean, dry one, because we want that signature velvety interior!
How do I get that deep, shiny top like some commercial loaves?
That shiny, sometimes almost crackled look usually comes from high sugar and fat content combined with steam during the initial bake. For this simple chocolate loaf cake, you can encourage a bit of shine by either sprinkling the top lightly with granulated sugar right before it goes in the oven, or by brushing the very top of the loaf with a tiny bit of melted butter right after it comes out of the oven (before it cools). That little bit of extra fat melts right in and gives you a lovely sheen.
Does this work if I skip the hot water/coffee?
If you skipped the hot liquid, you would absolutely still get a loaf of chocolate bread, but it wouldn’t be *this* loaf. The hot liquid is what blooms the cocoa powder—think about dissolving cocoa in cold water versus hot cocoa mix; it’s totally different! Skipping it results in a much flatter flavor and a slightly denser crumb because you haven’t activated the full potential of the cocoa. For the Best Chocolate Bread experience, please don’t skip that hot step!
If you’ve baked this and have other questions, or want to share how you used those chocolate chips, drop a comment below! I love seeing how everyone adapts my recipes, and you can see other kitchen experiments over at my Filipino cassava cake guide.
Understanding the Nutrition in Your Chocolate Bread
Now, before you dive headfirst into that second slice of chocolate bread—and I know you’ll be tempted!—I always like to give a quick overview of the nutrition involved. Remember, this is meant to be a treat, a wonderful, rich, cocoa-filled loaf for when you need a true moment of comfort. It’s a dessert that happens to look like bread, after all!
I’ve crunched the numbers based on the ingredients listed (assuming the optional chocolate chips are included) to give you a general idea of what’s in a single serving. But here’s my honest disclaimer, which is super important for trust: these figures are just estimates! Things like the exact brand of cocoa powder or the type of oil you use can change the final count slightly. Think of this as a good guide, not a medical guarantee.
Here are the estimated numbers for one generous slice of this Moist Chocolate Bread:
- Serving Size: 1 slice
- Calories: 350
- Total Fat: 18g
- Saturated Fat: 4g
- Carbohydrates: 45g
- Sugar: 35g
- Protein: 5g
- Cholesterol: 45mg
- Sodium: 250mg
See that sugar count? That’s why this tastes so decadent! It’s rich, it’s satisfying, and when you make it yourself with quality cocoa, you know exactly what went into it, which I think is the best part of Baking with Chocolate at home. Enjoy it responsibly, or don’t—I’m not your mom!
Share Your Decadent Chocolate Loaf Experience
Whew! Now that you’ve baked, sliced, and hopefully enjoyed this incredibly simple and moist chocolate bread, I absolutely want to hear about it! Seeing your results is genuinely the best part of sharing these recipes. Did you manage to resist eating the whole loaf in one sitting? Was the coffee trick as amazing as I promised?
Don’t be shy! If you made this loaf, please take a moment to rate the recipe right below this section. Stars help other busy home cooks find the path to quick, delicious baking triumphs. Whether you followed my recipe exactly or you added your own twist—maybe a little sea salt sprinkled on top?
I’m always eager to see how my readers make the recipes their own. If you snap a picture of your perfect Chocolate Loaf Cake slice, tag me on social media! Seeing your beautiful, fudgy creations makes my day. I love gathering all these kitchen success stories together. You can also swing by and check out my guide for easy, creamy homemade chocolate pudding if you need another quick chocolate fix.
If you have any lingering questions about the process—like why our batter is so thin, or how you achieved that perfect, rich flavor—drop a comment down below! I read every single one, and nothing makes me happier than helping someone conquer a recipe for the first time.
PrintUltra-Moist, Easy One-Bowl Chocolate Bread
Make this ultra-moist chocolate bread in one bowl for a simple, rich, and velvety loaf perfect for breakfast or dessert.
- Prep Time: 10 min
- Cook Time: 60 min
- Total Time: 70 min
- Yield: 1 loaf (8 servings) 1x
- Category: Dessert
- Method: Baking
- Cuisine: American
- Diet: Vegetarian
Ingredients
- 1 3/4 cups all-purpose flour
- 3/4 cup unsweetened cocoa powder
- 1 1/2 teaspoons baking soda
- 1/2 teaspoon baking powder
- 1/2 teaspoon salt
- 1 1/2 cups granulated sugar
- 1/2 cup vegetable oil
- 2 large eggs
- 1 teaspoon vanilla extract
- 1 cup buttermilk (or milk mixed with 1 teaspoon vinegar)
- 1/2 cup hot water or hot brewed coffee
- 1 cup semi-sweet chocolate chips (optional)
Instructions
- Preheat your oven to 350°F (175°C). Grease and flour a standard 9×5 inch loaf pan.
- In a large bowl, whisk together the flour, cocoa powder, baking soda, baking powder, and salt.
- Add the granulated sugar to the dry ingredients and whisk to combine well.
- Add the vegetable oil, eggs, vanilla extract, and buttermilk to the dry mixture. Mix with a whisk or spatula until just combined. Do not overmix.
- Carefully pour the hot water or coffee into the batter and mix gently until the batter is smooth. The batter will be thin.
- If using, fold in the chocolate chips.
- Pour the batter into the prepared loaf pan.
- Bake for 50 to 60 minutes, or until a wooden skewer inserted into the center comes out with moist crumbs attached.
- Let the bread cool in the pan for 15 minutes before turning it out onto a wire rack to cool completely.
Notes
- Using hot coffee instead of hot water deepens the chocolate flavor without making the bread taste like coffee.
- For an extra fudgy texture, you can add a swirl of melted chocolate or Nutella before baking.
- This quick bread stays moist for several days when stored tightly wrapped at room temperature.
Nutrition
- Serving Size: 1 slice
- Calories: 350
- Sugar: 35
- Sodium: 250
- Fat: 18
- Saturated Fat: 4
- Unsaturated Fat: 14
- Trans Fat: 0
- Carbohydrates: 45
- Fiber: 3
- Protein: 5
- Cholesterol: 45