

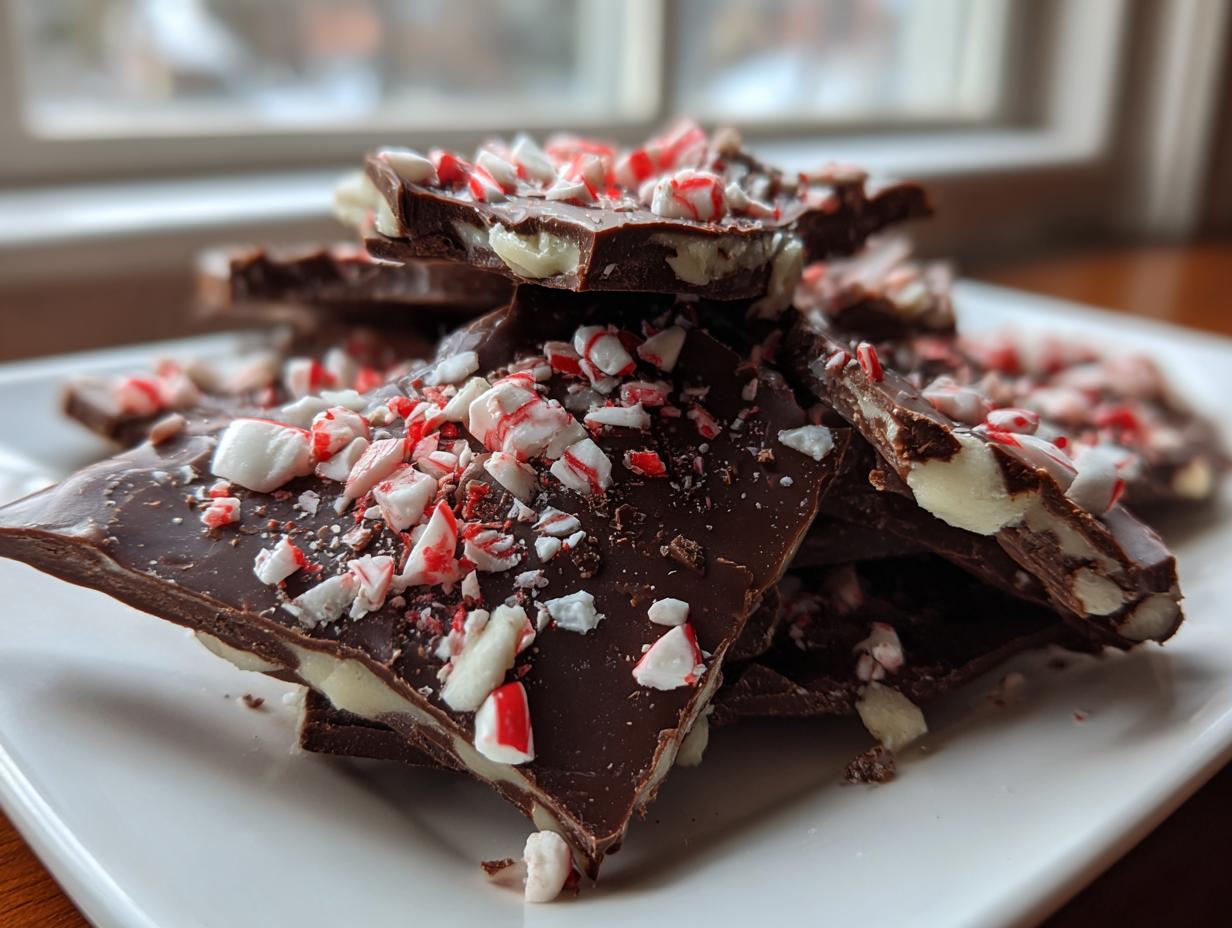
The holidays are magical, aren’t they? But let’s be honest, sometimes the magic gets lost in the rush! When you’re juggling work deadlines and family events, the last thing you need is an intense, multi-day baking project. That’s why I created this absolute lifesaver: the Easy 4-Ingredient No-Bake Classic Peppermint Bark. It delivers that incredible festive crunch and cool mint flavor we all crave, and it’s ready before you can even decide what to watch on TV tonight. This recipe proves that exceptional holiday treats don’t need hours of effort. Seriously, this is the easiest and most satisfying peppermint bark you will ever make. If you love super quick sweets, you should check out my 5-minute Oreo fudge too! Get ready to fill your house with that wonderful Christmas aroma!
- Why This Easy Peppermint Bark Recipe is Your Holiday Essential
- Gathering Ingredients for Classic Peppermint Bark
- Step-by-Step Instructions for Perfect Peppermint Bark
- Tips for Success When Making Homemade Christmas Sweets
- Storage and Reheating Instructions for Your Festive Holiday Bark
- Variations on the Classic Peppermint Bark Recipe
- Frequently Asked Questions About This Easy Christmas Candy
- Nutritional Estimate for Peppermint Bark
- Share Your Festive Holiday Bark Creations
Why This Easy Peppermint Bark Recipe is Your Holiday Essential
When the holidays hit, my calendar looks like a game of Tetris gone terribly wrong. That’s why I’m obsessed with this recipe; it solves the major holiday problem: How do I make something spectacular without spending all day chilling in the kitchen? This chocolate peppermint bark is truly my secret weapon for busy December weekends. It’s simple, it’s fast, and it looks way fancier than the effort required.
- It literally only uses four ingredients—that’s all you need!
- It’s 100% no-bake, meaning zero oven time needed.
- The results are beautiful for sharing or gifting. Trust me, everyone will think you spent hours on this festive treat.
If you need another quick-fix sweet that delivers huge flavor payoff, you have to try my Saltine Cracker Toffee recipe. It’s in the same family of delicious, fast holiday wins!
Speed and Simplicity: Making Peppermint Bark in Minutes
You read that right—the active prep time is just 15 minutes, and the actual cooking time is less than five! Because this is one of those fantastic No Bake Holiday Treats, the oven is completely off-limits. We are relying on the fridge to do the heavy lifting here. You melt, you pour, you sprinkle, and done! You’ll be amazed how quickly this classic peppermint bark comes together when you need a last-minute platter filler.
Perfect for Holiday Gifting Treats
Presentation matters, especially during the holidays, and this bark breaks into gorgeous, rustic chunks. It ships surprisingly well if you wrap the pieces tightly in cellophane bags and tie them with a ribbon. It’s the perfect, personal touch for neighbor gifts or when you need something special to drop off with a friend. It looks impressive, but only you will know how incredibly easy it was!
Gathering Ingredients for Classic Peppermint Bark
To make this simple, amazing peppermint bark, you don’t need a long grocery list. That’s the beauty of it! We are sticking to the fundamentals: two types of chocolate, fresh mint flavor, and those essential crunchy candy canes. You need 12 ounces of dark chocolate plus 12 ounces of white chocolate, all chopped up. Then, grab one teaspoon of peppermint extract and about one cup of candy canes that have already been crushed up. That’s our four ingredients right there!
Ingredient Notes and Substitutions for Your Peppermint Bark
Now, a little tip from my marketing days—sometimes the quality of the base ingredient makes all the difference, even when keeping it simple. If you want a really smooth, almost professional-looking bark that sets up beautifully, look for high-quality melting wafers. They are designed to melt perfectly and avoid grabbing any moisture. If you just can’t find the right dark chocolate or have some on hand, you can swap the dark chocolate layer out for milk chocolate. It makes the overall treat sweeter, but it’s a perfectly fine variation for your Homemade Christmas Sweets.
Step-by-Step Instructions for Perfect Peppermint Bark
Okay, time to get messy! Since this is a no-bake holiday treat, the instructions are super straightforward, but technique matters when you’re dealing with melting chocolate. You basically melt, pour, chill, melt, pour, sprinkle, and chill again. It’s so satisfying watching those layers set! Just remember, we are making those beautiful, crisp layers that define great peppermint bark, so pay attention to that chilling time. This recipe flows so easily; you can even check out my take on quick pineapple fried rice while the first layer is setting!
Melting the Dark Chocolate Base Layer
First things first, grab an 8×8 inch pan and line it completely with parchment paper. Make sure you leave some paper hanging over the sides—that’s your handle later! Chop up your dark chocolate and pop it into a microwave-safe bowl. The key here is patience. You can’t rush chocolate! Pop it in for 30-second bursts, stirring really well in between each time. If you stop stirring when it still looks a little bit chunky, residual heat will bring it the rest of the way smooth without scorching it. Once it’s totally shiny and velvety, pour it into your lined pan. Use an offset spatula to spread it into one nice, even layer across the bottom. Now, before we move on, pop that pan into the freezer for about five minutes. We need that dark layer firm before we pour the next one on top.
Creating the White Chocolate Peppermint Bark Topping
While the base is chilling, melt your white chocolate using the exact same 30-second interval technique. Once it’s perfectly smooth, take the dark chocolate layer out of the freezer. This next step is crucial: stir the peppermint extract right into the melted white chocolate. You need to mix it in fast! Then, immediately pour that minty goodness right over the firm dark layer. Spread it gently to cover everything evenly. This part happens fast, so be ready! Immediately sprinkle all those crushed candy canes over the wet white chocolate. Use your hands or the back of a spoon to gently press those little pieces down so they stick onto the top, otherwise, they just roll off. Now, back into the fridge it goes for at least an hour until it’s completely solid. If you want more inspiration on tasty creations, check out this chocolate peppermint bark recipe!
Tips for Success When Making Homemade Christmas Sweets
Even with only four ingredients, melting chocolate can sometimes feel like walking a tightrope, right? I’ve learned a few tricks over the years to make sure this peppermint bark comes out picture-perfect and avoids that crumbly, seized texture. Achieving that beautiful, sharp line between the dark and white layers is also something we need to focus on. If you’re looking for another way to use up your baking skills this month, my brown butter chocolate chip cookies are totally worth the effort!
Preventing Chocolate Seizing
This is the number one disaster we need to avoid! Chocolate hates water—and I mean *hates* it. A single drop of steam or water in your bowl while melting can turn your beautiful smooth chocolate into a gritty paste, and that means starting over. When I’m melting, I make sure my bowls are bone dry, and I keep my spatula completely dry too. Never use a damp dish towel near your melting station! Also, wipe down the inside of your candy cane bag before crushing to make sure no little bits of moisture get trapped in there with your peppermints.
When you are crushing those candy canes, use a heavy-duty Ziploc bag and a rolling pin, but put a clean towel over the top of the bag before you hit it. That stops the sharp pieces from tearing through the plastic and flying everywhere. For the cleanest look on your final Layered Chocolate Bark, try not to let the crushed candy cane pieces get too powdery; those small, chunky bits look the best sprinkled on top.
Storage and Reheating Instructions for Your Festive Holiday Bark
Because this peppermint bark is so delightfully high in fat thanks to all that chocolate, it’s pretty stable, but we still need to treat it right once it’s set up. You definitely don’t want to reheat it unless you are trying to melt it all down again! The goal here is to keep those sweet, crisp layers perfect and prevent the chocolate from getting soft if your house is warm.
The best way to store your bark is in a single layer in an airtight container. If you have to stack the pieces, which I usually do because I make far too much, put a little piece of wax paper or parchment paper between the layers. This stops the minty tops from sticking to the darker bottoms when the temperature fluctuates. Keep the container somewhere cool, like a pantry or even the refrigerator if your kitchen runs hot, especially around the holidays.
If you put the bark in the fridge, just let it sit on the counter for about 10 minutes before serving; that takes the hard chill off and lets the chocolate texture soften just a touch so it melts nicely in your mouth. If you’re making this ahead of time for a big party, it holds up beautifully for at least two weeks stored correctly. If you need other recipes that hold up well over time, you have to try my Crockpot Christmas Crack—it’s legendary!
Variations on the Classic Peppermint Bark Recipe
This four-ingredient recipe is fantastic as-is, but sometimes you just want to twist things up a little bit at the holidays, right? I love experimenting with my candied pecans, so I try to bring that spirit of customization into this simple peppermint bark, too. You can make small swaps to create a totally new candy that still comes together in minutes. We can lean into saltiness, or change up the base chocolate entirely!
Adding Flaky Sea Salt for an Elevated Flavor
One of the easiest ways to make this treat feel instantly fancy—a little bit like those fancy, expensive tins you see in stores—is to add sea salt. If you are doing this, don’t use regular table salt; that just makes it taste aggressively salty. You want flaky sea salt, like Maldon. The key timing here is right after you sprinkle on the crushed candy canes, almost at the same time. Sprinkle just a tiny pinch of the flaky salt directly over the candy canes before you put the whole thing in the fridge to set. That beautiful contrast between the sweet mint, the deep chocolate, and the tiny pops of salt is just heavenly!
Alternative Chocolate Choices for Layered Chocolate Bark
The recipe calls for dark chocolate on the bottom for that deep flavor contrast, but honestly, sometimes I just don’t have the good dark stuff on hand. If you want a sweeter experience overall, try using milk chocolate for the bottom layer instead. It gives you a much softer flavor profile overall. This is perfect if you’re making this for a crowd that includes a lot of younger kids who might find straight dark chocolate a bit too intense. You could even use semi-sweet if that’s what you have. It still works perfectly for that gorgeous Layered Chocolate Bark look, it just changes the chocolate foundation flavor!
Frequently Asked Questions About This Easy Christmas Candy
I know sometimes when a recipe is this fast, you end up with a few lingering questions in your head, especially when it comes to candy making. That’s totally normal! When I first started playing around with the Recipe for Peppermint Bark, I definitely had to troubleshoot a few things. Here are the most common things people ask me when they are diving into this super Simple Winter Candy for the first time!
Is this the same as the Costco Peppermint Bark?
Oh, the famous store-bought version! Ours is definitely striving for that classic Chocolate Peppermint Bark vibe, but my recipe is far easier because it’s not quite as thick, and we are using peppermint extract rather than layering peppermint oil, which can sometimes have a sharper, almost medicinal flavor if you use too much. My version is built for home kitchens, using simple, quality chocolate. If you want a true copycat, you might want to try using melting wafers instead of chopped chocolate chips for a smoother melt and break!
Why use peppermint extract instead of oil?
This is a great question about flavor intensity! Peppermint extract is water or alcohol-based, while peppermint oil is highly concentrated. Since this Easy Christmas Candy recipe relies on a very delicate balance after melting the chocolate, using oil risks overpowering the flavor since oil is so potent. I find that one teaspoon of extract gives us that perfect, bright mintiness without turning the whole batch into a giant breath mint. If you do happen to use oil, start with just 1/4 teaspoon—trust me, less is more!
Can I use oil instead of extract if I want a stronger flavor?
If you are dead-set on using oil, you absolutely can, but you must be careful, as I mentioned above! Oil often gives a slightly cleaner flavor, but it takes very little to go overboard. If you find your finished Festive Holiday Bark is tasting too strong or artificial, that’s usually the oil culprit. If you want to boost your dessert game with something totally different but still easy, check out my moist date nut bread recipe!
What is the very best way to crush the candy canes?
I always want those nice, varied chunks, not dust! The best method is definitely using a sturdy resealable plastic bag—the freezer bags work better because they are thick. Put your canes inside, then use a rolling pin or the bottom of a heavy skillet to gently tap and roll them until they are broken into small, irregular pieces. I always make sure there are some smaller dustings and some decent-sized shards; this gives great texture contrast when you bite into the finished White Chocolate Bark.
Nutritional Estimate for Peppermint Bark
I always like to keep a general idea of what we are eating, especially when we make big batches of Holiday Gifting Treats! Keep in mind that these numbers are just an estimate based on how I assembled this specific recipe—the chocolate brand you pick makes a difference. For one serving (or one glorious piece of bark), you’re looking at roughly 180 Calories, 12g of Fat, and 19g of Carbohydrates. The protein is small, around 2g. Since we aren’t measuring precise diets here, think of this as a lovely little holiday indulgence that’s worth every second!
Share Your Festive Holiday Bark Creations
Whew! We did it! We took simple ingredients and, in under 20 minutes, created something seriously festive and delicious. I truly hope you enjoy this Recipe for Peppermint Bark as much as my family does every single year. The holidays are about sharing joy, and honestly, seeing your beautiful creations definitely brings me joy!
I want to know what you thought! Did you try adding that flaky sea salt? Did you end up keeping it all for yourself? (I totally get it if you did!) When you make this, snap a picture, post it on social media, and tag me—I absolutely love seeing your take on my **Easy Christmas Candy** recipes. If you want to see more quick holiday sweets, I recently shared a recipe for easy raspberry jam that goes great with shortbread for gifting, too!
If you loved how simple this was, please come back and leave a star rating right here on the recipe card. It helps other busy cooks find the best treats when the clock is ticking. Don’t wait until next season to try this incredible bark; go ahead and make a batch this week! You can see how others have enjoyed this festive peppermint treat online, but trust me, homemade is always better!
PrintEasy 4-Ingredient No-Bake Classic Peppermint Bark

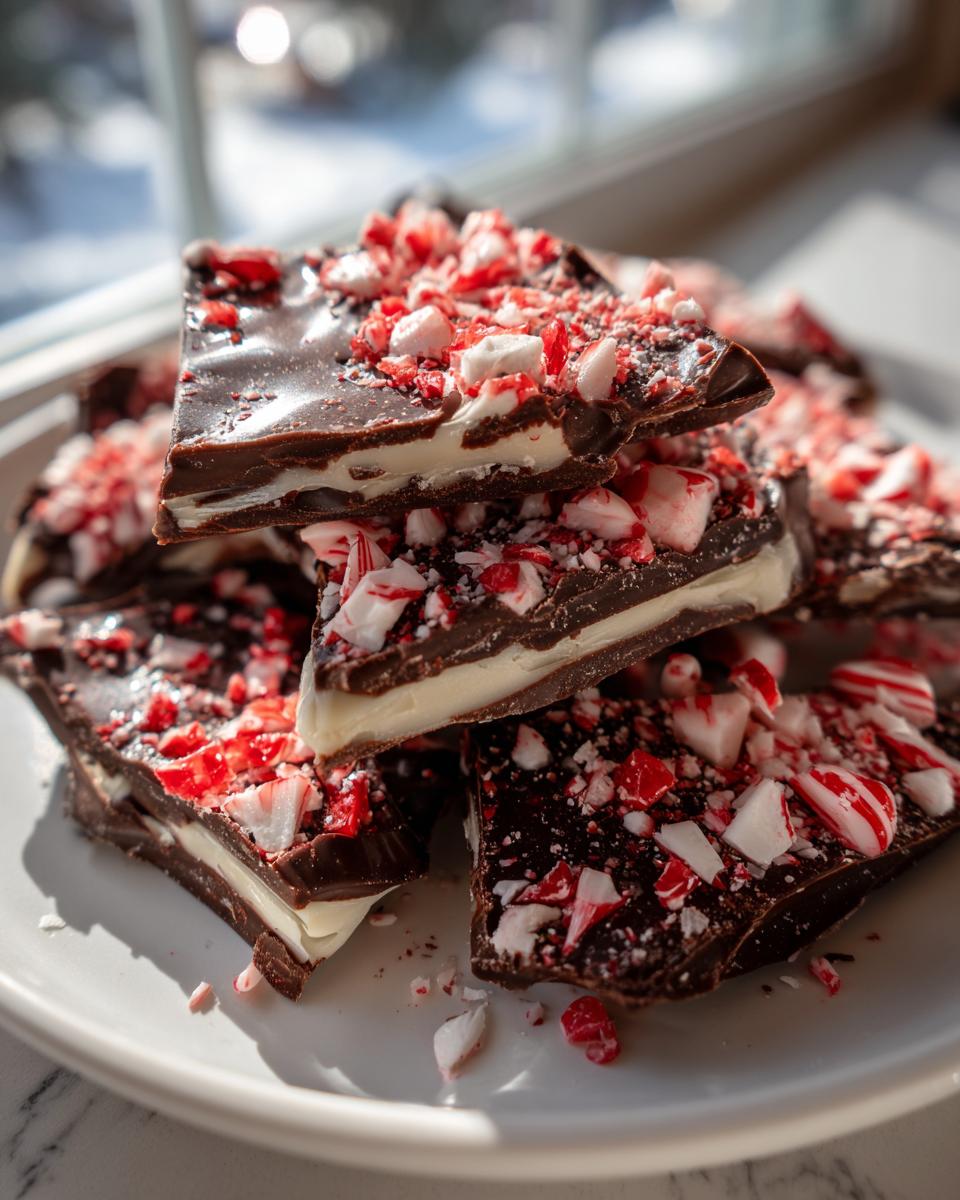
Make this simple, classic peppermint bark using only four ingredients. This no-bake holiday treat layers dark and white chocolate with crushed candy canes for a festive, quick dessert perfect for gifting.
- Prep Time: 15 min
- Cook Time: 5 min
- Total Time: 20 min
- Yield: About 16 servings 1x
- Category: Dessert
- Method: No-Bake
- Cuisine: American
- Diet: Vegetarian
Ingredients
- 12 ounces dark chocolate, chopped
- 12 ounces white chocolate, chopped
- 1 teaspoon peppermint extract
- 1 cup crushed candy canes
Instructions
- Line an 8×8 inch baking pan with parchment paper, allowing excess paper to hang over the sides for easy removal.
- Melt the dark chocolate in a microwave-safe bowl in 30-second intervals, stirring well after each interval until smooth. Do not overheat.
- Pour the melted dark chocolate into the prepared pan. Spread it into an even layer using an offset spatula.
- Place the pan in the freezer while you prepare the white chocolate layer, about 5 minutes.
- Melt the white chocolate in a separate microwave-safe bowl using the same 30-second interval method until completely smooth.
- Remove the pan from the freezer. Stir the peppermint extract into the melted white chocolate.
- Pour the white chocolate mixture over the dark chocolate layer. Spread it evenly.
- Immediately sprinkle the crushed candy canes evenly over the white chocolate layer. Gently press the candy canes into the chocolate with your hands or the back of a spoon.
- Return the pan to the refrigerator and chill for at least 1 hour, or until the bark is completely firm.
- Once set, lift the bark out of the pan using the parchment paper overhang. Break the bark into irregular pieces. Store in an airtight container.
Notes
- For a copycat version similar to store-bought versions, use high-quality melting wafers for smoother results.
- If you prefer a saltier flavor, sprinkle a pinch of flaky sea salt over the candy canes before chilling.
- You can substitute dark chocolate with milk chocolate if you prefer a sweeter base layer.
Nutrition
- Serving Size: 1 piece
- Calories: 180
- Sugar: 18
- Sodium: 15
- Fat: 12
- Saturated Fat: 7
- Unsaturated Fat: 5
- Trans Fat: 0
- Carbohydrates: 19
- Fiber: 1
- Protein: 2
- Cholesterol: 5