

Okay, let’s be honest. The holidays are magical, but they are also a complete sprint. Who has time to stand over the oven for hours when there are cookies to wrap and parties to plan? That’s why our philosophy here at Cooking by Felix is all about making the spectacular achievable, even when you’re slammed. And trust me, these grinch oreo balls are the spectacular solution you need right now.
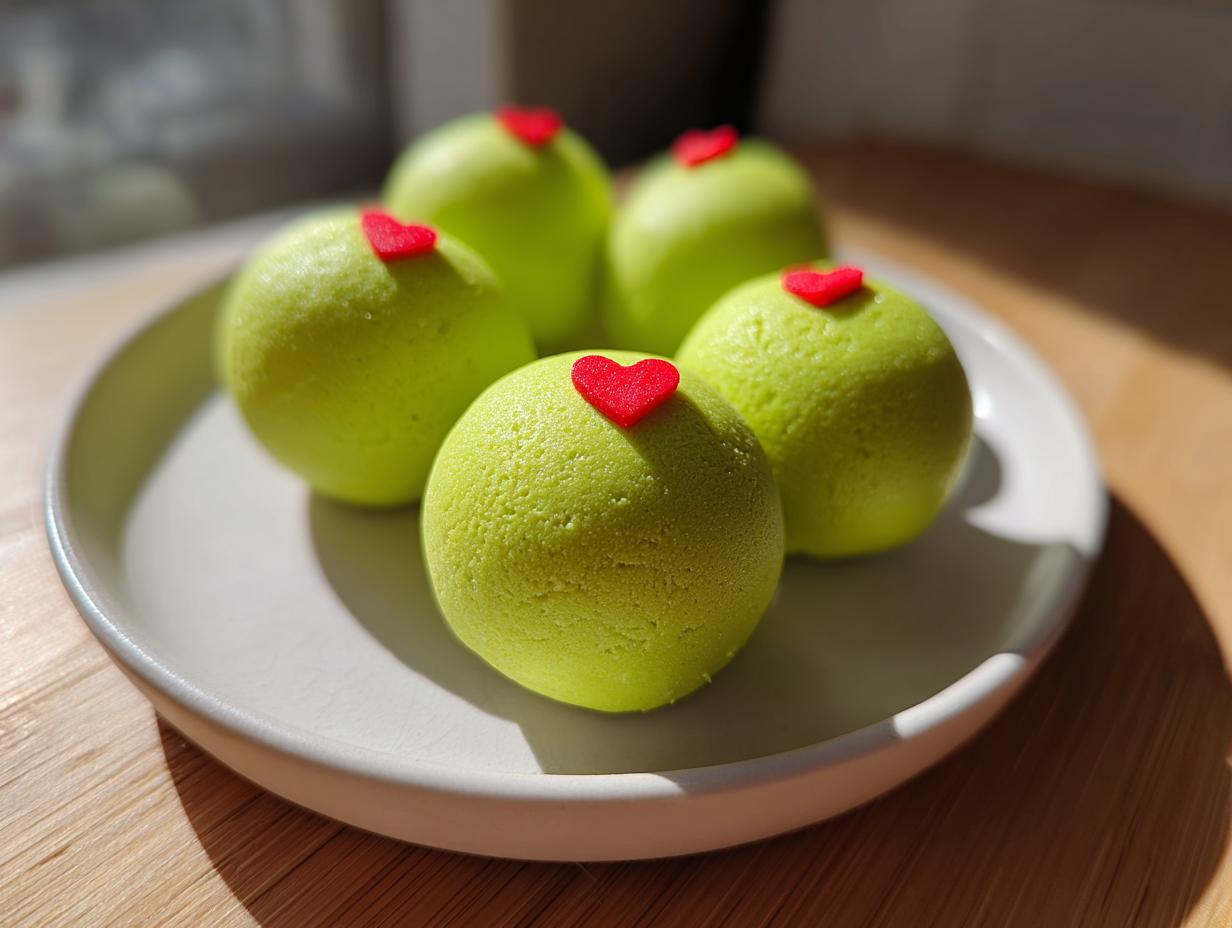
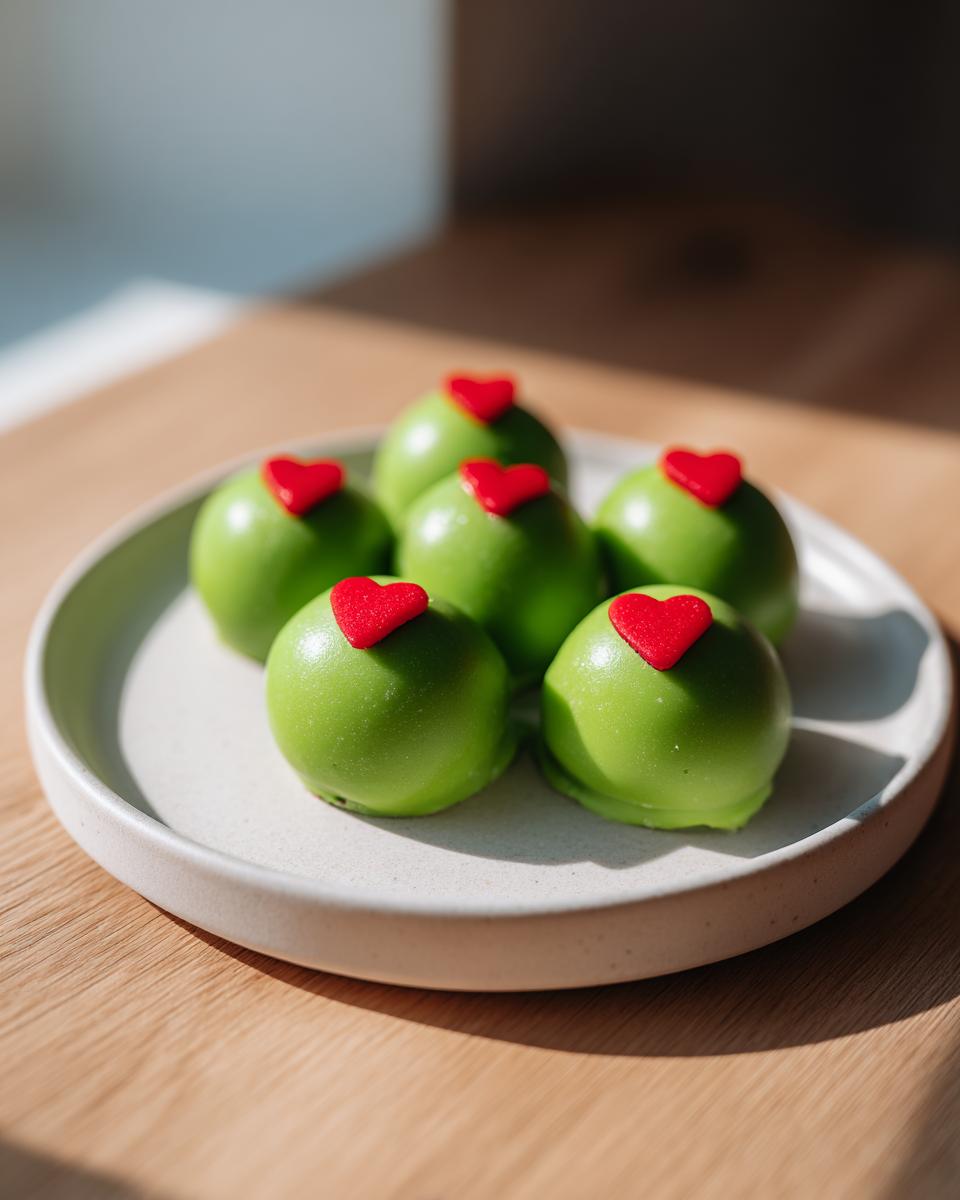
They look like they took days of meticulous decorating, but they are totally no-bake! Imagine a rich, fudgy center dipped in bright, happy green chocolate and topped with a tiny little heart. It’s the perfect bite-sized holiday treat designed for busy people who still want that wholesome, homemade touch. Seriously, these come together faster than you can find your Christmas playlist.
- Why You Will Make These grinch oreo balls Every Holiday Season
- Gathering Your Ingredients for Festive grinch oreo balls
- Step-by-Step Instructions for Perfect grinch oreo balls
- Expert Tips for Making the Best Holiday Oreo Balls Recipe
- Ingredient Notes and Substitutions for grinch oreo balls
- Serving Suggestions for Your Bite Sized Holiday Sweets
- Storage and Reheating Instructions for grinch oreo balls
- Frequently Asked Questions About Making grinch oreo balls
- Nutrition Estimates for These Festive Green Treats
Why You Will Make These grinch oreo balls Every Holiday Season
I’ve tested dozens of quick holiday recipes, but these little green guys always win the crowd over. They hit that perfect spot between being incredibly cute and ridiculously easy. You absolutely need these on your table this year, especially if you’re tired of sweating over the oven!
- Totally No-Bake Christmas Desserts: Seriously, the oven stays off! We’re just crushing, mixing, chilling, and dipping. It’s pure magic happening on the counter, not in the heat.
- Kid-Friendly Christmas Baking Magic: Even small hands can help roll the balls or press on that adorable little red heart sprinkle. This is a fantastic way to get the family involved without any tricky baking steps.
- They Are the Ultimate “Easy Oreo Truffles”: If you’ve ever made an Oreo truffle, you know the base is foolproof. It’s dense, fudgy, and guaranteed to please the chocolate lovers at your party.
- Incredible Visual Impact for Zero Effort: That bright green coating plus the little red heart? It screams festive! These **Christmas Truffles** look like they took hours, but we both know the truth.
- Perfect for Cookie Trays and Gifting: Because they hold their shape so well and stay fresh in the fridge, these are the best Bite Sized Holiday Sweets to stack up for exchanges or tuck into treat boxes for neighbors.
- Make-Ahead Champion: You can prep the balls days ahead of time by rolling them and just keeping them chilled. Then, melt your coating the day before your event. Set yourself up for success!
Gathering Your Ingredients for Festive grinch oreo balls
Building these adorable truffle centers is super simple, but like any good recipe, the quality of your core components makes all the difference. Since no baking is involved, we need to make sure the base is perfectly creamy and the coating melts down like velvet. When I developed this Holiday Oreo Balls Recipe, I stuck to the essentials for maximum flavor payoff.
Essential Components for the Holiday Oreo Balls Recipe
For the fudgy center, you need the full package of standard Oreo cookies—yes, cream, chocolate wafers, the whole thing! Plus, make sure your cream cheese has been sitting out long enough to be truly soft. Trust me on this one; chunky cream cheese results in lumpy truffle dough, and we want smooth!
- One standard 14.3 oz package of Oreo cookies (about 36 cookies total).
- 8 oz of cream cheese, making absolutely sure it’s softened to room temperature.
- 12 oz of green candy melts—these give us that perfect, vibrant Grinch green color without the hassle of coloring white chocolate.
- One teaspoon of coconut oil—this is optional, but I always add it to my melts because it makes them *so* much smoother for dipping!
- About 30-36 tiny red heart sprinkles for the final touch.
Step-by-Step Instructions for Perfect grinch oreo balls
Okay, this is where the fun really starts! Since these are no-bake, we move fast, but we can’t skip the chilling—that’s the secret to keeping them neat. Think of this entire process like a little assembly line. I’ve broken it down so you can keep your workflow smooth and ensure you end up with perfectly shaped Festive Green Treats!
Preparing the Oreo Truffle Base
First things first, we need crumbs! You can set up the food processor, or if you’re feeling super old-school, put those cookies in a heavy bag and go to town with a rolling pin. Pulse them until they look like fine, sandy dust. Next, dump those crumbs into a good-sized bowl. Add all eight ounces of your softened cream cheese. Now, you have to mix this *really* well. Use a spatula at first, but honestly, just use your clean hands toward the end until it forms one uniform, thick dough. It shouldn’t leave any cream cheese streaks behind, or they’ll be greasy later.
Once it’s all combined, start rolling! Aim for little balls about an inch wide. I usually get about 30 to 36. Pop them onto a parchment-lined tray right away.
Chilling and Coating the grinch oreo balls
This chilling step is non-negotiable, folks. Pop that tray into the fridge for at least 30 minutes. If you try to dip them warm, they just smoosh. While they’re chilling, melt your green candy melts. Remember my tip? A tiny splash of coconut oil makes dipping so much easier!
When the time is up, grab your tool—a fork or a specialized dipping tool works—and completely submerge one ball in the melted green coating. Lift it out and give the tool a little tap on the edge of the bowl to get rid of the drips. Immediately place that ball back on the parchment. This is the fun part: quick as a flash, press one small red heart sprinkle right on top to make it true Grinch Themed Food. Let them set up completely before you stack or store them!
Expert Tips for Making the Best Holiday Oreo Balls Recipe
Even though these are super simple, a couple of little tricks I picked up will elevate your little Christmas Truffles from good to absolutely show-stopping. The biggest game changer for me was learning how to manage that coating consistency. If you’re melting your green candy melts and they start getting too thick while you’re working through the batch—don’t panic! Just pop them back in the microwave for about 15 seconds, stir well, and they’ll be perfect again.
Also, if you want a little extra festive flair tucked inside, switch out the classic Oreos for a package of Red Velvet Oreos. You get that gorgeous, subtle red tint peeking out when someone takes a bite, which is just so pretty alongside that bright green shell. It adds a layer of complexity to these Bite Sized Holiday Sweets without adding any extra work.

Ingredient Notes and Substitutions for grinch oreo balls
I know sometimes the ingredient list can make you pause, especially when it comes to melting chocolate for dipping. For these Green Chocolate Covered Oreos, I strongly push for candy melts. They set up quickly, they hold their color brilliantly, and they are super reliable. If you absolutely must use white chocolate, you’ll need a good quality melting wafer and a couple of drops of oil-based gel food coloring—liquid coloring gums up the chocolate easily.
And that little bit of coconut oil I mentioned? It’s my secret weapon for smooth dipping! It thins the coating just enough so you get a thin, even shell around your truffle instead of a thick lump of chocolate. This keeps your **grinch oreo balls** looking slick and professional, even though we didn’t break a sweat making them.
Serving Suggestions for Your Bite Sized Holiday Sweets
Now that you have these adorable, festive green treats chilling away, you have to think about where they’ll shine brightest! Since these **grinch oreo balls** require zero oven time, they are the ultimate stress-free contribution to any gathering. They are such a fantastic visual centerpiece mixed in with traditional cookies.
If you’re heading to a big holiday cookie exchange, these are your secret weapon. They stand out immediately! Mix them onto a platter alongside simpler cookies—they serve perfectly as wonderful Easy Holiday Cookie Alternatives because they look labor-intensive but weren’t.
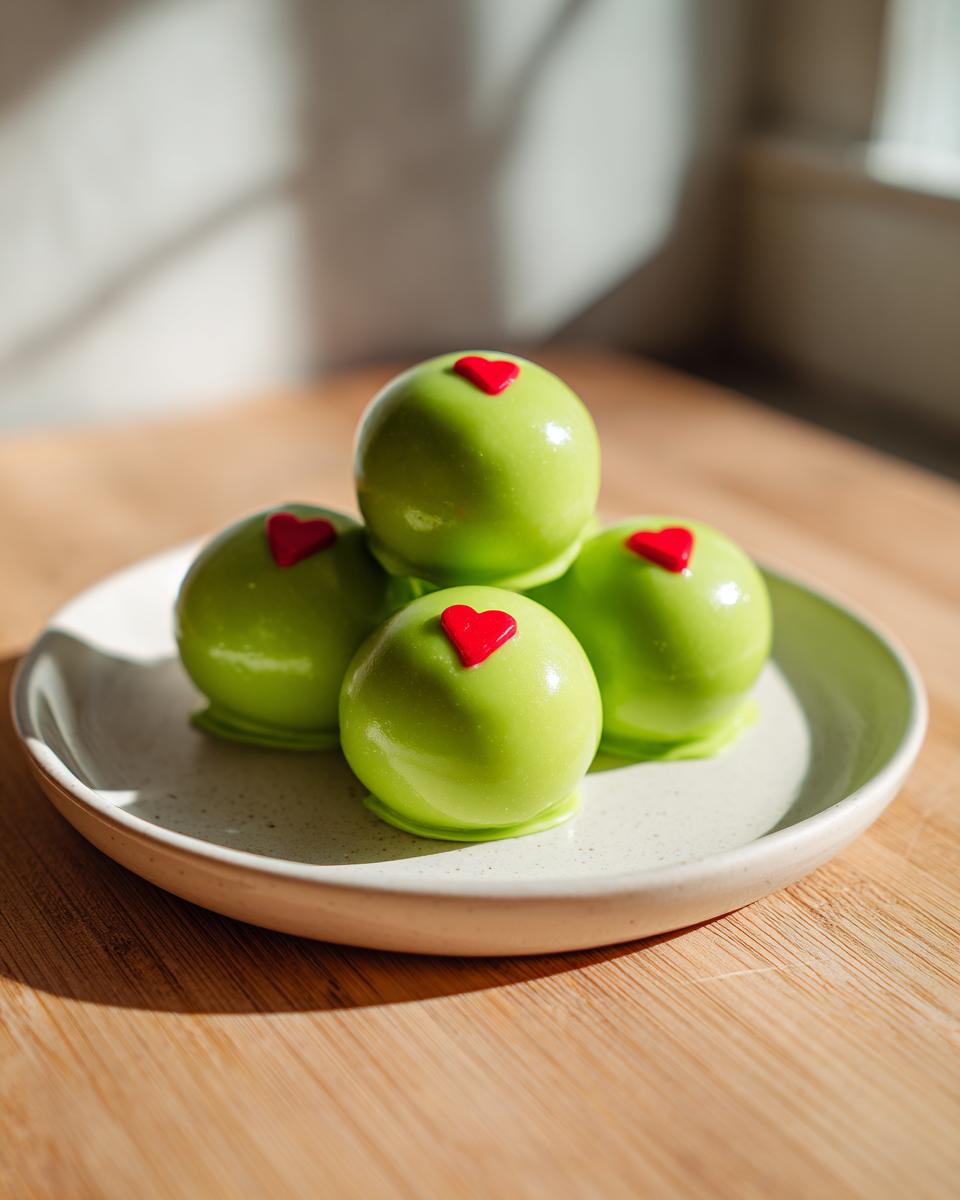
For party platters, arrange them on a tiered stand, maybe alternating green, white, and red accents if you have other treats. They look super playful when displayed this way. And don’t forget gifting! Place five or six in a small cellophane bag, tie it with a shiny ribbon, and you’ve instantly created a cute, simple Christmas gift that tastes homemade but took you minutes.

Storage and Reheating Instructions for grinch oreo balls
Because these lovely little guys rely on cream cheese and melted chocolate coatings, storage is pretty straightforward, though we do need to be mindful of keeping them cool. These are not the kind of No Bake Holiday Candy you can just leave sitting out on the counter for days while you host your holiday celebration; they need a little chill time to stay firm and fresh!
Keeping Your Grinch Oreo Balls Fresh
The best place for these is definitely the refrigerator. Get yourself an airtight container—and I mean *truly* airtight, because the fridge loves to make things taste like whatever else is lurking in there! Seal them up tight.
You can pretty much count on these staying delicious and fully festive for up to a week when stored properly in the fridge. The texture might firm up slightly right out of the cold, but that’s okay! Just pull them out about 15 to 20 minutes before you plan to serve them. That little bit of time on the counter softens the cream cheese center just enough to make them perfectly fudgy again.
If you are making these way ahead of time, say for a big event next month, you can actually freeze them! Just place the finished, chilled balls in a single layer on a baking sheet and pop that into the freezer until solid. Then, transfer them to a freezer bag. When you need them, just move them straight to the fridge for a full day to thaw slowly. This is such a great hack for keeping stress low during the hectic Christmas week!
Remember, since these are such simple, **Kid Friendly Christmas Baking** treats, keeping them cool locks in that gorgeous green color too. We don’t want any fading or melting!
Frequently Asked Questions About Making grinch oreo balls
I know when you’re making something as cute as these holiday truffles, you sometimes get a little anxious about getting the details just right. It’s okay! Even though these are one of the easier No Bake Holiday Candy recipes out there, I gathered up the top questions I get from friends trying them for the first time.
Can I use different kinds of Oreos besides the original ones?
Oh, absolutely! As I mentioned before, I love the look when you use Red Velvet Oreos because that soft red interior peeking out is just gorgeous when paired with the green shell. You can certainly use Mint Oreos if you want a little cool flavor boost, or even Golden Oreos if you want a slightly lighter center. Just remember, whatever cookie you use, cream cheese is the binder that holds it all together, so don’t skip that part!
My green coating is too thick! What do I do?
This happens to everyone, especially as the candy coating cools while you are working. If you’re dipping and it feels draggy or thick, just stop for a second! Reheat the melts in 15-second bursts in the microwave, stirring well between each burst, until it flows nicely again. And remember my little trick: stir in just half a teaspoon of coconut oil or vegetable shortening. It loosens everything up immediately, making dipping these grinch oreo balls such a breeze!
How do I make sure that little red heart sprinkle sticks perfectly?
This is crucial for that Grinch look! You must place it immediately after you dip the ball into the green coating and before the coating sets up. As soon as you set the dipped ball back onto the parchment paper, gently press the heart right on top. Make sure the coating is still wet around it; it acts like glue! If you wait even 30 seconds too long, the coating will firm up and the heart will just sit awkwardly on top instead of sinking in just a tiny bit.
Are these safe to leave out on a dessert table for a long party?
Since these are **Kid Friendly Christmas Baking** wonders, they are made with cream cheese, so they really prefer to stay cool. If your party is just an hour or two, they will probably be fine on a well-ventilated, cool table. However, for safety and best texture, I always recommend keeping them refrigerated until about 20 minutes before serving. If you can’t stash them in the fridge, make sure the table isn’t near a hot lamp or a heating vent!
Nutrition Estimates for These Festive Green Treats
I always like to give everyone a heads-up on what’s in the things we whip up in the kitchen, even for something as purely fun as these **grinch oreo balls**. Since these are rich little morsels packed with cream cheese and coating, they are definitely a treat! Keep in mind that these figures are just estimates based on the standard ingredients listed, so your results might vary slightly depending on the specific brands of Oreos or melts you use.
This data is calculated per single, one-inch **Christmas Truffle**, so plan accordingly when you set out your beautiful platter of Bite Sized Holiday Sweets!
- Serving Size: 1 ball
- Approximate Calories: 150 per ball
- Total Fat: 9g (Saturated Fat is about 5g)
- Total Carbohydrates: 16g
- Protein: Approximately 1g
- Sugar: 15g
See? Not bad for such a festive dessert! It’s a perfectly portioned little indulgence that makes your dessert table shine. Enjoy them!
PrintEasy Grinch Oreo Balls (No-Bake Holiday Treat)

Make these adorable Grinch Oreo Balls for a festive, no-bake holiday dessert. They use crushed Oreos and cream cheese, coated in bright green candy melts, and topped with a small red heart sprinkle. These are perfect for Christmas parties, cookie trays, or gifting.
- Prep Time: 25 min
- Cook Time: 5 min
- Total Time: 60 min
- Yield: 32 servings 1x
- Category: Dessert
- Method: No Bake
- Cuisine: American
- Diet: Vegetarian
Ingredients
- 1 package (14.3 oz) Oreo cookies (about 36 cookies)
- 8 oz cream cheese, softened
- 12 oz green candy melts or white chocolate with green food coloring
- 1 teaspoon coconut oil (optional, for smoother dipping)
- Small red heart sprinkles (for the Grinch heart)
Instructions
- Place the Oreo cookies into a food processor and pulse until fine crumbs form. If you do not have a food processor, place them in a large zip-top bag and crush them with a rolling pin.
- Transfer the crumbs to a medium bowl. Add the softened cream cheese. Mix with a spatula or clean hands until the mixture is completely combined and forms a thick dough.
- Roll the dough into small balls, about 1 inch in diameter. You should get about 30 to 36 balls. Place the balls on a baking sheet lined with parchment paper.
- Chill the Oreo balls in the refrigerator for at least 30 minutes to firm them up. This step prevents them from falling apart during dipping.
- Melt the green candy melts according to package directions. If using, stir in the coconut oil for a thinner consistency.
- Working with one chilled ball at a time, dip it completely into the melted green coating. Lift it out and gently tap the dipping tool against the side of the bowl to allow excess coating to drip off.
- Place the coated ball back onto the parchment-lined sheet. Immediately press one small red heart sprinkle onto the top of the green coating to resemble the Grinch’s heart.
- Allow the candy coating to set completely. You can speed this up by chilling the finished balls for another 15 minutes.
- Serve these easy Oreo truffles or store them in an airtight container in the refrigerator until ready to serve.
Notes
- If you prefer a slightly different flavor, you can substitute regular Oreos with Red Velvet Oreos for a subtle red tint in the center.
- For the best dipping consistency, do not overheat the candy melts. If they become too thick while working, microwave them in 15-second intervals until smooth again.
- These bite sized holiday sweets are excellent for holiday cookie exchanges.
Nutrition
- Serving Size: 1 ball
- Calories: 150
- Sugar: 15
- Sodium: 95
- Fat: 9
- Saturated Fat: 5
- Unsaturated Fat: 4
- Trans Fat: 0
- Carbohydrates: 16
- Fiber: 0
- Protein: 1
- Cholesterol: 10