


There’s just something about that first whiff of cinnamon and baked apples wafting through the house, right? It instantly throws me back to simpler times, even when my schedule feels totally hectic today. For years, I thought making a true, comforting dessert like the best homemade apple pie from scratch was reserved for grandmothers with unlimited time. Oops! My background in marketing taught me that efficiency and amazing results can coexist. That’s why I spent ages perfecting this recipe—it delivers that deeply nostalgic, perfectly flaky, all-butter crust and a spice-balanced filling that tastes like Americana, but uses simple steps designed for your busy life. This is the tradition you deserve to bring to your table tonight. If you love this kind of cozy flavor, you absolutely have to check out my recipe for moist apple bread too!
- Why This Homemade Apple Pie Recipe is Your New Go-To
- Ingredients for the Flaky Butter Pie Crust and Cinnamon Apple Filling
- How to Make Homemade Apple Pie from Scratch: Step-by-Step
- Tips for Pie Perfection When Making Homemade Apple Pie
- Storing and Reheating Your Classic Double Crust Pie
- Serving Suggestions for Your Homemade Apple Pie
- Frequently Asked Questions About Apple Pie Recipe From Scratch
- Nutritional Estimate for Homemade Apple Pie
- Share Your Best Homemade Apple Pie Experience
Why This Homemade Apple Pie Recipe is Your New Go-To
I know you’re busy, so let’s talk about why this homemade apple pie will become your absolute favorite. It’s all about payoff versus effort, and this one pays out huge!
- Seriously Flaky Crust: We insist on all-butter for that crisp, buttery texture that crumbles just right. No soggy bottoms here, I promise!
- Perfect Apple Blend: Using both tart and sweet apples means the filling has complexity, not just sweetness. Check out my thoughts on just the filling alone if you’re ever in a rush.
- No-Fail Assembly: The steps are broken down so clearly, even if this is your first time making a classic double crust pie, you’ll nail that perfect golden bake.
Ingredients for the Flaky Butter Pie Crust and Cinnamon Apple Filling
Before we even think about mixing, let’s get organized. For a truly stunning apple pie recipe from scratch, ingredient quality and temperature matter big time. I always lay everything out, just like in a professional kitchen. Trust me, keeping things cold for the dough is the single most important thing you can do for that flaky crust.
For the Flaky Butter Pie Crust
When it comes to this all-butter crust, if the butter isn’t icy cold, well, it just won’t happen. Think rocks, not soft cubes! This is the foundation of our classic double crust pie.
- 2 1/2 cups all-purpose flour
- 1 teaspoon salt
- 1 cup (2 sticks) unsalted butter, very cold and cubed
- 1/2 cup ice water, plus more if needed
For the Cinnamon Apple Filling
This mix of apples is non-negotiable for me. Granny Smith gives you that necessary tang to cut the sugar, and Honeycrisp brings the sweetness and holds its shape beautifully. See how important the apple choice is right from the start?
- 6 large Granny Smith apples, peeled, cored, and sliced 1/4 inch thick
- 6 large Honeycrisp apples, peeled, cored, and sliced 1/4 inch thick
- 3/4 cup granulated sugar
- 1/4 cup packed light brown sugar
- 1 teaspoon ground cinnamon
- 1/4 teaspoon ground nutmeg
- 1/8 teaspoon ground allspice
- 2 tablespoons all-purpose flour (for filling)
- 1 tablespoon lemon juice
- 1 large egg, beaten with 1 teaspoon water (for egg wash)
- 1 tablespoon coarse sugar (for sprinkling)
How to Make Homemade Apple Pie from Scratch: Step-by-Step
Alright, this is where the magic truly happens! Making a glorious homemade apple pie from scratch is a two-part symphony: preparing the crust and mixing the filling expertly. Remember, we are aiming for that unbelievably flaky texture, so patience during the mixing stages is key. I learned early on that rushing the dough is the fastest way to disaster! If you ever need a quick dough fix that isn’t pie, check out my easy biscuit dough recipe—it uses similar cold fat principles!
Creating the Flaky Butter Pie Crust
We start with that gorgeous butter we cubed while it was still rock hard. Whisk your flour and salt together first. Then, using a pastry blender—or honestly, just your fingertips if you’re fast—cut that butter in until you see crumbs, some the size of peas. Don’t try to make it perfectly smooth! Those pea-sized pieces are what steam in the oven to make those flaky layers we adore. Now, drizzle in the ice water a tablespoon at a time. Only mix until the dough reluctantly clumps together. Seriously, stop mixing the second it holds! Divide that ball in two, wrap them tight, and straight into the fridge they go for at least two hours. That chill time is non-negotiable for a beautiful, sturdy crust.
Mixing the Perfect Cinnamon Apple Filling
While the dough chills out, it’s time to tackle the apples. Get your Granny Smith and Honeycrisp slices mixed with the sugars, spices, flour, and lemon juice. Give it a good, gentle toss—you want every single slice coated in that sweet, warm cinnamon spice mix. You’ll notice the mixture starts releasing some liquid almost instantly. That’s good! Let that juicy goodness hang out on the counter while you roll out your bottom crust. This resting time lets the flour absorb some of that juice, which is vital for the next assembly step.
Assembling and Finishing Your Homemade Apple Pie
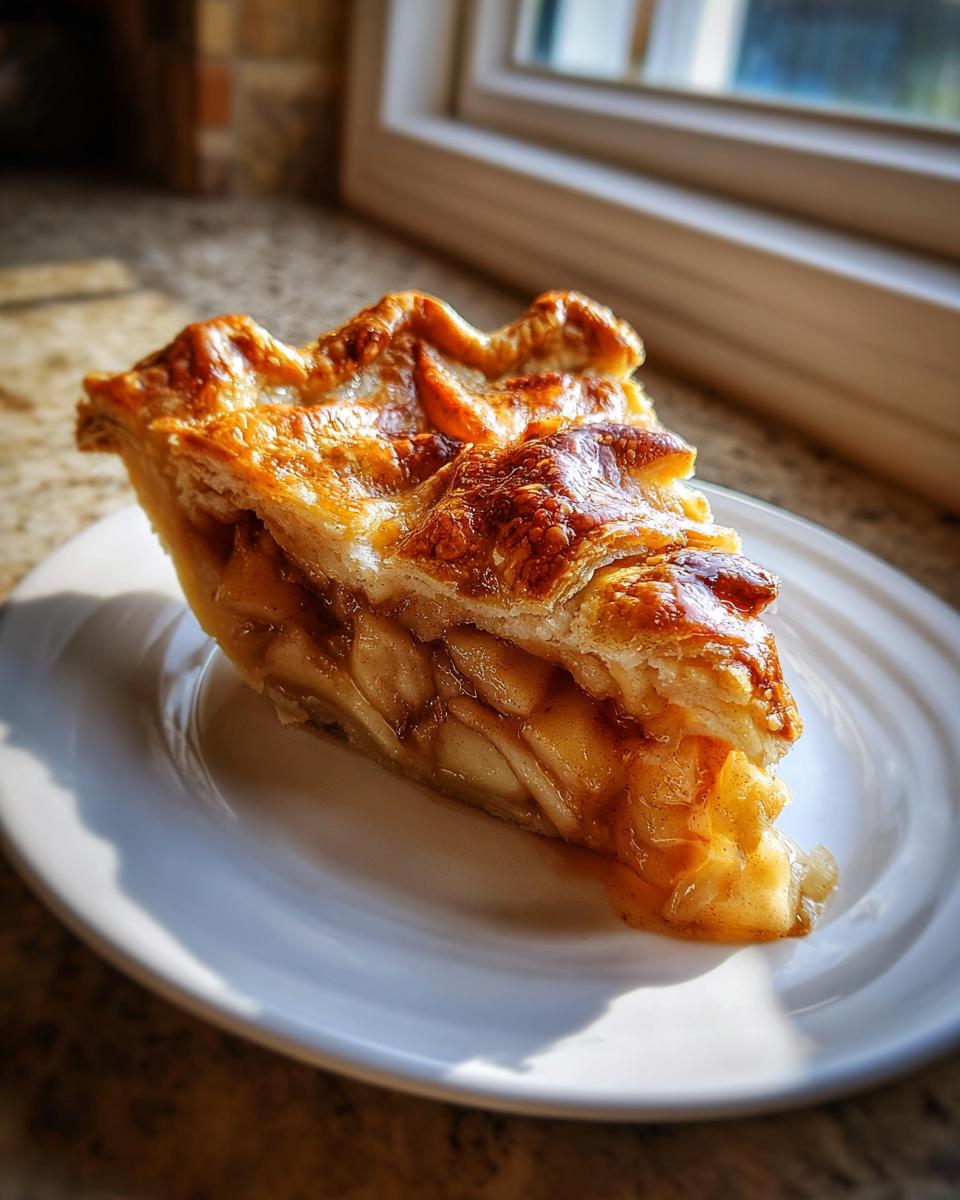
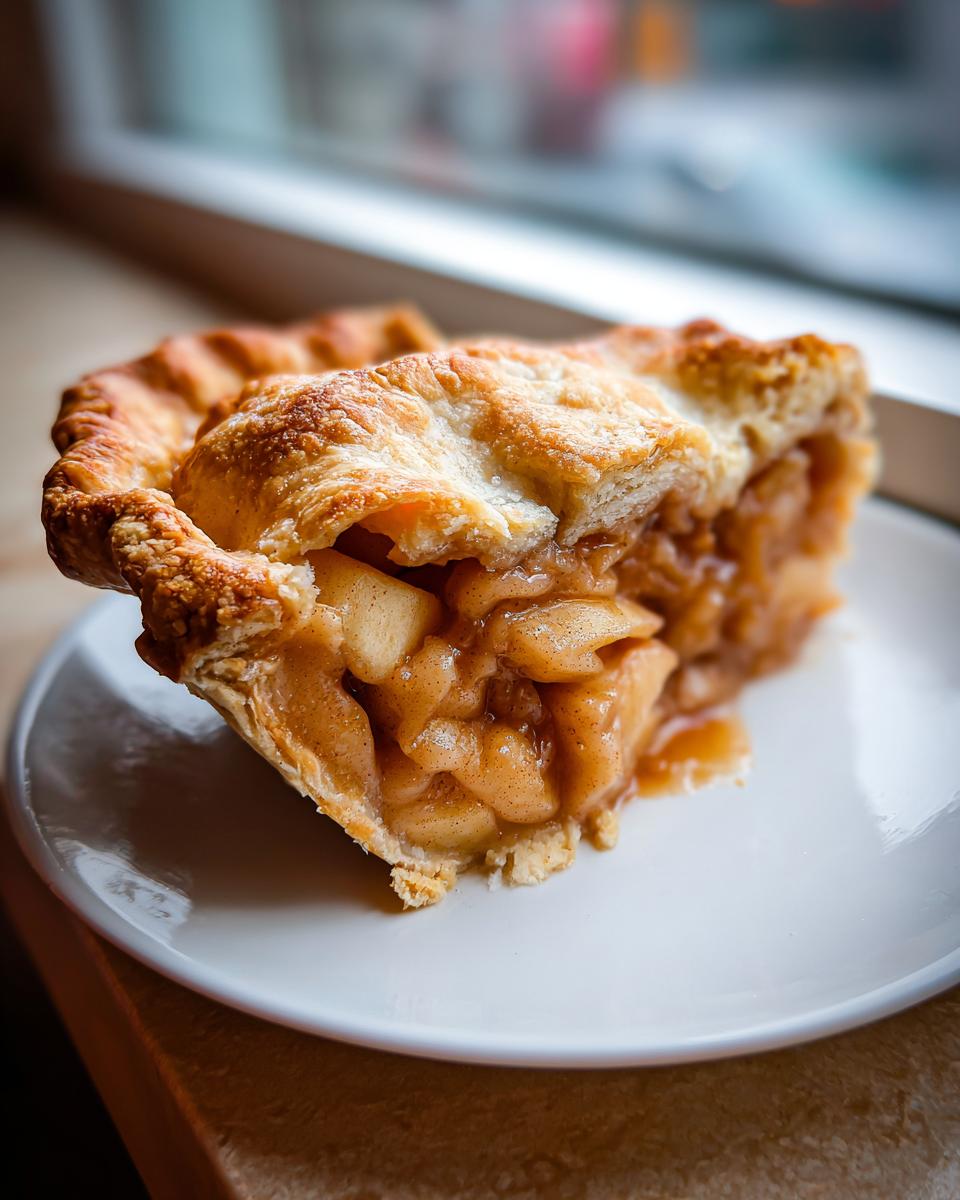
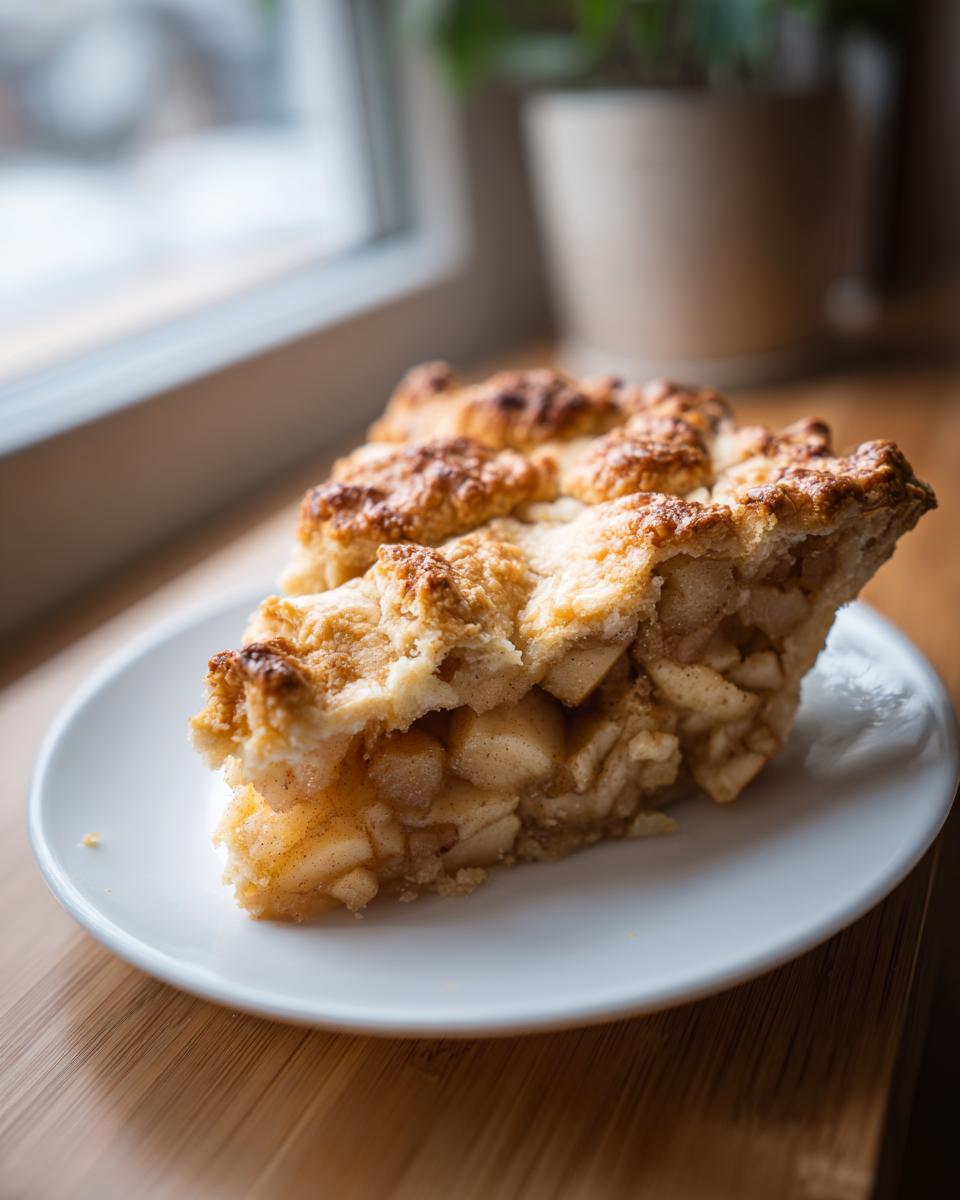
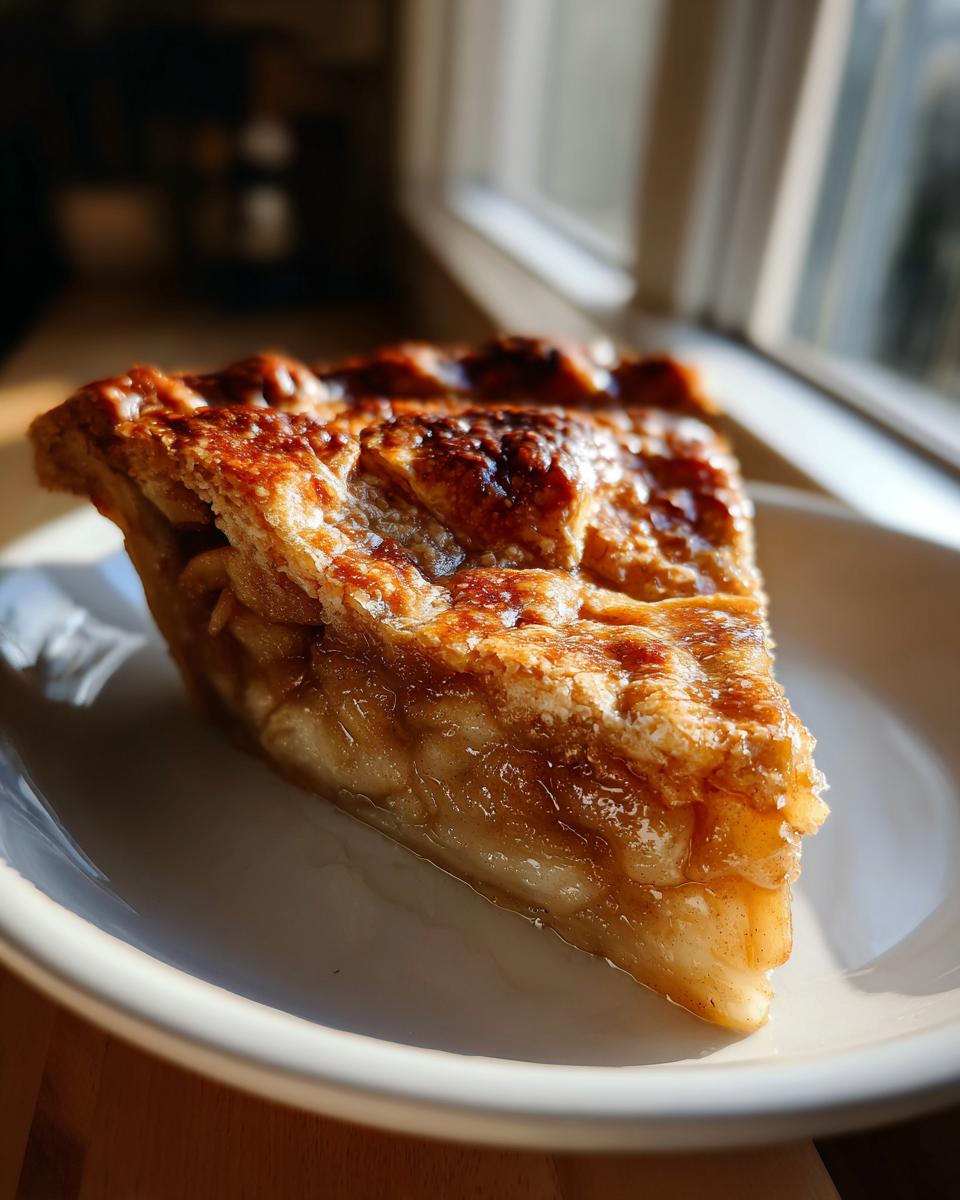
Dust your surface lightly—we don’t want the dough sticking! Roll out one chilled disk into a 12-inch circle and gently ease it into your 9-inch pie plate. Trim the overhang to about an inch. Now, pile that spiced apple filling high in the center—don’t be shy! Roll out your second disk for the top. You can cut large vents in it, or if you’re feeling artistic, weave a beautiful lattice, which lets steam escape and looks amazing. Crimp those top and bottom edges together to seal in all that goodness. For that final touch that looks like it came from a bakery, brush the whole thing lightly with the egg wash and sprinkle on that coarse sugar. It gives a beautiful glint when it bakes!
Baking Instructions for a Golden Finish
Preheat your oven to a hot 425°F, and place that pie on a baking sheet—you’ll thank me later when the filling bubbles over! Bake high and fast for 15 minutes at 425°F. This step shocks the crust into setting up beautifully. Then, drop the temperature down to 375°F and continue baking for another 45 to 55 minutes. Keep an eye on those edges; if they start getting too dark too fast, just slip some foil squares gently over them. The filling needs to be actively bubbly when you pull it out. But here’s the hardest part: you have to let it cool completely, usually three to four hours on a rack. If you cut it too soon, it will just run out! That resting time lets the juices thicken up into that perfect, syrupy sauce.
Tips for Pie Perfection When Making Homemade Apple Pie
You’ve got the recipe, but I want to make sure your first trip making this homemade apple pie is a total slam dunk! These aren’t just arbitrary rules; these are the tricks I learned after making way too many sad, mushy pies in my early days. It really comes down to temperature and respecting the raw materials.
First off, when we’re making that flaky crust, ultra-cold is our best friend. I’m talking about butter straight from the back of the freezer and water that has actual ice chips floating in it. If your butter starts looking greasy while you’re cutting it in, just pop the whole bowl into the freezer for five minutes. That’s my go-to move!
Secondly, let’s talk apples again for your cinnamon apple filling. Don’t just grab any old apple! That mix of tart (like Granny Smith) and sweet (like Honeycrisp) is what gives the pie its depth. If you only use sweet apples, the filling turns overly sugary and one-note, which we absolutely don’t want in a classic dessert like this.
Finally, remember that little note about increasing the flour if you like a super thick filling? If you find your filling seems a bit looser than you’d like, try bumping that 2 tablespoons of flour up to 3 tablespoons next time you bake this special homemade apple pie. It helps bind those juices perfectly during that slow cooling period!
Storing and Reheating Your Classic Double Crust Pie
Okay, you’ve done the hard part—the baking! Now, the crucial question: how do we keep this masterpiece perfect until it’s time to eat it all? Because this classic double crust pie is loaded with butter and fruit, storage matters a lot if you want to preserve that flaky texture.
First, the cooling time isn’t just a suggestion; it’s mandatory! You absolutely must let it cool for a full three to four hours before you even think about covering it. If you cover it hot, the steam gets trapped, and guess what? That gorgeous bottom crust turns soggy. Trust me, I’ve made that mistake so many times.
Once it’s completely cool, you have a couple of options. If you plan on eating the entire homemade apple pie within 24 hours, leaving it on the counter, lightly covered with plastic wrap or a cake dome, is totally fine. We didn’t cook this pie to trap moisture, so keep it out of the fridge if you can. The high sugar and acid concentration in the filling keeps it safe at room temperature for a day.
If you need it to last longer, then yes, pop it in the fridge. You want to wrap the whole thing tightly in plastic wrap first, and then maybe wrap it lightly in foil over that. This helps keep the crust from drying out or absorbing fridge smells. It’s good for about three days this way.
Now, for the best part: reheating a slice! If you just microwave it, you’ll turn that beautiful flaky crust into something resembling soft plastic. Yuck! I actually love eating it cold, but if you want that warm, gooey experience, use the oven. Pop a single slice on a baking sheet lined with foil and bake it at 350 degrees F for about 10 to 12 minutes. It warms the apples, melts the filling slightly, and crisps that crust right back up. You get that fresh-from-the-oven taste without ruining the structural integrity of the pie!
Serving Suggestions for Your Homemade Apple Pie
The absolute best part of baking a stunning homemade apple pie is figuring out what to put on top! Honestly, even after all that effort, the pie is never truly finished until you decide on the perfect partner. You’ve already got the rich, buttery crust and the warm cinnamon apple filling, so now we dress it up.
For me, nothing beats the classic duo: a generous scoop of high-quality vanilla bean ice cream. The cold, creamy texture hitting that warm, spiced apple is just heaven. It’s the contrast in temperatures that makes this dessert so comforting, especially on a chilly evening.
If you’re serving pie after a big dinner, sometimes you want something a little lighter than ice cream. A dollop of freshly whipped heavy cream works wonders. If you whip it slightly stiff and add just a tiny drizzle of maple syrup, it complements the brown sugar in the filling beautifully without overpowering the apple flavor. It tastes so much cleaner than anything from a can, I promise!
And hey, if you’re feeling ambitious, sometimes I’ll grate a little bit of sharp cheddar cheese right over a warm slice—don’t knock it ’til you try it! That salty bite really wakes up the sweetness of the apples. But truly, whether you go with ice cream, whipped cream, or just eat it plain, this pie is ready for its spotlight moment.
Frequently Asked Questions About Apple Pie Recipe From Scratch
I get so many questions about baking pies, especially when people are trying to nail that tricky crust on their first try! It’s normal to have questions when tackling something as classic as a good apple pie recipe from scratch. Here are the things I hear most often!
Can I use pre-made pie dough for this homemade apple pie?
Oh, I totally get the temptation! If you’re in a massive time crunch and just need an easy dessert recipe on the table tonight, sure, frozen dough will work in a pinch to get you that classic double crust shape. But, honestly? The whole reason this recipe shines is that buttery, flaky texture we get from making the dough ourselves. If you use store-bought, you’re missing out on *the actual best part* of this whole experience. Think of the homemade crust as essential for becoming a true pie master!
What is the best way to prevent a soggy bottom crust?
Ah, the dreaded soggy bottom! This breaks my heart every time I hear about it. Preventing it is all about heat conduction and moisture control for your homemade apple pie. My first tip is to bake on the lowest rack in your oven. This concentrates the heat toward the bottom crust, helping it cook through before the liquid from the apples saturates it. Second, skip the glass pie dish for your first few tries—a thin metal or aluminum pie plate conducts heat much better and crisps up the bottom beautifully. Lastly, make sure you tossed those apples lightly in the flour specified in the filling! That flour is there to bind the juices so they turn into thick sauce instead of pooling at the bottom.
Can I make the filling ahead of time for this comfort food dessert?
Yes, you absolutely can prep your cinnamon apple filling ahead of time, which is great for holiday baking when juggling lots of dishes! After you toss the apples with the spices, sugar, and lemon juice, you can store the mixture in an airtight container in the fridge for up to 24 hours. You don’t need to pre-cook it at all, but make sure you mix in that 2 tablespoons of flour right before you put it in the pie shell. Since the apples will release moisture while sitting, you might want to stir the mixture right before you put it into the bottom crust just to make sure everything is coated well before you top it.
Nutritional Estimate for Homemade Apple Pie
Look, I am a cook, not a scientist, so I have to give you this disclaimer right up front: these numbers are just an educated guess based on standard ingredient calculations for one slice of this homemade apple pie. Since we all use different brands of butter or slightly different amounts of sugar depending on how sweet our apples are, your actual nutrition facts will vary!
But, for reference, here is what you can generally expect from one serving of this truly comforting, rich dessert:
- Serving Size: 1 slice
- Calories: 450
- Sugar: 35g
- Sodium: 250mg
- Fat: 25g
- Saturated Fat: 15g
- Unsaturated Fat: 10g
- Trans Fat: 0g
- Carbohydrates: 58g
- Fiber: 3g
- Protein: 5g
- Cholesterol: 60mg
It’s a delicious, rich slice, so that fat and sugar content reflects that beautiful all-butter crust and the sweet filling! It tastes like a holiday, and sometimes, that’s worth every bit!
Share Your Best Homemade Apple Pie Experience
Whew! We did it! We conquered the classic homemade apple pie together. Now that you’ve pulled that golden, bubbly beauty out of the oven (and survived the cooling wait—the hardest part!), I seriously want to know how it went for you.
Did the crust turn out as flaky as you dreamed? Did the cinnamon and nutmeg fill your kitchen with that amazing aroma I talked about? Don’t keep all the success to yourself!
Please jump down to the comments section below and leave me a rating. Just five stars tells me this recipe is worth sharing widely! And if you took a picture of your gorgeous, crimped edges or that perfect slice, tag me on social media! Seeing your success with these achievable, traditional recipes is honestly why I do all this work. I love celebrating your wins.
If you want another incredibly satisfying, easy-to-handle bake that’s just as comforting, you absolutely have to try my Magic Cookie Bars next! Happy baking, friends!
PrintClassic Homemade Apple Pie with Ultimate Flaky All-Butter Crust

Make the best homemade apple pie from scratch using this classic, easy recipe. It features a tender, flaky double crust and a sweet, cinnamon-spiced apple filling perfect for any gathering.
- Prep Time: 45 min
- Cook Time: 70 min
- Total Time: 185 min
- Yield: 8 servings 1x
- Category: Dessert
- Method: Baking
- Cuisine: American
- Diet: Vegetarian
Ingredients
- 2 1/2 cups all-purpose flour
- 1 teaspoon salt
- 1 cup (2 sticks) unsalted butter, very cold and cubed
- 1/2 cup ice water, plus more if needed
- 6 large Granny Smith apples, peeled, cored, and sliced 1/4 inch thick
- 6 large Honeycrisp apples, peeled, cored, and sliced 1/4 inch thick
- 3/4 cup granulated sugar
- 1/4 cup packed light brown sugar
- 1 teaspoon ground cinnamon
- 1/4 teaspoon ground nutmeg
- 1/8 teaspoon ground allspice
- 2 tablespoons all-purpose flour (for filling)
- 1 tablespoon lemon juice
- 1 large egg, beaten with 1 teaspoon water (for egg wash)
- 1 tablespoon coarse sugar (for sprinkling)
Instructions
- Prepare the Pie Dough: In a large bowl, whisk together the 2 1/2 cups flour and 1 teaspoon salt. Cut in the cold, cubed butter using a pastry blender or your fingertips until the mixture resembles coarse crumbs with some pea-sized pieces of butter remaining.
- Gradually add the ice water, one tablespoon at a time, mixing until the dough just comes together. Do not overmix. Divide the dough in half, form each half into a disk, wrap tightly in plastic wrap, and chill for at least 2 hours.
- Prepare the Filling: In a very large bowl, combine the sliced apples, granulated sugar, brown sugar, cinnamon, nutmeg, allspice, 2 tablespoons flour, and lemon juice. Toss gently until the apples are evenly coated. Set aside while you roll out the bottom crust.
- Assemble the Bottom Crust: On a lightly floured surface, roll out one disk of dough into a 12-inch circle. Carefully transfer the dough to a 9-inch pie plate. Trim the edges, leaving a 1-inch overhang. Chill the pie plate while you prepare the top crust.
- Assemble the Top Crust: Roll out the second disk of dough. You can cut vents into the top or create a lattice design. Place the top crust over the filling. Trim the edges, leaving a 1-inch overhang. Crimp the top and bottom edges together to seal. Brush the top crust with the egg wash and sprinkle evenly with coarse sugar.
- Bake the Pie: Preheat your oven to 425 degrees Fahrenheit. Place the pie on a baking sheet (to catch drips). Bake for 15 minutes at 425°F. Then, reduce the oven temperature to 375 degrees Fahrenheit and continue baking for 45 to 55 minutes, or until the crust is golden brown and the filling is bubbly. If the edges brown too quickly, cover them loosely with aluminum foil.
- Cool: Let the pie cool completely on a wire rack for at least 3 to 4 hours before slicing. This allows the filling to set properly.
Notes
- For the flakiest crust, keep all butter and water extremely cold. Work quickly when mixing the dough.
- If you prefer a thicker filling, increase the filling flour to 3 tablespoons.
- Use a mix of tart and sweet apples, like Granny Smith and Honeycrisp, for the best flavor balance.
Nutrition
- Serving Size: 1 slice
- Calories: 450
- Sugar: 35g
- Sodium: 250mg
- Fat: 25g
- Saturated Fat: 15g
- Unsaturated Fat: 10g
- Trans Fat: 0g
- Carbohydrates: 58g
- Fiber: 3g
- Protein: 5g
- Cholesterol: 60mg