


When life feels like it’s spinning too fast, there’s nothing quite like pulling a perfect, deeply scented pie out of the oven. I know that feeling—I’m Felix Hayes, and my world used to be 100% corporate deadlines, leaving me craving that deep comfort of home baking but never quite finding the time. That’s exactly why I obsessed over creating this triple berry pie recipe. Forget everything you ever worried about; this version is foolproof. I promise you an unbelievably flaky, buttery crust and, here’s the important part, a filling that sets up perfectly so you actually get clean slices. It’s the best of my family’s tradition meeting my modern need for efficiency. If you loved that work, you’ll definitely want to check out my strawberry rhubarb pie—it uses similar tricks!
- Why This Foolproof Triple Berry Pie Recipe Works
- Gathering Ingredients for Your Triple Berry Pie
- How to Prepare the Buttery Pie Dough for Your Triple Berry Pie
- Making the Sweet Tart Fruit Pie Filling
- Assembling Your Triple Berry Pie: Crust and Topping Options
- Baking and Cooling: The Final Steps for Homemade Triple Berry Pie
- Storage and Serving Suggestions for Your Triple Berry Pie
- Frequently Asked Questions About Making a Triple Berry Pie
- Estimated Nutritional Data for This American Classic Pie
- Estimated Nutritional Data for This American Classic Pie
Why This Foolproof Triple Berry Pie Recipe Works
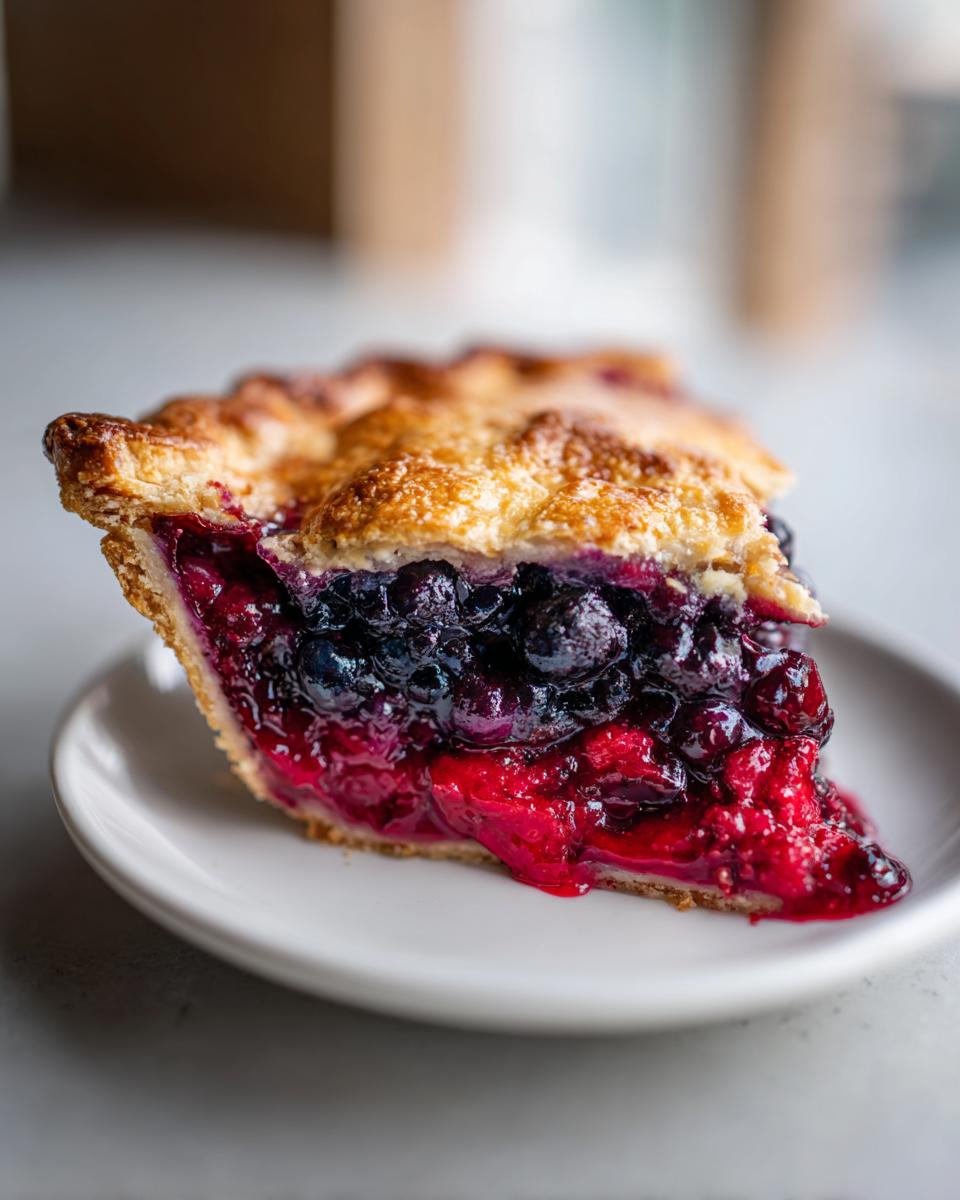
It’s easy to throw berries and sugar into a crust, but that’s how you end up with a soupy mess at the bottom of your plate! I developed this triple berry pie method to eliminate those baking anxieties. It’s all about controlling moisture and structure, which gives you that perfect, bakery-quality slice every single time. You can trust this recipe, whether it’s summer and the berries are bursting off the vine or the middle of winter and we’re using frozen fruit. If you want to see another berry favorite, I have a great post on my blackberry pie with a flaky lattice crust!
The Secret to a No Runny Pie Filling
Here’s the real game-changer that solves soupy pie syndrome: cornstarch, and we use it generously! For this triple berry pie, the cornstarch is key to binding all those lovely berry juices as they heat up. Once it cools down, those juices turn into a glorious, thick glaze that holds the fruit beautifully. No more sliding filling when you cut into your slice, I promise!
Achieving the Perfect Flaky Pie Crust Tutorial
A dessert this great deserves an amazing jacket. The key to my unbelievably buttery pie dough recipe is temperature control. Think ice cold! You absolutely must keep that butter frigid and work the dough as little as possible. The butter chunks don’t dissolve; they create tiny steam pockets while baking. Make sure you follow my chilling rule—that one hour in the fridge isn’t optional, it’s absolutely necessary!
Gathering Ingredients for Your Triple Berry Pie
Okay, let’s talk about what you need to make this magic happen! When you’re aiming for the Best Triple Berry Pie Recipe, every ingredient needs to pull its weight. I’ve broken down the list so you can pull everything out before you even start whisking the flour. Having everything ready—what we call ‘mise en place’—is half the battle when you’re busy, trust me on that one!
- You’ll start with 2 1/2 cups of all-purpose flour and just 1 teaspoon of salt for the dough.
- The secret to that flaky crust? 1 cup of unsalted butter, which must be very cold and cubed into little pieces. Remember, cold is king here!
- Ice water is non-negotiable for bringing that dough together; grab 1/2 cup, plus maybe a tiny bit more if your kitchen is warm.
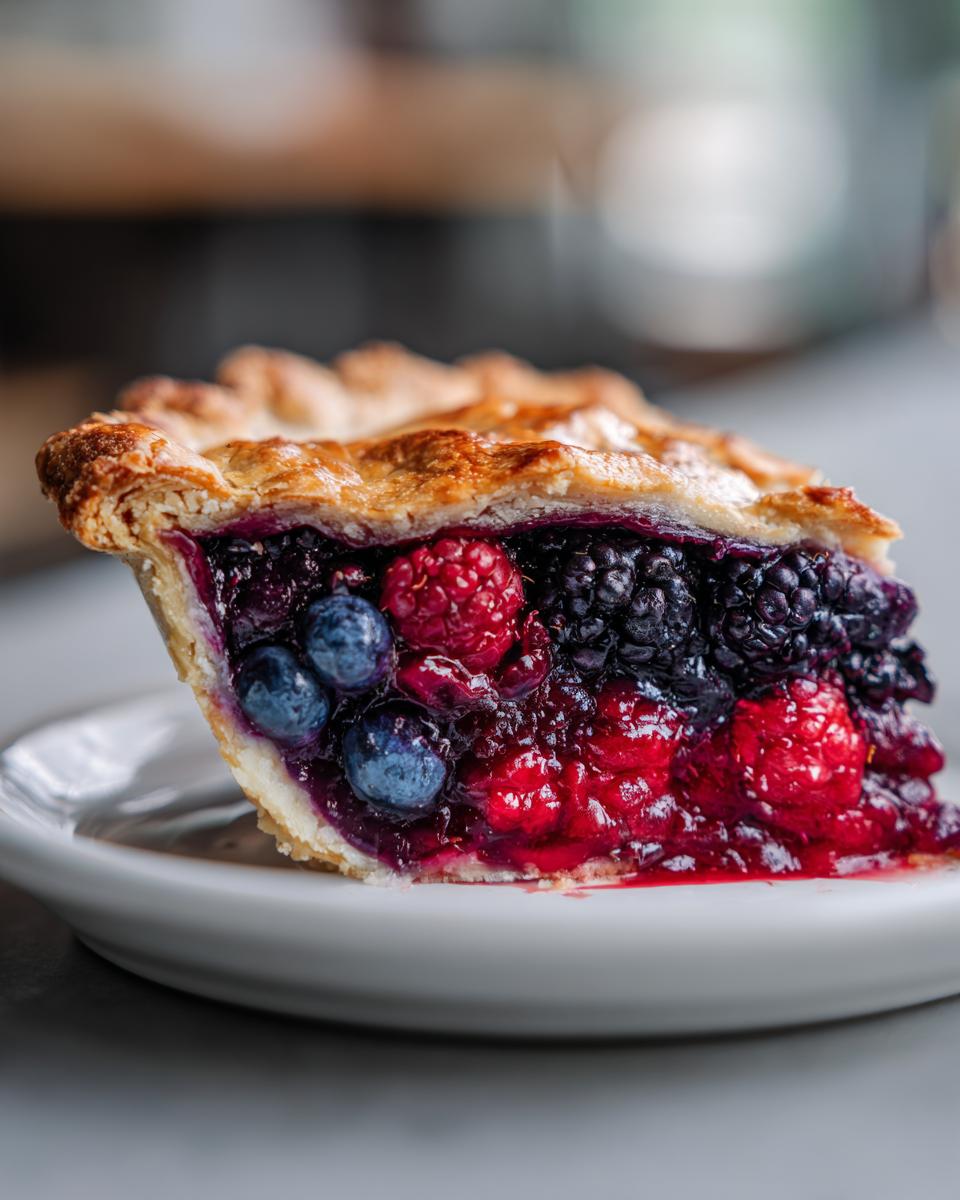
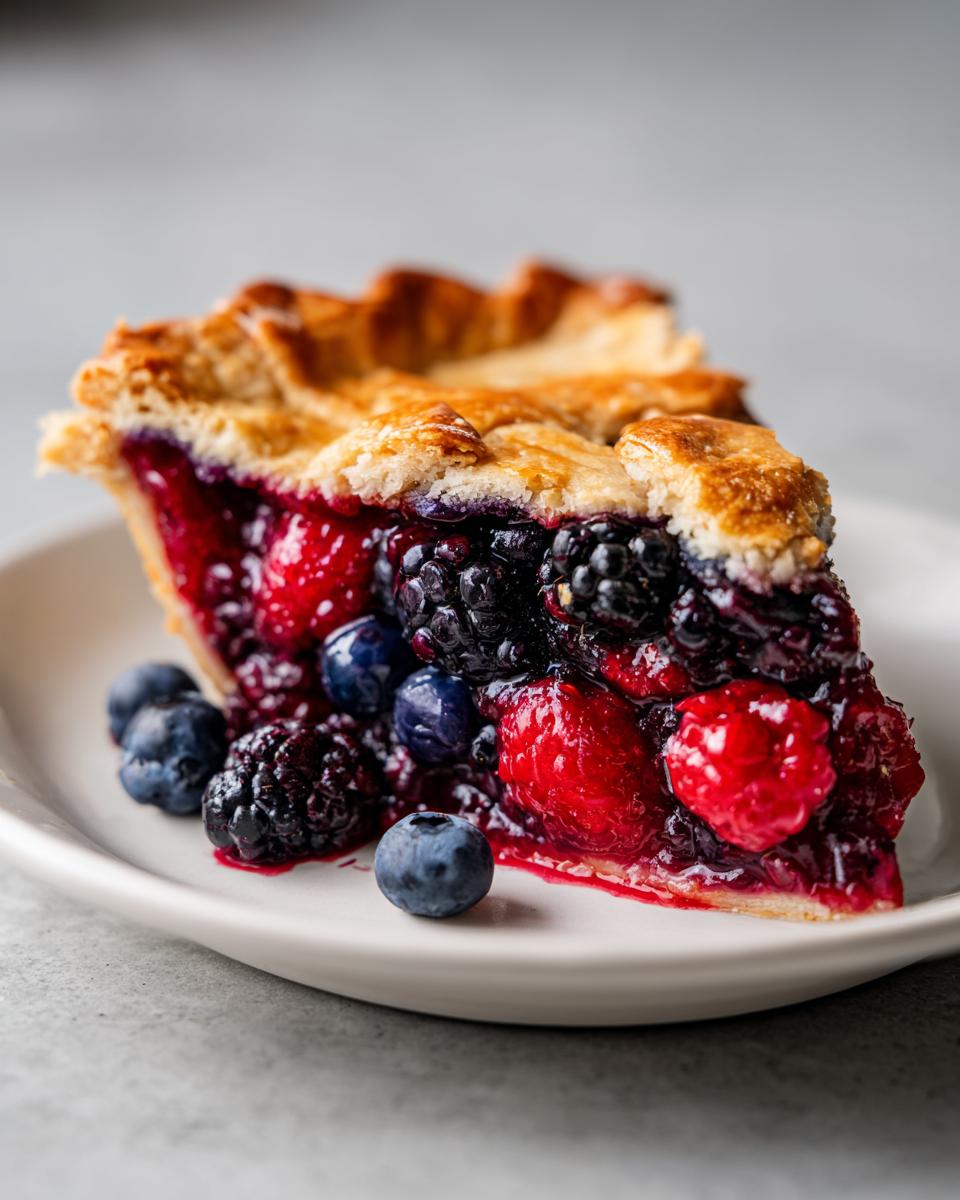
- For the fruit, we need 6 cups of mixed berries—your blackberries, blueberries, and raspberries all swimming together.
- Sugar-wise, go for 1 1/2 cups of granulated sugar to balance that lovely tartness.
- The structure-builder: 1/4 cup of cornstarch. This is your main defense against a watery pie!
- Don’t forget 1 tablespoon of lemon juice and 1 teaspoon of vanilla extract for depth of flavor.
- Finally, for the finishing touches, you need 1 large egg for the wash, and 1 tablespoon of coarse sugar for a little crunch on top.
If you want to perfect other pastry work, check out my flaky buttermilk biscuit recipe. It uses similar techniques for getting that amazing texture!
Ingredient Notes and Substitutions for Triple Berry Pie
This is where you can breathe a sigh of relief! You don’t need a perfect summer day to tackle this. You can absolutely use frozen berries instead of fresh ones for your Homemade Triple Berry Pie. Frozen are often picked at peak ripeness anyway!
Now, if you go the frozen route—and I want you to listen closely here—you must add an extra teaspoon of cornstarch to that berry mixture. Because frozen berries are going to release more liquid as they thaw during baking, we need that extra insurance for our no runny pie filling secret. Don’t thaw them first; just toss them into the sugar and starches while they are still icy!
How to Prepare the Buttery Pie Dough for Your Triple Berry Pie
Alright, this is where we lay the foundation for that incredibly flaky crust. The goal of this step is to keep things icy cold and avoid turning that butter into mush, which is the exact opposite of what we want for a great buttery pie dough recipe. So, grab your biggest bowl!
First things first: whisk the flour and the salt together. You want these dry components totally married before the fat even comes near them. Now, introduce the butter. Remember, this has to be very cold and cubed up. I use my pastry blender—you can use your fingers if you work super fast—to cut that butter right into the flour mixture.
Don’t overwork it! We are looking for a texture that resembles coarse crumbs, like you have some gravel mixed in with the sand. But don’t whisk it all away! You need some pieces of butter to still be visible, specifically about the size of small peas. Those pea-sized chunks are what turn into steam pockets when they hit the oven, giving you that perfect lift and flakiness in your final triple berry pie crust.
Next, the ice water. Add it slowly, maybe one tablespoon at a time, mixing gently until the dough just barely holds itself together when you squeeze a handful. Seriously, stop when it just crumbles less. You don’t want a smooth ball of dough yet! Divide that shaggy mass into two equal halves. Flatten each half into a solid disk—don’t knead it, just press it into shape—wrap it up tight in plastic wrap, and tuck it into the fridge. It needs a minimum of one hour of chilling time. Don’t rush this step; that mandatory chill sets the gluten and firms up the cold butter, guaranteeing success later on. If you want to see how I use cold butter for other things, take a peek at my easy brioche bread recipe, though we treat the dough much more gently here!
Making the Sweet Tart Fruit Pie Filling
This is the fun part, where the colors start to shine through! Once our pie dough is chilling out in the fridge, we turn our attention to making one incredible sweet tart fruit pie filling. You want flavor, right? We get that from mixing up the three berries, but we don’t want them turning into mush before they even hit the oven. That’s why my instruction says to be gentle!
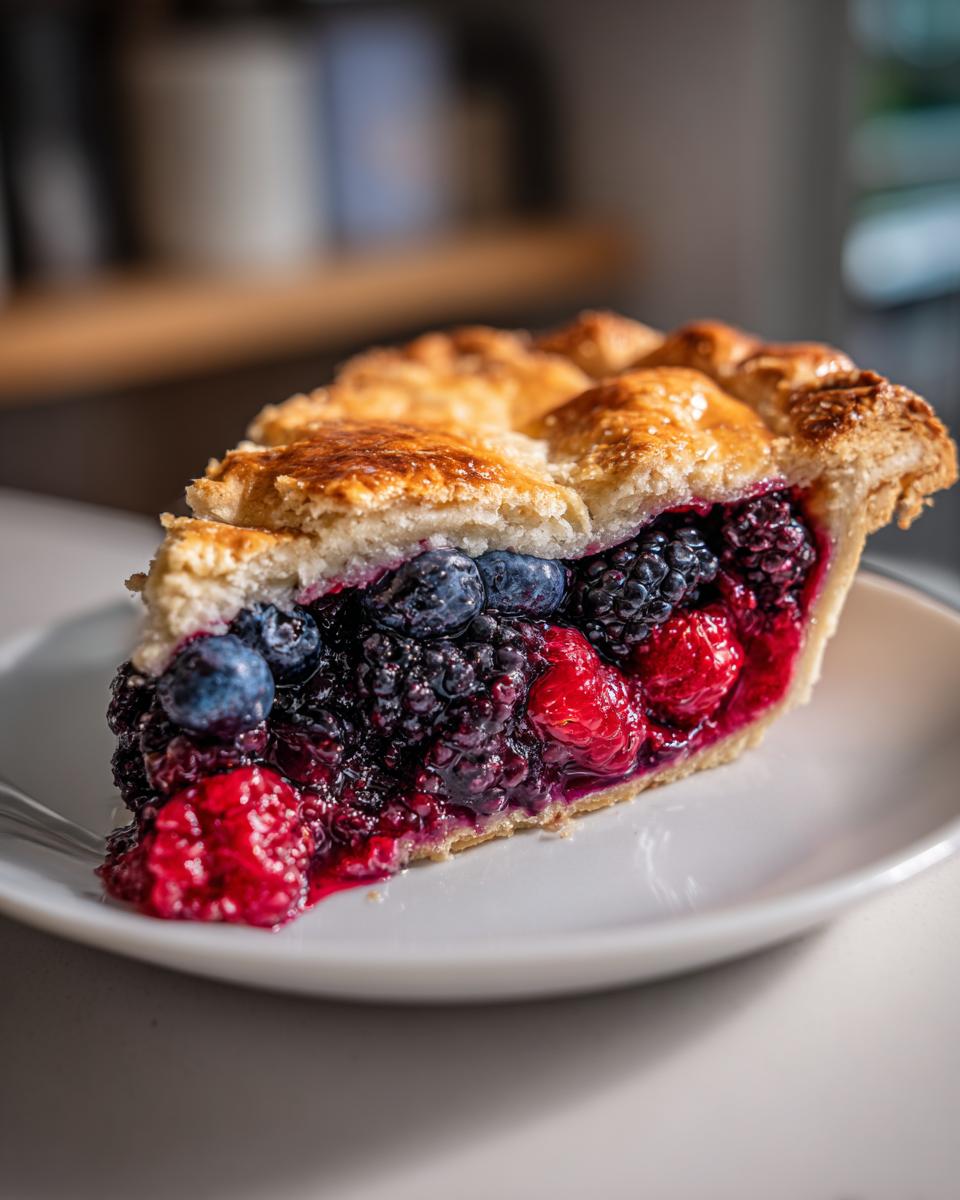
In a separate bowl—make sure it’s big enough to move things around without squeezing too hard—gently combine all 6 cups of your wonderful mixed berries. Blackberries, blueberries, raspberries, you name it. Don’t stir them like you’re scrambling eggs!
Now, we add the dry stuff that stops this whole operation from turning into soup. Pour in that 1 1/2 cups of granulated sugar—it helps draw out the juices a bit, which is what we want before baking. Then, add your secret weapon, the 1/4 cup of cornstarch. Make sure you get all those dry bits evenly distributed around the fruit so there aren’t any pockets of straight starch or plain sugar hiding out.
Finish this little bowl of magic with your 1 tablespoon of bright lemon juice (that really wakes up the berries!) and 1 teaspoon of vanilla extract. Now, using a big rubber spatula, gently fold everything together. I mean it, fold! You want the berries coated evenly, but you still want those berries to look mostly whole. This step is crucial for readers searching for the best way for how to make berry pie filling that holds its shape.
Once everything is coated and looks pretty, just set the bowl aside while you deal with rolling out that bottom crust. It’s okay if it sits for a little while—that short rest lets the sugar start working on those juices! If you want to see another filling I love, check out my stovetop apple pie filling sometime; it’s fantastic for fall!
Assembling Your Triple Berry Pie: Crust and Topping Options
Time to put the structure together! We’ve got the chilled dough hiding out, and the gorgeous, starchy filling waiting patiently. If anything is going to save your triple berry pie from being runny, it’s following these assembly steps precisely. First up, we need to secure that bottom crust. Go ahead and dust your counter lightly with flour. Take one of those chilled dough disks—it should feel firm but workable—and roll it out into about a 12-inch circle. Remember, we always roll slightly larger than the pie plate means to!
Gently drape that rolled-out dough over your 9-inch pie plate. Don’t stretch it! Let gravity help you ease it into the curves. Trim the edges so you have about an inch of dough hanging over the rim—that’s your working margin. Pop the whole assembled plate back into the fridge while you prepare your topping. Keeping that bottom crust cold ensures it bakes up flaky, not tough, right against the filling.
Now, the moment of decision: what’s crowning this beautiful homemade triple berry pie? You have options, honey! You can go the classic route with an intricate triple berry pie with lattice top, or you can opt for the super easy, delightfully crunchy triple berry pie with crumb topping. If you’re going for the crumb topping, you’ll just mix up the specified streusel ingredients (flour, brown sugar, and cold butter) until they look like coarse sand, give the berries a quick toss, and skip the top rolled dough entirely. Easy peasy!
If you decide to use a full top crust or a lattice, pour that wonderful, thick berry filling right into the chilled bottom crust. It should look full, but don’t pile it so high that it touches the top layer before baking! If you’re using a full sheet of dough, now is the time to cut vents into the top crust—at least four slits right in the middle. These are literally the pie’s breathing holes; steam has to escape, or you end up with a soggy mess underneath all that golden crust. Once sealed, brush the top with that beaten egg wash and sprinkle it with coarse sugar for that beautiful sparkle we all love!
This pie definitely brings me back to wanting to bake everything, kind of like when I made my famous cinnamon roll apple pie recipe during the holidays! If you just love beautiful pastry work, check out other baker insights over at this external resource.
Tips for the Triple Berry Pie with Lattice Top
If you’re going for the lattice—and trust me, it really shows off those gorgeous berries inside—preparation is everything. Cut your second sheet of dough into even strips, maybe about 3/4 inch wide. Don’t worry if they aren’t mathematically perfect; that handmade look is part of the charm of this American classic pie!
Lay half your strips vertically across the filling, spaced evenly apart. Now here’s the weaving part: Fold back every *other* strip horizontally halfway. Lay one of your new strips across the exposed vertical strips, and then unfold the ones you tucked back. Then, fold back the strips you *didn’t* fold back the first time, lay down your second horizontal strip, and unfold them. Keep repeating that over-and-under motion until the entire surface is covered. It sounds complicated, but honestly, after the first two rows, you’ll get into a rhythm. This weaving technique ensures the strips are locked together, so they don’t shift or shrink unevenly while baking.
Crucially, make sure you crimp those lattice edges right into the bottom crust overhang really well. Use your thumb and forefinger to press them together firmly to seal in all those sweet juices. And those little vents you might have added while weaving (or if you just cut vents into a full top crust)? Those are your escape routes! They allow the steam to vent out slowly, preventing the filling from bubbling up violently and pushing your beautiful lattice apart. That bit of engineering is how you guarantee that sliceable texture we are aiming for!
Baking and Cooling: The Final Steps for Homemade Triple Berry Pie
Okay, the assembly is done! Your beautiful triple berry pie is ready for the heat, but we need to be smart about how we bake it so that crust turns golden and the filling actually sets. Don’t just throw it on the rack! First thing: get your oven cranked up to 400 degrees F. And just as importantly, place a baking sheet inside the oven while it preheats. This isn’t just for show; the hot sheet helps drive heat up into the bottom crust quickly, which is a huge step toward avoiding soggy bottoms!
Carefully place your pie onto that hot baking sheet. We start baking hard for the first 20 minutes at 400 degrees F. That blast of high heat sets the structure of your flaky crust immediately. Once it’s set, you need to quickly turn the oven temperature down to 375 degrees F (190 degrees C). If you skip this drop in temperature, you might burn the edges before the middle is done.
Now, keep baking for another 35 to 45 minutes at the lower temperature. How do you know it’s done? You look for two things: the crust should be a deep, satisfying golden brown, and most importantly, you should see the berry filling bubbling thickly right up through those vents or slits you cut. If you see juices boiling vigorously and they look thick—like lava, not water—you’re golden. A little trick I use, based on what I learned watching my Aunt Carol, is covering the very edges of the crust with foil strips if they start turning too dark before the center is cooked. Stop the foil wrapping once the top is perfectly brown!
But now comes the hardest part. The true acid test for anyone making a perfect triple berry pie, or any fruit pie for that matter: cooling! You absolutely, positively must let this pie cool on a wire rack for a minimum of four hours. I know, I know, the smell is intoxicating, and cutting into that warm pie seems like the dream, but trust me! That cornstarch we added doesn’t fully set the juices until the pie comes down to near room temperature. If you slice it early, all that beautiful tart fruit juice is going to run out, and you’ll be left with a soupy mess. Four hours! It’s non-negotiable for a clean slice. If you’re looking for other methods that require patience, you might appreciate my tips on achieving the best results in my creamy egg salad recipe.
If you peeked at other bakers who nail this pie, you’ll see they are obsessed with setting time too. You can see how Carla Mae Peterson emphasizes the full cool-down over at her site. She knows the secret!
Storage and Serving Suggestions for Your Triple Berry Pie
The patience you showed letting that triple berry pie cool down pays off when it comes to storage—and hopefully, you have leftovers because this stuff disappears fast! Once the pie is completely set after those four hours of cooling, you have a couple of options.
For short-term storage, say if you plan on eating it within the next day or two, leaving it on the counter loosely covered is usually fine. Since the filling is now set and has a high sugar/acid ratio, it’s reasonably stable at cooler room temperature. However, if your kitchen runs warm, or if you want to keep it fresh for up to four days, I always recommend wrapping the pie plate tightly in plastic wrap and popping it into the refrigerator. That chill solidifies the filling texture even more, which is dreamy if you like your fruit pie firm!
When it comes to reheating, I usually skip it unless I absolutely have to. Why? Because reheating can sometimes make that beautiful crust a little less flaky and might actually soften the filling enough to make it weep a little. But if you just can’t stand a cold slice, try a quick, low-temperature reheat. Wrap a slice loosely in foil and warm it in a 300-degree oven for about 10 to 15 minutes. You want it warm through, not bubbling hot.
Serving suggestions? Oh, this is the best part! Because we nailed that sweet-tart balance in the filling, you don’t need a lot of fuss. A giant scoop of good quality vanilla bean ice cream is the classic, non-negotiable companion. The cold ice cream melting slowly into the room-temperature berry juices? Perfection. If you’re feeling a little fancier, a dollop of freshly whipped cream is wonderful, especially if you whip a little lemon zest into the cream first. It just brightens up those mixed berry flavors instantly.
If you’re looking for other breakfast-to-dessert ideas that are super simple, you can see how I use simple ingredients to elevate classics in my classic French toast recipe. Enjoy every slice of your hard work!
Frequently Asked Questions About Making a Triple Berry Pie
I figured some of you might still have a few little questions floating around after tackling this incredible triple berry pie. No stress! Baking is all about trial and error, but I’m here to help you skip the errors part so you just get straight to deliciousness. Ask away!
Can I use only two types of berries instead of three?
Absolutely! This recipe is adaptable, that’s the joy of making a homemade triple berry pie. If you only have blueberries and raspberries on hand, go for it! The ratio isn’t set in stone. Just use your best judgment on sweetness. If you’re using a lot of tart raspberries, you might want to bump the sugar up by a tablespoon or two. If you’re using very sweet blueberries, maybe cut the sugar down by a tablespoon. Taste your berries raw before mixing them with the starch and sugar, and trust your flavor instincts!
What is the best way to prevent the bottom crust from getting soggy?
This is such a common problem when making any fruit pie, especially one loaded with juicy berries! We already covered the importance of chilling the bottom crust, which helps a lot. But here is my favorite trick, stolen from my Aunt Rosa: before you pour in the berry filling, take that beaten egg white you saved from the egg wash (or just whisk a separate egg white) and brush a very thin coating all over the inside surface of the chilled bottom crust. It cooks up into a tiny, invisible moisture barrier! Alternatively, make sure that pie plate is absolutely bone-chilling cold when the filling goes in. That immediate cold shock helps set the bottom crust quickly.
How long does this **Best Triple Berry Pie Recipe** last?
If you manage not to eat the entire American classic pie in one sitting, it stores surprisingly well. Because we used that cornstarch correctly, the filling stays mostly set. You can keep leftovers, tightly covered with plastic wrap or foil, on the counter for about one full day. If you want it to last longer—up to four days—definitely cover it well and keep it in the refrigerator. Honestly, it tastes best on day one, but day two, warm slab with a scoop of cream cheese ice cream? Divine. If you’re looking for other reliable resources, I always check out Tastes Better From Scratch when I need inspiration for my triple berry pie!
Estimated Nutritional Data for This American Classic Pie
I always feel a little funny putting numbers on something that brings so much homemade joy, but for those of you tracking things, here are the estimates based on the ingredients list for one generous slice of this sweet tart fruit pie.
- Serving Size: 1 slice
- Calories: 410
- Sugar: 35g (Mostly natural sugar from the fruit!)
- Fat: 22g
- Carbohydrates: 52g
- Protein: 4g
Just remember, these figures are estimates, of course! They can change a bit depending on the exact sweetness of your berries or if you use a crumb topping instead of a full crust. If you want more details on how I tackle other simple holiday favorites, take a look at my tips for easy white chocolate fudge. Now go enjoy a piece—you earned it!
Estimated Nutritional Data for This American Classic Pie
I always feel a little funny putting numbers on something that brings so much homemade joy, but for those of you tracking things, here are the estimates based on the ingredients list for one generous slice of this sweet tart fruit pie.
- Serving Size: 1 slice
- Calories: 410
- Sugar: 35g (Mostly natural sugar from the fruit!)
- Fat: 22g
- Carbohydrates: 52g
- Protein: 4g
Just remember, these figures are estimates, of course! They can change a bit depending on the exact sweetness of your berries or if you use a crumb topping instead of a full crust. If you want more details on how I tackle other simple holiday favorites, take a look at my tips for moist spice cake recipe. Now go enjoy a piece—you earned it!
PrintFoolproof Triple Berry Pie: Secret to Flaky Crust and Perfectly Set Filling

This recipe delivers a perfectly set, sliceable triple berry pie using blackberries, blueberries, and raspberries. You achieve an unbelievably flaky, buttery pie crust and a sweet-tart filling every time, whether you use fresh or frozen berries.
- Prep Time: 45 min
- Cook Time: 65 min
- Total Time: 110 min
- Yield: 8 servings 1x
- Category: Dessert
- Method: Baking
- Cuisine: American Classic Pie
- Diet: Vegetarian
Ingredients
- 2 1/2 cups all-purpose flour
- 1 teaspoon salt
- 1 cup (2 sticks) unsalted butter, very cold and cubed
- 1/2 cup ice water, plus more if needed
- 6 cups mixed berries (blackberries, blueberries, raspberries), fresh or frozen
- 1 1/2 cups granulated sugar
- 1/4 cup cornstarch (the secret to no runny pie filling)
- 1 tablespoon lemon juice
- 1 teaspoon vanilla extract
- 1 large egg, beaten (for egg wash)
- 1 tablespoon coarse sugar (for topping)
Instructions
- Prepare the Pie Dough: In a large bowl, whisk together the flour and salt. Cut in the cold butter using a pastry blender or your fingers until the mixture resembles coarse crumbs with some pea-sized pieces of butter remaining. Gradually add the ice water, one tablespoon at a time, mixing until the dough just comes together. Do not overmix. Divide the dough in half, form each half into a disk, wrap in plastic, and chill for at least 1 hour.
- Prepare the Filling: In a separate bowl, gently combine the mixed berries, granulated sugar, cornstarch, lemon juice, and vanilla extract. Toss until the berries are evenly coated. Set aside while you roll out the bottom crust.
- Assemble the Bottom Crust: On a lightly floured surface, roll out one disk of dough into a 12-inch circle. Carefully transfer the dough to a 9-inch pie plate. Trim the edges, leaving a 1-inch overhang. Return the pie plate to the refrigerator.
- Fill and Top the Pie: Pour the berry filling into the chilled bottom crust. Roll out the second disk of dough. You can cut vents, create a lattice top, or use a full top crust. If using a full crust, cut several slits in the top to allow steam to escape. Crimp the edges of the top and bottom crusts together to seal.
- Apply Egg Wash: Brush the top crust lightly with the beaten egg and sprinkle with coarse sugar.
- Bake the Pie: Preheat your oven to 400 degrees F (200 degrees C). Place the pie on a baking sheet (to catch drips). Bake for 20 minutes at 400 degrees F. Reduce the oven temperature to 375 degrees F (190 degrees C) and continue baking for another 35 to 45 minutes, or until the crust is golden brown and the filling is bubbling thickly. If the edges brown too quickly, cover them loosely with foil.
- Cool Completely: This step is critical for a perfectly set filling. Let the pie cool on a wire rack for at least 4 hours before slicing. This allows the cornstarch to fully set the juices.
Notes
- For a crumb topping instead of a top crust, prepare a streusel using 1 cup flour, 1/2 cup brown sugar, 1/2 cup cold butter (cubed), and 1/2 teaspoon cinnamon. Sprinkle evenly over the filling before baking.
- If you use frozen berries, do not thaw them first. Add them directly to the sugar mixture, but you may need to add an extra teaspoon of cornstarch to the filling.
- To ensure a flaky pie crust, keep all ingredients cold and avoid working the dough more than necessary.
Nutrition
- Serving Size: 1 slice
- Calories: 410
- Sugar: 35g
- Sodium: 250mg
- Fat: 22g
- Saturated Fat: 14g
- Unsaturated Fat: 8g
- Trans Fat: 0.5g
- Carbohydrates: 52g
- Fiber: 3g
- Protein: 4g
- Cholesterol: 55mg