

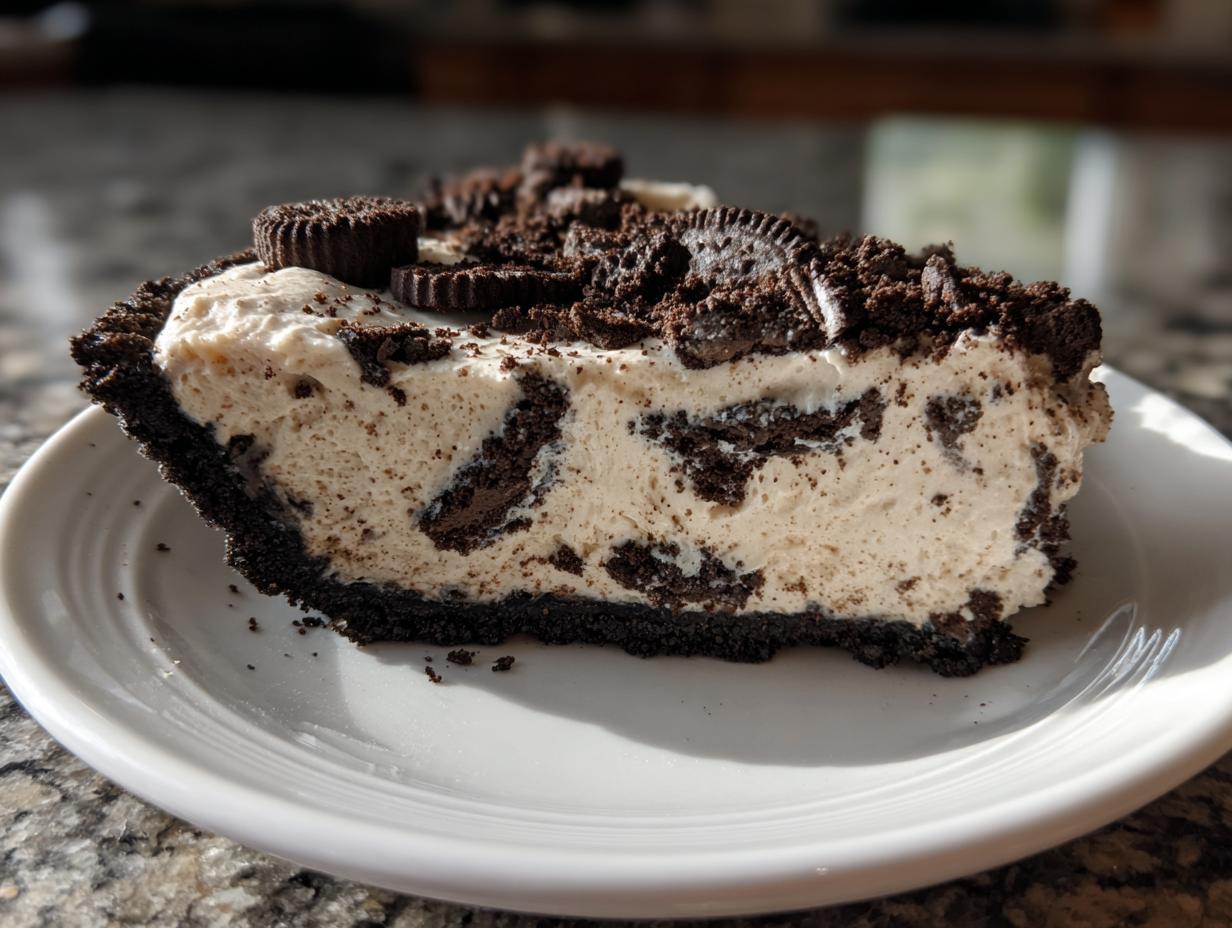
You know those days? The ones where you need a show-stopping dessert for a last-minute gathering, but the thought of turning on the oven feels like climbing a mountain? I live that life constantly! My marketing background taught me that sometimes you need maximum impact with minimum fuss. That’s why I rely on my Easy No-Bake Oreo Pie. This isn’t just some simple recipe; it’s the ultimate answer for anyone craving something rich, creamy, and completely decadent without any fuss. If you love layers of cookies and cream, you absolutely have to check out my take on the Ultimate No-Bake Oreo Dirt Cake later too! But for now, this pie is pure gold when time is short, and trust me, it’s always the first thing to disappear at any potluck I bring it to. You are going to fall in love with how simple it is!
- Why This No-Bake Oreo Pie Recipe Works for Busy Cooks
- Gathering Ingredients for Your Easy Oreo Pie
- Step-by-Step Instructions for the No-Bake Oreo Pie
- Tips for the Best Ever Oreo Pie Results
- Serving Suggestions for Your Chilled Dessert Ideas
- Storage and Reheating Instructions for Leftover Oreo Pie
- Frequently Asked Questions About No Bake Pies
- Nutritional Estimate for This Decadent Chocolate Treat
- Share Your Easy Oreo Pie Creations
Why This No-Bake Oreo Pie Recipe Works for Busy Cooks
I know that for most of us, weeknights are a sprint, not a marathon. That’s exactly why this Easy No-Bake Oreo Pie is an essential addition to your recipe rotation. It delivers on decadence without demanding hours in the kitchen or heating up the house. Forget complicated steps, because this falls squarely into the world of fantastic No Bake Desserts! It’s specifically designed for those moments when you need Last Minute Desserts that look like you spent all day on them. Seriously, you never have to turn on the oven for this one, which makes it my go-to for those hot summer nights—a true gem among Summer Desserts No Oven favorites.
Speed and Simplicity: The Core of This Oreo Pie
When I say fast, I mean it. We are looking at maybe 20 minutes of actual prep time, tops! You just crush cookies, mix, press, and chill. That’s it! There’s no tempering, no baking thermometer to watch, and no worrying about sunken centers. Because it’s so straightforward, this recipe is consistently reliable, and it always lands firmly in the “must-bring” category whenever I need Quick Party Food.
Achieving That Perfect Creamy Pie Filling
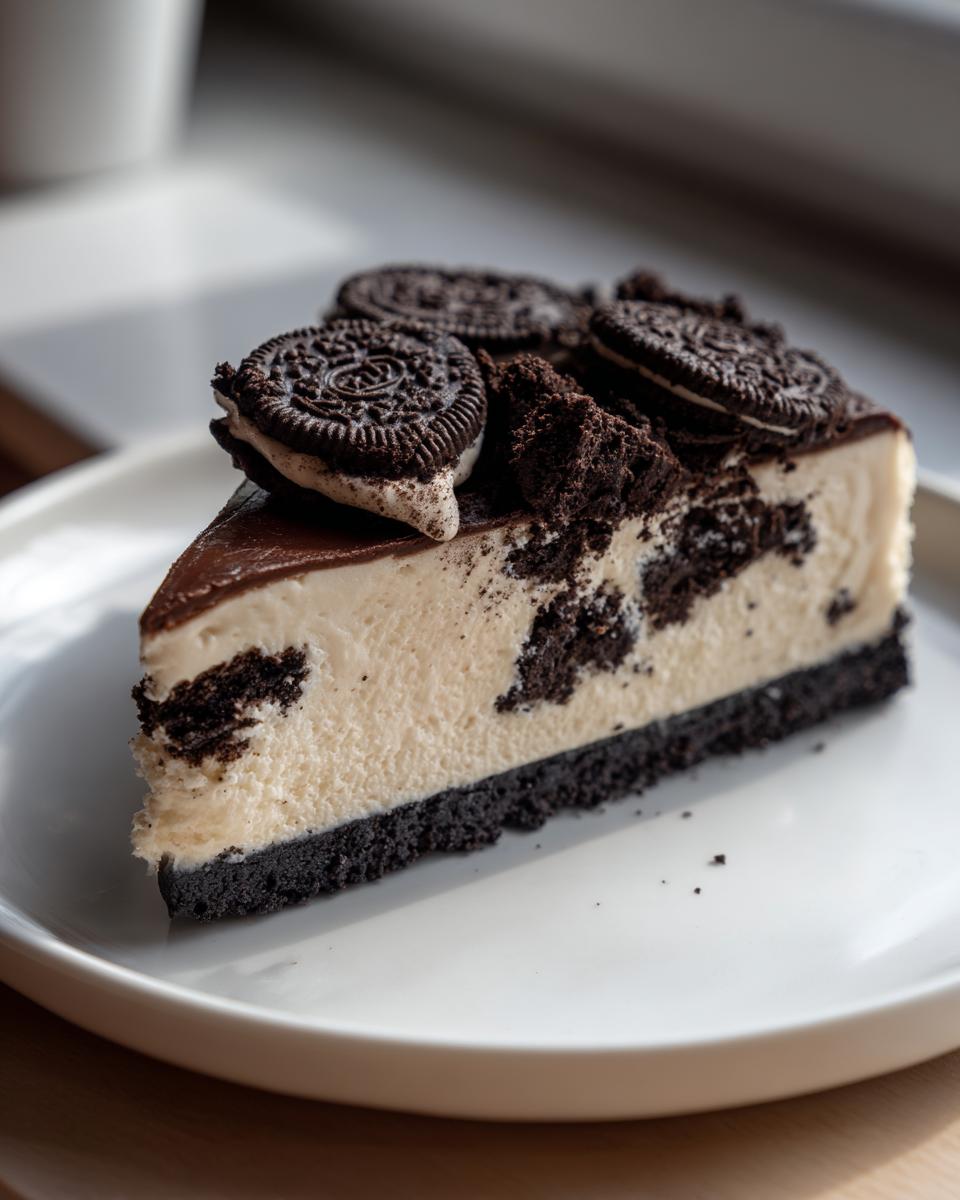
The texture is truly what sets this Oreo Pie apart from simple pudding mixes. We achieve that signature light, yet sturdy texture by properly beating the softened cream cheese and then gently folding in the light, airy whipped topping. This combination creates an amazing Creamy Pie Filling that sets up beautifully in the fridge. It’s that careful combination of ingredients that guarantees a mousse-like consistency every single time, which is far better than just mixing a box of instant pudding.
Gathering Ingredients for Your Easy Oreo Pie
Okay, let’s talk about what you need. Since this is such a simple recipe, there aren’t a million jars you have to hunt down in the pantry—which is a win in my book! But even with simple recipes, ingredient preparation matters. I’ve listed out exactly what you need below for this perfect Oreo Pie. Don’t stress too much if you don’t have a food processor, though; it just makes the crushing faster!
Notes on the Chocolate Cookie Crust Components
The crust is the foundation of all good pies, right? For this one, we’re sticking to the classic flavors that make this dessert so popular. You absolutely need the standard chocolate sandwich cookies—you know the ones! We’re using the whole cookie, filling and all, because that creamy center melts down and adds structure.
- 1 package (14.3 ounces) chocolate sandwich cookies (Oreos are perfect for that classic taste)
- 6 tablespoons unsalted butter, completely melted
Make sure that butter is fully melted, not just soft! If it’s not melted, it won’t properly coat all those crumbs, and your Chocolate Cookie Crust will end up crumbly instead of holding together when you slice it.
Key Elements for the Fluffy Oreo Pie Filling
This part is where the magic happens to create that luxurious, light texture. Pay close attention to the state of these two main items. They have to be exactly right!
- 1 package (8 ounces) cream cheese, making sure it is completely softened to room temperature
- 1 cup powdered sugar (sift it if you notice any lumps!)
- 1 teaspoon vanilla extract
- 1 container (8 ounces) frozen whipped topping, which you must thaw completely before starting
- 1 cup crushed chocolate sandwich cookies (you’ll crush these separately for texture)
The cream cheese needs to be pliable so it whips up smoothly—no lumps allowed! And seriously, the whipped topping needs to be thawed, but still chilled. If it’s too runny, you’ll end up with soup instead of a beautiful, Fluffy Dessert Recipes filling.
Step-by-Step Instructions for the No-Bake Oreo Pie
Alright, we have our ingredients ready to go, so let’s put this beauty together! Since we aren’t dealing with high heat, our focus is entirely on mixing the right texture and letting the cold do the heavy lifting. It moves fast, so have your 9-inch pie plate ready to go. Remember, every step contributes to that incredible texture, so be deliberate!
Preparing and Chilling the Chocolate Cookie Crust
First thing: grab all but one cup of those sandwich cookies and pulse them in your food processor until you have fine crumbs. Then, drizzle in that melted butter and pulse again until it all looks like damp, dark sand. This is crucial! Press that mixture firmly and evenly into the bottom and up the sides of your pie plate. Give it a good pat down all over. Pop that crust into the freezer right away—we need it nice and cold while we whip up the filling!
Mixing the Oreo Pie Filling to Perfection
Take your softened cream cheese, powdered sugar, and vanilla and beat them together with your hand mixer until everything is totally smooth. No lumps, please! Next, gently fold in those medium-sized chunks of your reserved cookies. Here’s the secret: now, gently fold in your thawed whipped topping. I mean *gently*. If you mix too hard here, you deflate all the air, and your filling won’t be light and fluffy like my Homemade Chocolate Pudding recipes!
Final Assembly and Setting the Oreo Pie
Once the filling is just combined, spoon all that glorious mixture evenly into your chilled crust. Smooth the top with a spatula so it looks nice when it sets. Now comes the waiting game—but don’t worry, it’s mostly hands-off! Cover the pie loosely and slide it into the refrigerator for a minimum of 4 hours. Better yet, let it chill overnight. Just before serving, sprinkle those final reserved cookie crumbles right on top. That sparkle makes a huge difference!
Tips for the Best Ever Oreo Pie Results
Even though this is a super simple dessert, there are just a few little tricks I’ve learned over the years of making this pie that elevate it from good to absolutely spectacular. Trust me, these small adjustments are what make the difference between a decent treat and a showstopper! Knowing how to tweak it for different preferences means this Oreo Pie can handle any party theme you throw at it.
Ingredient Swaps and Variations for Your Oreo Pie
Now, the base recipe is perfection, but sometimes I like to keep people guessing! If you find yourself with some extra chocolate pudding mix lying around, you can absolutely try incorporating that. The original notes mentioned this, but here’s how I do it: instead of using all the whipped topping, swap out about half of it (or about 4 oz) for a cup of *thick* chocolate pudding made according to the box directions. This gives the filling an extra dense, almost mousse-like quality. It’s fantastic!
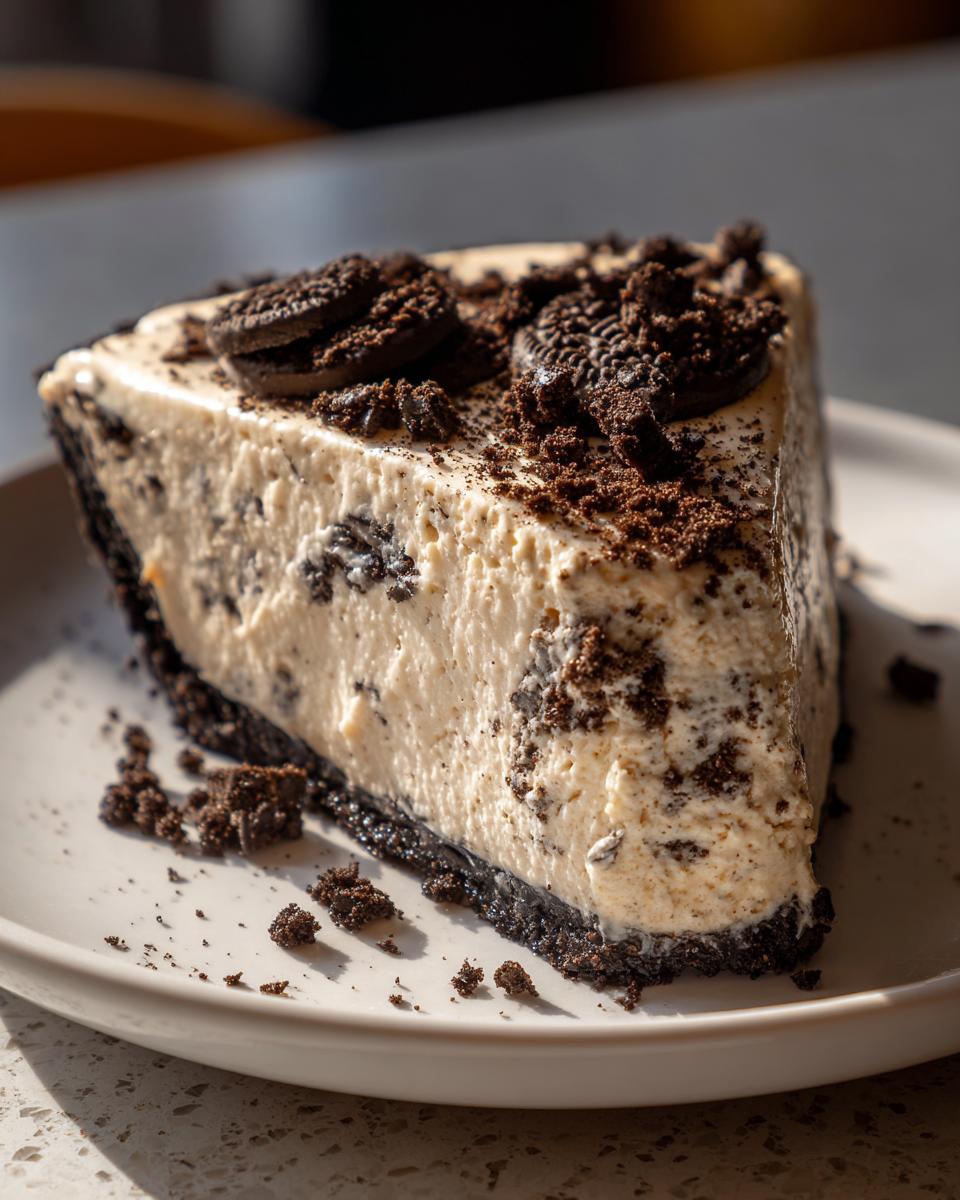
Also, if you are looking for something slightly tangier, which I love during the summer, try making an Oreo Cheesecake Pie variation. Just beat in about two ounces of softened cream cheese *with* the regular cream cheese base mixture, and maybe add a tiny squeeze of fresh lemon juice. That little bit of zest cuts through the richness wonderfully without dominating the cookie flavor.
Making This Oreo Pie Ahead of Time
This is perhaps the best part about this dessert: it loves being made early! Honestly, as one of the best Make Ahead Desserts I’ve ever created, you can totally assemble the entire thing a full day before you plan to serve it. In fact, I think it tastes even better the next day because the moisture from the filling has time to really settle into that buttery crust.
Just make sure it’s covered tightly with plastic wrap—I usually place a piece of plastic wrap directly touching the top surface of the pie before covering the whole thing securely. That stops that lovely filling from developing any kind of skin in the fridge overnight. When you pull it out, it’s perfectly chilled, firm, and ready to slice!
Serving Suggestions for Your Chilled Dessert Ideas
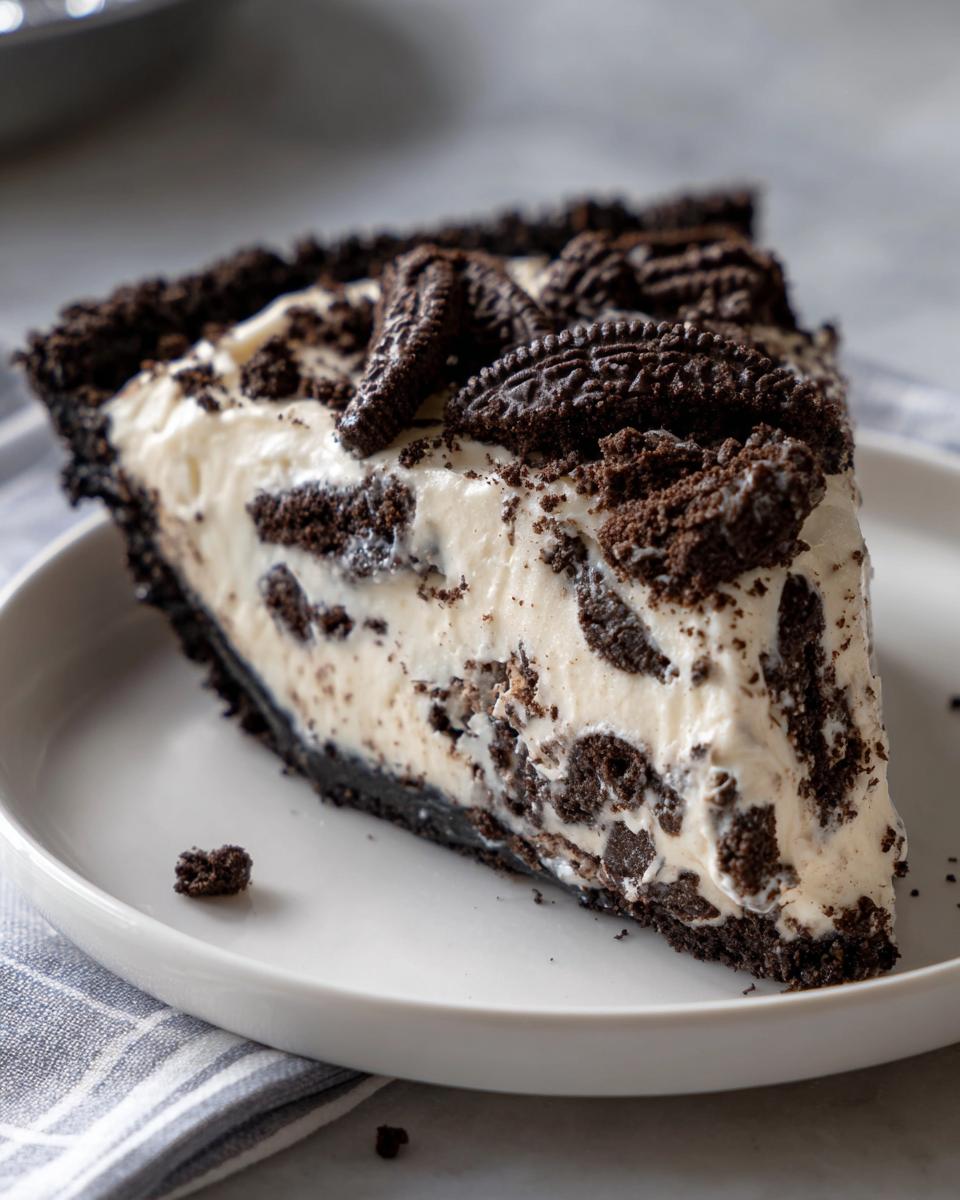
Since this beautiful Oreo Pie is already such a Crowd Pleasing Sweet, presentation is surprisingly easy. I love serving slices on small, chilled white plates—the contrast really makes the dark crust pop! If you’re serving it after a big meal, a tiny drizzle of raspberry sauce on the plate adds a lovely, unexpected tartness that cuts through the rich chocolate.
For an even more indulgent experience (especially with the kids!), a small dollop of slightly stabilized whipped cream on top of each slice just before serving is amazing. If you’re looking for another super easy win for your next gathering, you have to check out my recipe for Magic Cookie Bars next. But honestly, this pie is perfect all on its own!
Storage and Reheating Instructions for Leftover Oreo Pie
One of the great things about this no-bake pie is that it tastes even better as leftovers, provided you store it right! Since the filling relies on cream cheese and whipped topping to stay firm, we have to be strict about keeping it cold. You should always keep this Oreo Pie covered airtight in the refrigerator. I usually use a pie carrier or just plastic wrap pressed gently against the top surface to keep any fridge smells out.
It holds up beautifully for about three to four days, ready for any late-night snack attacks! Now, let’s talk about reheating—and this is important: Please, please, please do not even think about reheating this pie! Unlike a baked custard or brownie, heating this up will just melt that gorgeous, fluffy filling into a sweet puddle. This dessert is meant to be served cold and crisp, straight from the fridge. If you accidentally left a slice out for too long and it gets soft, just pop it back in the freezer for about 30 minutes to firm it back up before enjoying it chilled.
Frequently Asked Questions About No Bake Pies
When I put a new recipe out there, I always think about the questions that pop into my head when I’m reading one myself. Dealing with Simple Pie Recipes that don’t go into the oven leaves a few wrinkles to iron out, especially regarding texture and setting time. Let’s tackle the common concerns I hear all the time about keeping this Oreo Pie perfect!
Can I use a different type of cookie for the crust?
Oh, you certainly *can*, but I have to tell you, part of what makes this recipe so delicious is that rich, deep chocolate wafer crunch! That signature flavor fades if you swap it out. If you must, you could use graham crackers, but then you’re leaning more towards a classic cheesecake crust than the ultimate Oreo Pie experience. If you use graham crackers, you might need just a tiny bit more butter to help them hold together properly since they don’t have that sugary filling mixed in.
Why won’t my pie filling firm up?
This is usually one of two common snags, and both have to do with air. First, did you give it enough time? Four hours is the bare minimum, but if your fridge isn’t super cold, it might need longer. The other big culprit, especially when dealing with Cookies and Cream Recipes like this, is overmixing the whipped topping. When you fold in that thawed topping, if you stir too hard or too long, you knock all the fluffy air out! That air is what helps the cream cheese set up firm, so be patient when folding!
Is this considered an Icebox Dessert Recipe?
Absolutely! This fits the description perfectly. An Icebox Dessert Recipe simply means it’s a dessert that sets up completely within the cold environment of an icebox—which is just an old-fashioned word for your refrigerator! Because we rely solely on chilling time and the stabilizer effect of the cream cheese and whipped topping, this pie is the definition of an icebox treat. It’s totally designed to be pulled right out of the cold when you need something refreshing and quick!
Nutritional Estimate for This Decadent Chocolate Treat
Since this Oreo Pie is such an indulgent, crowd-pleasing sweet, I know some of you wonder what exactly you’re diving into! And hey, knowledge is power, even when it comes to dessert, right? I always want you to feel good about what you’re serving up, whether it’s for a holiday or just a Tuesday night indulgence.
I’ve pulled up the typical estimations based on the ingredients we used in the Master Recipe. Please remember this is just an estimate. The exact numbers can shift a little depending on the brand of chocolate sandwich cookies or the exact brand of whipped topping you end up using. This information is for reference, not a guarantee, but it gives you a good general idea of what a slice contains!
- Serving Size: 1 slice
- Calories: 420
- Sugar: 35g (Yes, it’s a treat, but that sugar helps it set!)
- Fat: 26g
- Saturated Fat: 15g
- Carbohydrates: 45g
- Protein: 4g
- Cholesterol: 55mg
See? It’s rich, it’s chocolatey, and it’s totally worth it! This is why we call it a decadent chocolate treat. It’s meant to be enjoyed in moderation, but gosh, is it satisfying when that craving hits!
Share Your Easy Oreo Pie Creations
Seriously, you’ve made it! You followed the steps, resisted the urge to sneak taste-test the filling (though I know you peeked!), and now you have this incredible, cold, creamy dessert sitting perfectly in your fridge. I want to see what you created! This is why I share these recipes—to bring joy to your kitchens.
When you take that first beautiful slice of your **oreo pie**, snap a picture! Tag me on social media so I can oooh and aaah over your perfect Oreo crust and fluffy filling. Did you add a special garnish? Did the kids help crush the cookies? I want to hear all about it!
Please leave a rating right here on the page. Seeing those stars helps other busy cooks feel confident enough to try this recipe, and it helps me know I’m giving you what you need in the kitchen. If you have a question about adjusting the chill time or any substitution you tried, drop a comment below, too. I personally read every single one! If you need help or want to share something privately, you can always use my contact page. Happy baking—or should I say, happy chilling!
PrintEasy No-Bake Oreo Pie

Make this simple, creamy Oreo pie with a chocolate cookie crust. This no-bake dessert comes together fast and is perfect for parties or a quick treat.
- Prep Time: 20 min
- Cook Time: 0 min
- Total Time: 4 hr 20 min
- Yield: 8 servings 1x
- Category: Dessert
- Method: No-Bake
- Cuisine: American
- Diet: Vegetarian
Ingredients
- 1 package (14.3 ounces) chocolate sandwich cookies (like Oreos)
- 6 tablespoons unsalted butter, melted
- 1 package (8 ounces) cream cheese, softened
- 1 cup powdered sugar
- 1 teaspoon vanilla extract
- 1 container (8 ounces) frozen whipped topping, thawed (or equivalent whipped cream)
- 1 cup crushed chocolate sandwich cookies (for topping)
Instructions
- Prepare the crust: Place all but 1 cup of the chocolate sandwich cookies into a food processor and pulse until fine crumbs form. Reserve the remaining 1 cup of cookies for topping.
- Mix the crust: Pour the melted butter over the cookie crumbs and pulse until the mixture resembles wet sand.
- Press the crust: Press the crumb mixture firmly and evenly into the bottom and up the sides of a 9-inch pie plate. Place the crust in the freezer while you prepare the filling.
- Make the filling base: In a large bowl, beat the softened cream cheese, powdered sugar, and vanilla extract with an electric mixer until smooth and creamy. Scrape down the sides of the bowl as needed.
- Add cookies to filling: Crush the remaining 1 cup of whole cookies into medium chunks. Gently fold the crushed cookies into the cream cheese mixture.
- Fold in whipped topping: Gently fold in the thawed whipped topping until just combined. Do not overmix; you want the filling to remain light and fluffy.
- Assemble the pie: Spoon the filling evenly into the chilled cookie crust. Smooth the top with a spatula.
- Chill: Cover the pie loosely with plastic wrap and refrigerate for at least 4 hours, or until the filling is firm.
- Garnish and serve: Before serving, sprinkle the reserved crushed cookies over the top of the pie. Slice and serve this easy Oreo pie cold.
Notes
- For a richer chocolate flavor, use a chocolate pudding mix in place of some of the whipped topping, following package directions for a thick, no-bake filling.
- You can use a store-bought graham cracker crust or a pre-made Oreo crust to save time on prep.
- This dessert is excellent made a day ahead of time, allowing the flavors to set fully.
Nutrition
- Serving Size: 1 slice
- Calories: 420
- Sugar: 35g
- Sodium: 310mg
- Fat: 26g
- Saturated Fat: 15g
- Unsaturated Fat: 11g
- Trans Fat: 0.5g
- Carbohydrates: 45g
- Fiber: 1g
- Protein: 4g
- Cholesterol: 55mg