

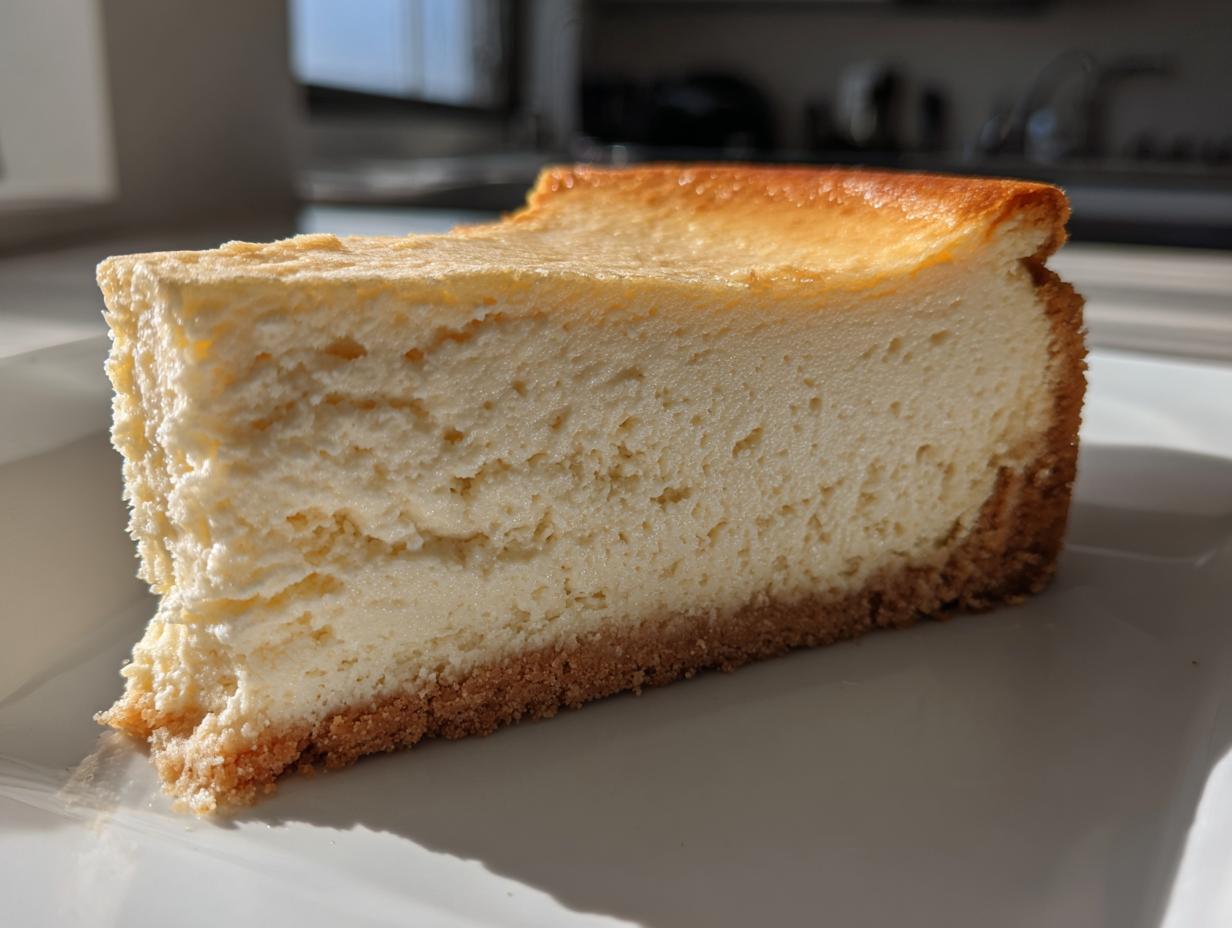
Oh, the cheesecake. It’s the dessert that feels entirely too fancy for a Tuesday night, yet we crave that gorgeous, velvety texture all the time, right? When I was hustling back in my marketing days, making an elegant **white chocolate cheesecake** felt impossible—too much stress about steam baths and cracks! Well, I solved that problem for us. I’m thrilled to share the Ultra-Creamy, No-Fail Baked White Chocolate Cheesecake (No Water Bath Needed). This recipe gives you that restaurant-quality smoothness without any of the scary oven tricks. Trust me, after years of testing, we cracked the code to keep this beauty perfectly smooth every single time. If you enjoy mastering these more complex baking challenges, you should definitely check out my recipe for easy Filipino cassava cake, too!
- Why This Creamy White Chocolate Cheesecake Recipe Works (Foolproof Baking)
- Ingredients for Your Ultimate White Chocolate Cheesecake Recipe
- How to Make Baked White Chocolate Cheesecake Step-by-Step
- Expert Tips for the Best White Chocolate Cheesecake
- White Chocolate Raspberry Cheesecake Variation and Other Flavor Ideas
- Storage and Reheating Instructions for Your White Chocolate Cheesecake
- Frequently Asked Questions About Making White Chocolate Cheesecake
- Serving Suggestions for Your Cheesecake for Celebrations
- Nutritional Estimate for This Decadent Dessert
- Share Your Success with This White Chocolate Cheesecake
Why This Creamy White Chocolate Cheesecake Recipe Works (Foolproof Baking)
Look, I get it. Cheesecake seems intimidating. I used to be terrified of them, especially after one memorable disaster where my New York style cheesecake looked like a rumpled, cracked mountain range. That failure—which happened two days before a big office potluck—pushed me to figure out the *real* secret to a consistently creamy white chocolate cheesecake. It’s all about temperature control and managing residual heat.
You absolutely will not need that fussy water bath here, promise. My method for this foolproof cheesecake relies on wrapping the pan tightly in foil to keep any accidental drips out, and then, critically, using the oven itself as a slow cooling chamber. That 1-hour gentle cooldown after turning the heat off is what relaxes the structure slowly, preventing the dreaded crack that happens when the cake shrinks too fast.
Also, don’t skimp on letting your cream cheese and eggs get to room temperature! That’s non-negotiable for that silky cheesecake filling. If you’re looking for more inspiration on mastering classic bakes, my guide on the ultimate success for New York cheesecake goes into more detail on temperature control for dense bakes!
Ingredients for Your Ultimate White Chocolate Cheesecake Recipe
Okay, let’s talk ingredients. This is where we set ourselves up for success before we even turn the mixer on! Because we aren’t using a water bath, the ingredients need to be spot-on to guarantee that Rich and Smooth Cheesecake texture we’re aiming for. Seriously, don’t rush the softening process for the dairy components—it’s how we get that lump-free batter. If you’re looking for other ways to use simple, high-quality ingredients, check out my easy white chocolate fudge recipe!
For the Buttery Graham Cracker Crust
- 1 1/2 cups graham cracker crumbs
- 1/4 cup granulated sugar (for crust)
- 6 tablespoons unsalted butter, melted
For this crust, make sure you press that crumb mixture down really firmly into the bottom of your pan. You want a solid base so the filling has something sturdy to sit on.
For the Rich and Smooth Cheesecake Filling
- 3 (8 ounce) packages cream cheese, softened to room temperature
- 1 1/2 cups granulated sugar (for filling)
- 1 teaspoon vanilla extract
- 1/4 teaspoon salt
- 1 cup white chocolate, good quality, melted and slightly cooled
- 3 large eggs, room temperature
- 1/2 cup sour cream, room temperature
See those fridge-cold items? They MUST be warm enough to blend perfectly. Room temperature equals a truly silky cheesecake filling, my friend. Trust me on this one!
How to Make Baked White Chocolate Cheesecake Step-by-Step
Alright, now for the fun part—putting it all together! This is where our prep work pays off. Remember, we are aiming for that rich and smooth cheesecake, and the order we mix things, and how we bake it, makes all the difference. We’re keeping things streamlined. If you plan on making more things that need that perfect bake, you might love looking at my chocolate chip cheesecake recipe for comparison!
Preparing the Crust and Oven Setup
First things first, get your oven ready! Preheat it to 325 degrees Fahrenheit. Now, this is the protective step for our no-water-bath adventure: take heavy-duty aluminum foil and wrap the entire outside bottom of your 9-inch springform pan really, really well. We need a good seal so zero water sneaks in, even though we aren’t submerging it. Once wrapped, mix up your crust ingredients and press that mixture firmly into the bottom of the pan. Bake that crust for just 10 minutes to set it up. Pull it out and let it cool completely while you handle the filling.
Mixing the Silky Cheesecake Filling
Grab your big bowl and that electric mixer. Start by beating the softened cream cheese with the large amount of sugar, vanilla, and salt. Scrape down those sides constantly! We are mixing until it’s perfectly smooth—no tiny lumps allowed. Next, gently mix in your slightly cooled, melted white chocolate until it’s just combined. Don’t rush this; if the chocolate is hot, it’ll mess with the texture!
This next part is crucial: add the eggs one at a time. You only want to mix until that last bit of yellow disappears. Stop immediately after the last egg is incorporated; overmixing eggs introduces air, and air causes cracks! Finally, very gently mix in the room-temperature sour cream until the whole batter looks uniform and silky. Pour this beautiful filling right over that cooled crust.
Here’s a little trick Felix swears by: once the filling is in the pan, gently tap the entire pan on the counter a few times. This forces any big, sneaky air bubbles hiding in there to float right up to the top so they can pop away. Less air equals fewer cracks!
Baking and Slow Cooling for a Foolproof White Chocolate Cheesecake
Slide that foiled pan into the oven for about 55 to 65 minutes. You’re looking for a visual cue: the edges should look mostly set, but that center 2-inch circle needs to have a little wobble—a gentle jiggle when you nudge the pan. That means it’s perfect inside!
Now, for the *no-fail* secret: Do NOT pull it out right away! Turn the oven completely off. Prop the oven door open about an inch—I use the handle of a wooden spoon, works like a charm. Let that white chocolate cheesecake hang out in the cooling oven environment for a full hour. This slow descent in temperature is what stops the cake from shrinking wildly and causing those ugly cracks. After that hour, take it out, let it cool on the counter to room temperature, and then it’s chill time for at least six hours. Patience is key here!

Expert Tips for the Best White Chocolate Cheesecake
If you want this to be the best white chocolate cheesecake recipe you’ve ever tried, we have to nail down two quick things Felix learned the hard way. First, let’s talk about those ingredients needing to be room temperature. Cream cheese, eggs, sour cream—if they are cold, they just won’t blend smoothly, and you end up fighting lumps until you overwork the batter. It’s just not worth the headache!
Second, melting white chocolate requires respect! It burns so easily, and burnt chocolate tastes chalky, ruining that beautiful flavor. Skip putting it directly on high heat. Instead, use a double boiler setup, or if you’re using the microwave, do it in tiny 15-second bursts, stirring aggressively between each one. Keep it slightly cooled before adding it to the cream cheese mixture, too. Follow these little steps, and you are guaranteed that wonderfully rich and smooth cheesecake texture. For more tips on getting creamy results, check out my guide on the best classic creamy egg salad recipe; the principles of smooth mixing carry over!
White Chocolate Raspberry Cheesecake Variation and Other Flavor Ideas
While this basic **white chocolate cheesecake** is absolutely divine on its own—a pure, creamy dream—sometimes you just need that little pop of color or tartness, especially when serving it for a big celebration. When I first made this recipe, I got so excited about the color, I almost forgot the flavor balance! Don’t make my mistake!
You absolutely must try the fruit swirl. If you want that gorgeous **White Chocolate Raspberry Cheesecake variation**, it’s super easy. Remember those raspberry preserves I mentioned in the notes? You’ll take about half a cup of those preserves, warm them just slightly so they’re easily pourable, and drizzle them right over the top of the filling before it goes into the oven. Then, take a knife or a skewer and gently swirl it through the batter just a couple of times. You want streaks, not a full pink mix!
Don’t over-swirl, or you defeat the purpose of having that beautiful, decadent white chocolate base. A few delicate figure-eights are all you need. It bakes up into the most stunning pattern, making it a true centerpiece dessert.
If berries aren’t your thing, you can add great depth using bright citrus. Try whisking the zest of one large orange right into the filling when you add the vanilla. The orange cuts through the richness of the white chocolate beautifully. It’s a subtle twist, but it makes this indulgent treat feel even brighter. For more fruity baking inspiration that balances richness, take a look at my strawberry rhubarb pie recipe—it handles fruit layering so well!
Storage and Reheating Instructions for Your White Chocolate Cheesecake
Okay, once you’ve successfully baked this masterpiece, we need to treat it right! Chilling is non-negotiable; you need a minimum of six hours in the fridge, but goodness, overnight is where this white chocolate cheesecake really gets its dense, luscious texture. Make sure it’s sealed up tight with plastic wrap so it doesn’t absorb any weird fridge smells. You don’t want your decadent dessert tasting like last night’s leftovers, right?

When it’s time to serve your incredible creation, let it sit out on the counter for about 20 minutes before you slice it. That little bit of warmth takes the chill off the creamy filling, making it taste unbelievably rich and smooth. And honestly? You really don’t need to reheat baked cheesecake. Just let it smile on the counter for a bit. If you’re stocking up on leftovers, though, make sure you check out how I store things like my easy coconut curry soup—the principles of airtight storage are the same!
Frequently Asked Questions About Making White Chocolate Cheesecake
I know you might still have questions swirling around—especially when tackling something as gorgeous as a baked cheesecake! It’s my job here at Cooking by Felix to make sure this experience is stress-free, even when we’re making such decadent white chocolate desserts. We want this to be the most glorious, easy homemade cheesecake you’ve ever attempted!
Can I use a different crust for this white chocolate cheesecake?
Absolutely! The buttery graham cracker crust is my standard because it bakes up beautifully firm, but you have options! If you love a really deep chocolate flavor, crushed Oreo cookies mixed with melted butter work wonderfully. Or, if you want to lean into that buttery element even more, finely crushed shortbread cookies make for an amazing base. Either way, just remember to press it down *hard* before that initial 10-minute bake. This guarantees a stable layer for supporting that creamy filling we worked so hard to perfect!
What is the best white chocolate to use for a creamy cheesecake filling?
This is HUGE. If you use cheap white chocolate baking chips, they sometimes have stabilizers that keep their shape, which can lead to a slightly grainy texture, and we definitely don’t want that when aiming for the silky cheesecake filling. I strongly suggest using good quality white chocolate baking bars, often labeled as couverture, that have a higher cocoa butter content. If you can melt it smoothly—like in my easy creamy homemade chocolate pudding recipe—it incorporates much better into the dairy, giving you that pure, rich flavor without any grittiness.
Is this recipe better than a No Bake White Chocolate Cheesecake?
That is like comparing apples and oranges, but since you asked, I’ll tell you my honest opinion! No-bake versions are fantastic, especially in the summer, because they are light, airy, and super fast. But if you want that deep, classic, almost dense texture that melts on your tongue, the baked version wins every time. This recipe provides a truly rich and smooth cheesecake experience because baking sets the egg proteins just right, creating structural integrity that no amount of gelatin or chilling can replicate. For true indulgence, stick with the bake, use my cooling trick, and you can’t go wrong!
Serving Suggestions for Your Cheesecake for Celebrations
Now that you’ve managed a flawless, white chocolate cheesecake—no cracks, pure silkiness—it deserves a grand entrance! Because the flavor is so rich and sweet, often less is more when it comes to garnishes. I usually have this as the beautiful centerpiece dessert for any gathering.
For elegance, I keep it simple. A generous sprinkling of high-quality, finely sifted cocoa powder dusted lightly over the top looks incredibly chic against the pale cream color. If you want color without overpowering the flavor, fresh berries are your best friend. Think vibrant raspberries or a mix of lightly sweetened blueberries. You can also drizzle a very thin layer of melted, dark chocolate right over the top just before serving. Want more ideas for making any dish look special? Check out my tips on presentation in my guide about the best classic French toast recipe—the plating principles apply!
Nutritional Estimate for This Decadent Dessert
When you’re diving into something as truly special and decadent as this white chocolate cheesecake, I always tell folks to enjoy it without worrying too much! But, because I know some of you like to keep spreadsheets for everything—and because we believe in giving you all the information—here is the estimated nutritional breakdown. Keep in mind, these numbers are totally based on standard ingredient calculations, so they are just guidelines for your incredible, homemade feast.
This isn’t a light snack, that’s for sure, but wow, is it satisfying! Making this from scratch using real ingredients means you’re getting quality fats and rich proteins from that amazing cream cheese. If you’re interested in how simple ingredients come together for other surprisingly satisfying meals, you should take a peek at my recipe for easy creamy peppercorn sauce—it’s a very different kind of treat!
- Serving Size: 1 slice
- Calories: 450
- Fat: 30g
- Carbohydrates: 40g
- Sugar: 35g
- Protein: 8g
- Cholesterol: 95mg
See? Pure indulgence! Every single calorie is worth it when you take that first bite of smooth, tangy, chocolatey goodness. Enjoy every slice!
Share Your Success with This White Chocolate Cheesecake
Now that you’ve conquered the creamy, no-fail technique and created your own spectacular white chocolate cheesecake—please, please let me know how it went! Seriously, seeing your creations is the best part of my whole process here at Cooking by Felix. Sharing a recipe is one thing, but seeing it shine on your own kitchen counter is everything.
If you followed my tips and that slow cooling method worked like magic for you, just head down to the comments below and give it a five-star rating! Tell me what you thought of the texture—did it come out as rich and smooth as you hoped? And if you shared a picture on Instagram or Facebook, please tag me! Seeing your photos is the absolute fuel that keeps me tinkering and testing in the kitchen. I love watching you all turn simple ingredients into something truly amazing.
If you’re already dreaming up your next baking adventure—maybe something that needs a perfect hard glaze—you should go check out my recipe for the best cookie icing recipe that hardens smoothly. Happy baking, and enjoy every bite of that incredible cheesecake!
PrintUltra-Creamy, No-Fail Baked White Chocolate Cheesecake (No Water Bath Needed)
Make a restaurant-quality, rich, and smooth white chocolate cheesecake without the stress of a water bath. This foolproof recipe delivers an unbelievably creamy texture perfect for any celebration.
- Prep Time: 25 min
- Cook Time: 65 min
- Total Time: 8 hr 30 min
- Yield: 12 servings 1x
- Category: Dessert
- Method: Baking
- Cuisine: American
- Diet: Vegetarian
Ingredients
- 1 1/2 cups graham cracker crumbs
- 1/4 cup granulated sugar (for crust)
- 6 tablespoons unsalted butter, melted
- 3 (8 ounce) packages cream cheese, softened to room temperature
- 1 1/2 cups granulated sugar (for filling)
- 1 teaspoon vanilla extract
- 1/4 teaspoon salt
- 1 cup white chocolate, good quality, melted and slightly cooled
- 3 large eggs, room temperature
- 1/2 cup sour cream, room temperature
Instructions
- Preheat your oven to 325 degrees Fahrenheit. Wrap the outside bottom of a 9-inch springform pan tightly with heavy-duty aluminum foil to prevent leaks.
- Prepare the crust: In a medium bowl, mix the graham cracker crumbs, 1/4 cup sugar, and melted butter until evenly moistened. Press the mixture firmly and evenly into the bottom of the prepared springform pan. Bake the crust for 10 minutes. Remove from the oven and let it cool while you prepare the filling.
- Prepare the filling: In a large bowl, use an electric mixer to beat the softened cream cheese, 1 1/2 cups sugar, vanilla extract, and salt until completely smooth, scraping down the sides of the bowl often. Do not overmix; stop when just combined and smooth.
- Gently mix in the slightly cooled, melted white chocolate until just incorporated.
- Beat in the eggs one at a time, mixing only until each egg is blended into the batter. Do not beat after the last egg is added.
- Mix in the sour cream until the batter is uniform and silky.
- Pour the filling over the cooled crust. Gently tap the pan on the counter a few times to release any large air bubbles.
- Bake for 55 to 65 minutes. The edges should look set, but the center 2-inch area should still have a slight jiggle when gently nudged.
- Turn off the oven, prop the oven door open slightly (about 1 inch), and let the cheesecake cool inside the oven for 1 hour. This slow cooling prevents cracking.
- Remove the cheesecake from the oven. Let it cool completely on a wire rack to room temperature (about 1 to 2 hours).
- Cover the cooled cheesecake loosely with plastic wrap and refrigerate for at least 6 hours, or preferably overnight, before serving.
Notes
- Use room temperature ingredients for the cream cheese, eggs, and sour cream; this is key to achieving a silky, lump-free texture.
- Melt your white chocolate gently using a double boiler or in short bursts in the microwave to prevent scorching.
- For a variation, swirl in 1/2 cup of raspberry preserves into the batter before baking for a White Chocolate Raspberry Cheesecake.
Nutrition
- Serving Size: 1 slice
- Calories: 450
- Sugar: 35g
- Sodium: 250mg
- Fat: 30g
- Saturated Fat: 18g
- Unsaturated Fat: 12g
- Trans Fat: 0.5g
- Carbohydrates: 40g
- Fiber: 1g
- Protein: 8g
- Cholesterol: 95mg